
You're building more than a workspace—you're architecting a launch pad. A proper stem lab setup checklist for 12 year olds isn't about accumulating gadgets; it's about creating an environment where your twelve-year-old can move from guided tutorials to self-directed experimentation, from block-based tinkering to text-based problem-solving. This checklist covers the infrastructure, tools, software access, consumables, and safety protocols you'll need to support genuine skill progression—the kind that translates into industry-standard competencies, not just weekend entertainment.
Essential Physical Infrastructure and Power Requirements
Before a single kit arrives, you need a workspace that can handle sustained experimentation without bottlenecking creativity.

Dedicated power management: You'll want at least four independently switched outlets on surge-protected power strips—one for a laptop or desktop, one for 3D printer/soldering station power cycles, one for microcontroller testing (Arduino, Raspberry Pi, BBC micro:bit), and one for adjustable LED task lighting rated above 800 lumens. Twelve-year-olds working with breadboards need shadow-free illumination, and you don't want them unplugging a running print to test a circuit.
Ventilation and temperature control: If you're running enclosed 3D printers or soldering stations, you need either a window-adjacent setup or a small exhaust fan rated for workshop use. PLA filament fumes are minimal but not zero; proper airflow matters for repeated multi-hour sessions.
Static-safe work surface: A 24" × 48" workbench at 28-30" height (standard desk is too tall for comfortable electronics work) with an anti-static mat and grounding strap. You're protecting sensitive components—microcontrollers, environmental sensors, motor drivers—from accidental electrostatic discharge that kills silently.
Storage with categorical separation: Stackable, labeled bins for consumables (jumper wires, resistors, capacitors, spare filament), tools (multimeter, wire strippers, hex keys), and active projects. Mixing half-finished builds with raw components creates workflow friction that discourages independent work. I use transparent 6-quart bins; your twelve-year-old can see what they need without excavating.
Wall-mounted pegboard tool organization: Keep precision screwdrivers, flush cutters, needle-nose pliers, and safety glasses within arm's reach. If your child has to hunt for a tool, they lose momentum. Momentum matters more than you think at this age—it's the difference between "I'll finish this later" and actually finishing.
Fire safety baseline: A 5-lb ABC fire extinguisher rated for electrical fires, mounted within six feet of the workspace. You're introducing soldering irons, lithium polymer batteries, and devices that draw 10+ amps. Hope you never need it. Have it anyway. See our full home STEM lab safety requirements for ventilation specifics and material handling protocols.
Computing Hardware and Software Platform Access
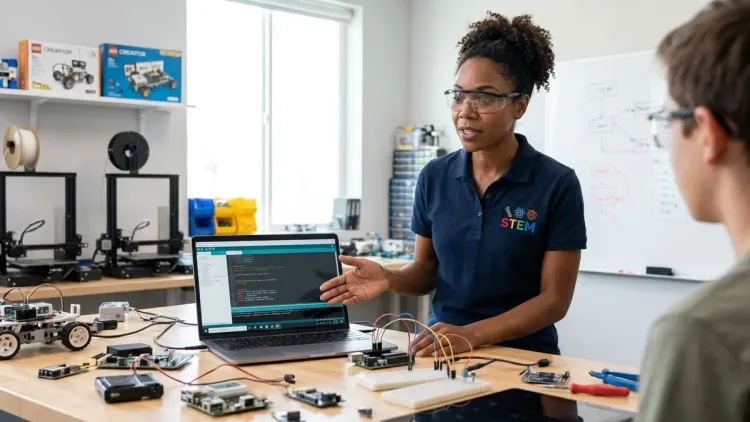
At twelve, your child is ready for professional-grade development environments, not just educational sandboxes. The goal is to build fluency with tools they'll encounter in actual engineering and research contexts.
Dedicated laptop or desktop minimum specs: You need a machine that can run Python 3.11+, Arduino IDE 2.x, Scratch 3.0, Tinkercad (browser-based but resource-heavy), and PrusaSlicer or Cura simultaneously. That means at minimum 8GB RAM (16GB preferred), quad-core processor, and 256GB SSD storage. Chromebooks won't cut it—they can't natively run Arduino IDE or most robotics platforms. Windows 10/11, macOS 12+, or Ubuntu 22.04 LTS all work; avoid tablet-only setups.
Offline-capable software priorities: Choose platforms that don't require constant cloud connectivity. Arduino IDE, Thonny (Python editor), and desktop Scratch all function offline. Cloud-dependent platforms—many AI/ML kits, some robotics curricula—fail the moment your internet drops, teaching learned helplessness instead of resilience. My off-grid solar experiments taught me this the hard way.
Multi-language learning path: Install Scratch 3.0 Desktop for visual algorithm design, Arduino IDE for embedded systems and sensor interfacing, and Thonny or VS Code for text-based Python. Your twelve-year-old should be actively transitioning from block-based to text-based coding; maintaining access to both lets them scaffold upward without anxiety. See how to transition from block-based to text-based robot programming for a concrete progression timeline.
3D design software access: Tinkercad (browser-based, beginner-friendly) and Fusion 360 (free educational license through Autodesk, industry-standard parametric CAD). Tinkercad gets them designing printable objects in an afternoon; Fusion 360 introduces constraints, assemblies, and engineering-grade modeling. Both belong in a twelve-year-old's toolkit. Our guide on how to teach kids 3D design skills with Tinkercad and Fusion 360 walks through the capability milestones.
Slicing software for 3D printing: PrusaSlicer (open-source, excellent documentation) or Cura (broader printer compatibility). These translate CAD models into machine instructions—your child learns that design and fabrication are separate skills, both essential. They'll encounter concepts like layer height, infill density, and support structures; this is applied geometry and materials science, not guesswork.
Version control introduction: Install GitHub Desktop and create a free account. At twelve, your child can start versioning code, forking repos, and collaborating on open-source projects. This isn't premature—it's exactly when professional habits should start forming, before bad ones calcify.
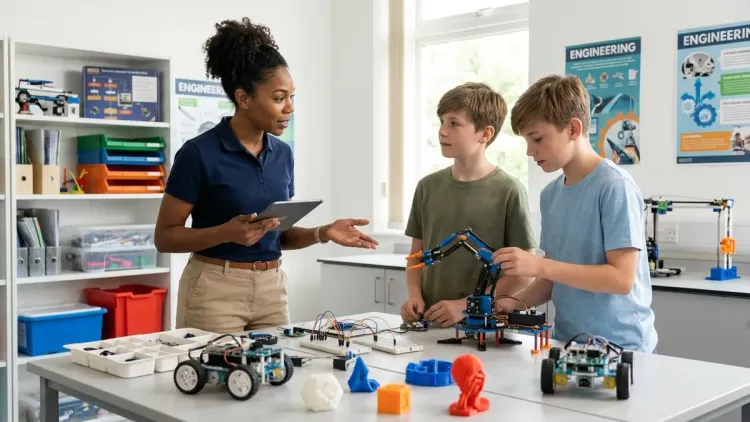
Core Hardware Platforms and Expandability

You're not buying finished toys; you're investing in modular platforms that grow with your child's capabilities. Prioritize ecosystems that support iterative complexity.
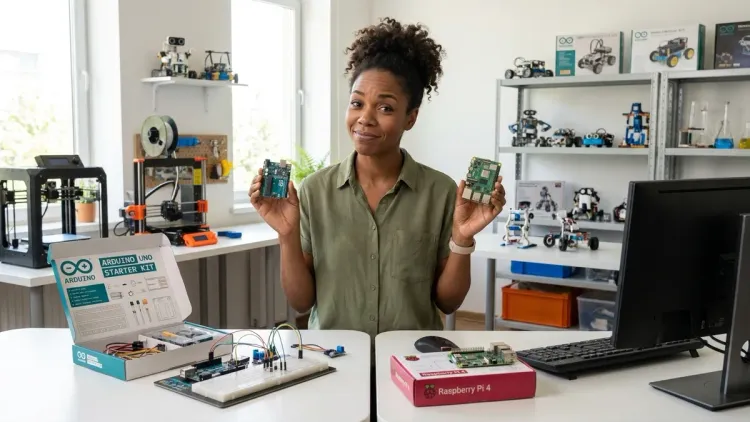
Microcontroller development board: Either Arduino Uno R3 with a breadboard starter kit or Raspberry Pi 4 Model B 4GB with a beginner GPIO kit. Arduino teaches close-to-hardware programming, real-time control loops, and analog sensor interfacing—skills that transfer directly to robotics and IoT. Raspberry Pi introduces Linux, Python-based automation, and networked systems. Neither is "better"; ideally, your child will use both within a year. See Arduino vs Raspberry Pi for 12 year olds for a detailed capability comparison.
Expandable robotics platform: LEGO Mindstorms Robot Inventor or VEX IQ if you want competition-ready engineering. Both support Scratch-based block coding and Python text coding; both have active global communities and extensive third-party sensors. LEGO integrates seamlessly with existing Technic collections; VEX has superior metal construction and industry-style fasteners. Check our LEGO Mindstorms vs VEX Robotics breakdown for build quality and learning curve differences.
3D printer for iterative prototyping: An enclosed safety-rated printer like the Flashforge Adventurer 5M (auto-leveling, direct-drive extruder, WiFi connectivity) or budget-friendly Creality Ender 3 V3 SE. At twelve, your child should be designing custom brackets, sensor housings, and replacement parts—not just printing downloaded models. PLA filament is bio-based and low-odor; keep a 5-roll inventory (black, white, and three accent colors). Plan on 500g of filament per month during active project phases.
Environmental sensor kit for citizen science: Arduino-compatible or micro:bit-based kits that measure temperature, humidity, air quality (PM2.5/PM10), soil moisture, and light levels. These aren't toys—they're gateways to collecting and analyzing environmental data and contributing to real research projects. Look for kits with datalogging capability (SD card or cloud upload) and CSV export; your twelve-year-old should be graphing trends in Python or spreadsheet software.
Soldering station and hand tools: A temperature-controlled soldering iron (adjustable 200–450°C), lead-free solder, flux pen, and a brass sponge tip cleaner. Twelve is old enough to learn permanent electrical connections; through-hole soldering on perf board is more reliable than breadboard jumpers and teaches precision. Add flush cutters, wire strippers (20-30 AWG), precision screwdrivers, and a basic multimeter. These tools last decades if maintained—buy quality once.
Renewable energy experimentation kit: A small solar panel array (10-20W), charge controller, and rechargeable battery bank for powering microcontroller projects off-grid. I built my first solar-powered weather station at thirteen; watching your code run on sunlight you captured fundamentally shifts how you think about energy. See our renewable energy lab kits and solar energy kits for science projects for curriculum-aligned options.
Consumables, Safety Equipment, and Recurring Supplies
One-time purchases get the headlines, but consumables determine whether projects stall or accelerate. Stock these before momentum builds.
Electronics components assortment: Pre-sorted resistor kit (1/4W, E12 series, 10Ω–1MΩ), ceramic capacitor kit (10pF–10µF), transistor assortment (NPN/PNP), and a spool of 22 AWG solid-core hookup wire in six colors. Buy breadboard-friendly components with standard lead spacing. Expect to restock resistors and wire every 4-6 months during active use.
3D printer filament inventory: Maintain at least three 1kg spools of PLA in different colors. Running out mid-print kills project flow. PLA has a shelf life (moisture absorption degrades print quality); store in sealed bags with desiccant packs. Budget around $60/quarter for filament if your child is printing 2-3 times weekly.
Safety gear and PPE: ANSI Z87.1-rated safety glasses (mandatory for soldering, 3D printer maintenance, and any work with flying debris), cut-resistant gloves for handling hot print beds, and a well-stocked first aid kit with burn gel. Teaching safety protocols now prevents the shortcuts that cause injuries later.
Adhesives and fasteners: Cyanoacrylate (CA glue) for instant bonding, two-part epoxy for structural repairs, blue painter's tape for 3D print bed adhesion, and an M3/M4 bolt and nut assortment. Twelve-year-olds should learn that different joints require different solutions—mechanical fasteners for disassembly, adhesives for permanent bonds.
Cleaning and maintenance supplies: Isopropyl alcohol (90%+ for electronics cleaning and print bed prep), cotton swabs, compressed air, and microfiber cloths. Dirty sensors give false readings; oxidized connectors cause intermittent failures. Maintenance is a technical skill, not a chore.
Lab notebook and documentation habit: A bound gridded notebook for sketches, measurements, observations, and troubleshooting notes. Digital is fine (Markdown files in GitHub), but handwriting during active experimentation reduces screen-switching friction. Documenting failures matters as much as successes—it's how engineers think.
Progressive Learning Resources and Curriculum Integration
Hardware without guidance is expensive shelf decoration. You need a structured learning path that respects your child's autonomy while preventing aimless wandering.
Project-based learning kits with skill milestones: Choose kits that explicitly state what your child will be able to do after completion—not vague age ranges. "Learn Python basics" means nothing; "write a function that reads sensor data, calculates moving averages, and triggers an alert" is a testable skill. Our STEM project kits for 12 year olds guide evaluates options through this lens.
Coding platform progression: Start with Scratch-based robotics, transition to MicroPython on microcontrollers, then pure Python 3 for data analysis and machine learning. This isn't arbitrary—it mirrors how professional embedded systems engineers learn, from high-abstraction rapid prototyping down to hardware-adjacent optimization. See best coding platforms for 12 year old beginners for platform-specific capability maps.
Machine learning and AI introduction: Twelve is the right age to start with Teachable Machine (browser-based, visual model training) and progress to scikit-learn in Python. Your child should understand supervised vs unsupervised learning, training vs testing data, and overfitting—concepts that underpin every AI system they'll encounter. Our guide on how to teach kids AI and machine learning provides age-appropriate project sequences.
Citizen science participation: Register for platforms like Zooniverse or SciStarter where your twelve-year-old can contribute to real research—classifying galaxies, transcribing historical documents, analyzing audio recordings. Then build custom sensor arrays to collect original environmental data. See best citizen science kits for kids for hardware that supports publishable data collection.
Online learning subscriptions: Consider platforms like Codecademy (Python, JavaScript), Brilliant.org (interactive problem-solving), or Khan Academy (math foundations for engineering). These work best as just-in-time resources—your child looks up specific concepts when projects demand them, not as front-loaded lecture series. Avoid subscription boxes that ship disposable activities; one-time purchase kits with reusable components have better ROI. Compare options in coding subscription box vs one-time kit.
Community and mentorship access: Join local FIRST LEGO League or VEX Robotics teams, or online communities like Arduino Project Hub and Thingiverse. Twelve-year-olds need to see what's possible when they look sideways at peers, not just upward at experts. Collaborative builds teach version control, task delegation, and constructive critique—soft skills that matter as much as soldering technique.
Final Check Before You Go
Your stem lab setup checklist for 12 year olds should include:
Infrastructure
- Dedicated powered workbench with anti-static protection
- Ventilation (window or exhaust fan for fumes)
- Organized tool storage and component bins
- Fire extinguisher and first aid kit within reach
Computing
- Laptop/desktop with 8GB+ RAM, quad-core processor
- Arduino IDE, Python IDE, Scratch, and 3D slicing software installed
- GitHub account and version control practice started
Hardware Platforms
- Arduino or Raspberry Pi development kit
- Expandable robotics platform (LEGO Mindstorms or VEX)
- 3D printer with safety enclosure and filament stock
- Environmental sensor kit for data collection
- Temperature-controlled soldering station and hand tools
Consumables and Safety
- Electronics component assortment (resistors, capacitors, wire)
- 3+ spools of PLA filament in working inventory
- Safety glasses, burn protection, and PPE
- Lab notebook for documentation
Learning Path
- Project-based kits with explicit skill milestones
- Progression from block coding to Python established
- Citizen science or competition team participation
- Community access for collaboration and mentorship
If you've checked these boxes, you've built a functional research environment, not a toy closet. For broader context on space planning and workflow optimization, see our complete guide on how to build a home STEM lab.
Frequently Asked Questions
What's the minimum budget for a complete STEM lab setup for a 12 year old?
Expect to invest approximately $800–$1200 for a foundational setup that includes a used laptop or budget desktop (around $300–$500), a beginner 3D printer (around $200–$400), an Arduino or Raspberry Pi starter kit (around $60–$120), basic hand tools and soldering station (around $100), consumables and safety gear (around $80), and initial filament and component stock (around $60). This baseline supports sustained skill development across electronics, programming, fabrication, and data science without requiring subscriptions or constant replenishment. You can phase purchases over 2–3 months, starting with computing hardware and a microcontroller kit, then adding 3D printing and sensor platforms as core skills solidify. Budget an additional $20–$40 monthly for consumables like filament, components, and project-specific materials.
How much space does a functional home STEM lab for a 12 year old actually require?
A 6' × 4' footprint—roughly the size of a twin bed—gives you enough room for a 48" workbench, a rolling chair, wall-mounted pegboard tool storage, and a small shelving unit for active projects and consumables. The workbench itself needs at least 24" of depth to accommodate a laptop, breadboard workspace, and a 3D printer side-by-side without crowding. If you're working with a shared bedroom or multi-purpose space, a fold-down wall-mounted workbench with locking tool cabinets can reduce the permanent footprint to under 3' × 2' when stowed, though this requires more deliberate setup and teardown discipline that some twelve-year-olds struggle to maintain consistently. Vertical storage—pegboard, wall-mounted bins, overhead shelves—maximizes small spaces more effectively than adding floor cabinets. For layout strategies in constrained environments, see dedicated STEM room vs multi-purpose learning space.
Should I prioritize Arduino or Raspberry Pi for a 12 year old's first microcontroller platform?
Arduino teaches closer-to-hardware programming with immediate feedback loops—your child writes C++ code that directly controls voltages, reads sensor values in real time, and manages power states without an operating system layer buffering their decisions. This builds intuition about how computers interact with physical systems and prepares them for embedded engineering and robotics competitions. Raspberry Pi introduces Linux, Python-based automation, networked applications, and general-purpose computing tasks like data logging, image processing, and running multiple programs simultaneously. For a twelve-year-old with minimal coding experience, start with Arduino to build confidence through tangible cause-and-effect (LED blinks, motor spins, sensor reads); then add Raspberry Pi within 6–12 months to explore higher-level systems design and internet-connected projects. If your child already has solid Python skills from prior Scratch or visual coding experience, Raspberry Pi offers faster early wins. Both platforms cost under $120 for complete starter kits, so you'll likely own both within the first year—they solve different problems and learning one makes the other easier. See our detailed platform breakdown in Arduino vs Raspberry Pi for 12 year olds.
Final Thoughts
A thoughtfully constructed stem lab setup checklist for 12 year olds doesn't just enable projects—it normalizes invention as a habit. Your child stops asking permission to build and starts prototyping solutions to problems they notice themselves: a sensor network to track backyard biodiversity, a solar-powered phone charger for camping trips, a custom game controller for a sibling with different motor abilities. This is the watershed age when tinkering either becomes identity or fades into "something I used to do." The difference isn't talent; it's infrastructure. You're not buying your way to expertise—but you are removing the friction that makes curiosity feel like work. Build the bench, stock the bins, install the tools, then step back. Watch what they build when the path is clear.