
You've watched your learner master visual programming—dragging blocks, sequencing commands, debugging with colorful feedback. Now they're ready for the next milestone: writing actual code that professional engineers use. This guide walks you through the transition from block to text robot coding, a pivotal moment in any STEM learning path that bridges playful exploration with industry-standard skills.
You'll learn how to scaffold this shift strategically, which platforms ease the jump, what cognitive leaps to expect, and how to prevent the frustration that derails so many young programmers at this stage. This process typically takes 8-12 weeks with consistent practice (2-3 sessions weekly), and targets learners ages 10-14 who've completed at least 20-30 hours of block-based programming. By the end, your student will write functions, debug syntax errors, and control real hardware using Python or Arduino C++—the same languages used in robotics labs worldwide.

What You'll Need
Technical Prerequisites:
- Block-based experience: Minimum 20-30 hours with Scratch, Blockly, or equivalent visual programming
- Reading comprehension: Comfortable reading at 4th-grade level or above (coding requires decoding error messages and documentation)
- Basic algebra understanding: Variables, expressions, and simple equations
- Typing proficiency: 15+ words per minute with basic punctuation accuracy
Hardware & Software:
- Programmable robot platform supporting both block and text modes (examples: LEGO Mindstorms Robot Inventor, VEX IQ Robotics Kit, or Arduino Robot Car Kit)
- Computer requirements: Windows 10/11, macOS 10.15+, or Ubuntu 20.04+; 4GB RAM minimum, 8GB recommended
- Development environment: Python 3.9+ with IDLE or Thonny IDE, or Arduino IDE 2.x
- USB cable for robot-computer connection (check if your robot uses USB-C, Micro-USB, or USB-A)
- Reliable internet for initial software downloads and documentation access (many IDEs work offline after setup)
Supplementary Resources:
- Notebook or digital document for code snippets and debugging notes
- Access to Robotics Kit Compatibility Checklist to verify your platform supports text-based languages
- Reference guide for your chosen robot's API or library documentation
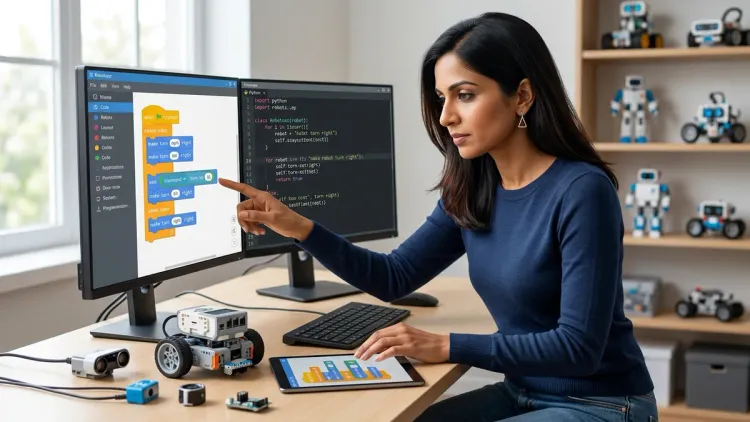
Step 1: Choose a Hybrid Platform That Scaffolds the Transition

Your first strategic decision determines everything that follows: select a robot platform that offers both block-based and text-based programming for the same hardware. This continuity is crucial. When students see identical robot behaviors produced by blocks one day and text the next, they build schema around the idea that code is simply another way to express the same logic—not a completely foreign skill.
The LEGO Mindstorms Robot Inventor excels here. Its Scratch-based environment lets students export block programs as Python code, providing a direct comparison. Similarly, platforms like VEX IQ bridge Blockly to C++, and many Arduino-compatible robots offer Blockly wrappers that generate visible C++ code below each block workspace.
Lab Specs to verify: Does the platform support live code-switching (toggling between block and text views of the same program)? This feature reduces cognitive load dramatically. Check software compatibility—some platforms require specific OS versions or cloud accounts. For example, LEGO Mindstorms' Python environment requires Bluetooth connectivity and works best on Windows/macOS rather than Chromebooks. VEX's text-based VEXcode compiles locally but requires admin privileges to install drivers.
I've watched hundreds of sixth-graders struggle when they jump to text-based coding using entirely new hardware. The double novelty—new syntax and unfamiliar motors/sensors—overwhelms working memory. A hybrid platform lets them focus on language syntax while working with motors, sensors, and chassis they already understand intuitively. Look for robots with extensive documentation in both formats, active user forums, and clear API references. Poor documentation is the silent killer of text-based transitions.
Durability consideration: Will this platform grow with your learner? The best transition robots support expandability—additional sensors, third-party libraries, integration with professional tools. A robot that caps out at introductory text-based code becomes a stepping stone you'll replace within a year. Prioritize platforms with paths toward advanced concepts like object-oriented programming, sensor fusion, or ROS (Robot Operating System) integration if your learner shows serious interest.
Step 2: Start With Dual-View Programming to Build Conceptual Bridges
Don't delete the block interface yet. Your most powerful teaching tool during the transition from block to text robot coding is simultaneous comparison. Start every new concept by building it in blocks, then immediately view or write the equivalent text code. This parallel exposure builds what cognitive scientists call "representational fluency"—the ability to recognize the same idea expressed in different symbolic systems.
Begin with the simplest possible program: make the robot move forward for two seconds. In Scratch or Blockly, this might be two blocks. Show your learner the text equivalent: robot.move_forward(2) in Python or motor.spin(FORWARD, 2, SECONDS); in C++. Point out the structural parallels: the action verb (move_forward/spin), the parameters (2, SECONDS), and the syntax markers (parentheses, semicolons).
Layer complexity gradually. Next session, add a turn. Then a loop that repeats the forward-turn sequence. Each time, construct the block version first, discuss what it does, predict what the text version will look like, then reveal the actual code. This prediction step is critical—it activates prior knowledge and makes the text code feel like a puzzle to solve rather than arbitrary symbols to memorize.
Many modern platforms offer "code preview" features where the text updates live as you manipulate blocks. LEGO Mindstorms and VEX both implement this beautifully. Use it liberally for the first 4-6 sessions. Students should spend roughly 60% of their time in block view, 40% reading the generated text, asking questions like: "Why does this line have a semicolon but that one doesn't?" or "What happens if I change this number in the text—will the block update?"
Here's where I see parents rush: they assume once a child "gets it" after two or three examples, they're ready to write from scratch. Not yet. You're building neurological pathways, not just transferring information. The research on cognitive load theory suggests we need 10-15 repetitions of a concept in varied contexts before learners can apply it independently. Create those repetitions by building 8-10 different programs in dual-view mode before attempting pure text-based coding.
Step 3: Introduce Text-First Challenges With Extensive Scaffolding

After your learner has decoded 8-10 dual-view programs and can accurately predict text syntax from block patterns, it's time to flip the script: text-first challenges. But don't just hand them a blank IDE and say "make the robot dance." That's pedagogical malpractice.
Instead, provide heavily scaffolded exercises. Start with "fill-in-the-blank" programs where 80% of the code is written and they complete specific lines. For example:
# Make the robot drive in a square
for i in range(4):
    robot.move_forward(___)  # Fill in the distance
    robot.turn_right(___)     # Fill in the degrees
This structure lets them focus on parameter values and logic flow without wrestling with syntax they haven't internalized yet. Gradually reduce the scaffolding: next exercise, provide function names but no parameters. Then provide only comments describing what each line should do. Finally, give them a behavior goal with no code template.
Debugging becomes your primary teaching tool here. Introduce deliberate errors in your scaffolded code: a missing parenthesis, a misspelled function name, an incorrect indentation. In my classroom, I call these "bug hunts," and they're more valuable than writing perfect code. When students fix these errors, they're learning to read compiler/interpreter messages—a skill that separates frustrated quitters from resilient programmers.
The Robotics Programming Languages for Kids Explained guide covers syntax differences between Python, C++, and other options, which becomes relevant as students start comparing error messages across platforms. Python's error messages are generally more readable for beginners ("SyntaxError: invalid syntax" with a line number), while Arduino C++ errors can be cryptic ("expected ';' before 'robot'"). Choose your first text language accordingly.
Time estimation reality check: Most learners need 3-4 weeks of scaffolded text exercises before they can write a novel 15-20 line program independently. That's 6-8 sessions if you're meeting twice weekly. Rushing this phase creates brittle knowledge—students memorize specific examples but can't transfer the patterns to new problems.
Step 4: Teach Syntax Rules Explicitly Through Error Pattern Recognition
Here's where the transition from block to text robot coding gets cognitively demanding: syntax rules. Block-based programming protects students from syntax errors—you can't drag blocks into invalid configurations. Text-based programming is unforgiving. A missing semicolon, a lowercase letter where uppercase is required, or incorrect indentation halts the entire program.
Don't leave syntax learning implicit. Create a reference sheet that explicitly teaches your chosen language's rules:
Python Syntax Essentials:
- Indentation matters (4 spaces after colons in loops, conditionals, functions)
- No semicolons needed
- Function calls require parentheses even with no parameters:
robot.stop() - String text needs quotes:
"forward"notforward - Variables are case-sensitive:
Speedandspeedare different
Arduino C++ Syntax Essentials:
- Every statement ends with a semicolon
- Indentation is stylistic but good practice
- Curly braces
{}group code blocks - Function calls need parentheses and parameters:
motor.spin(50); - Case-sensitive throughout
- Must declare variable types:
int speed = 50;
Build these rules through error pattern recognition exercises. Show students five broken code snippets and ask them to identify the error category (missing semicolon, wrong indentation, misspelled function, etc.) before fixing them. This metacognitive step—naming the error type—helps students develop internal debugging checkers. When they write their own code later, they'll instinctively pause and ask: "Did I close that parenthesis? Is my indentation consistent?"
The vocabulary matters. Students often say "it's broken" or "it doesn't work." Train them to use precise language: "I'm getting a syntax error on line 7" or "The compiler says there's an unexpected indent." This precision shifts their mindset from "coding is mysterious and unpredictable" to "coding follows rules I can learn and apply systematically."
The Python vs Scratch for Teaching AI to Kids article explores how syntax complexity affects cognitive load differently across age groups, which informs how much explicit instruction versus discovery learning to employ during this phase.
Step 5: Practice Code Translation Exercises in Both Directions
Fluency requires bidirectional translation. Students should be able to convert block programs to text and visualize what text code would look like as blocks. This back-and-forth solidifies conceptual understanding in ways that unidirectional work never achieves.
Exercise Type 1: Block-to-Text Translation
Provide a 10-15 block program that makes the robot navigate a simple obstacle course. Ask your learner to write the equivalent text code without using the auto-generate feature. They should refer to their syntax reference sheet and previously written programs. When they finish, run both versions and verify identical behavior.
Exercise Type 2: Text-to-Block Reverse Engineering
Give them a text program you've written (or found in documentation examples) and ask them to sketch what it would look like as blocks on paper. This mental visualization exercise strengthens their ability to "read" code—to see loops, conditionals, and sequences as structural units rather than character-by-character text.
Exercise Type 3: Mixed Translation Debugging
Present a block program and its "equivalent" text code, but introduce subtle differences (the block program turns 90 degrees; the text code turns 85 degrees). Students identify the discrepancies and decide which version is correct based on the stated goal.
These exercises take 20-30 minutes each and should be distributed across 4-6 sessions. They feel tedious to some learners, especially those who "just want to build cool robots." But this is where you leverage your authority as the educator to insist on foundational skill-building. In my experience, students who skip translation practice hit a wall around conditionals and nested loops—they can copy examples but can't adapt them to new situations.
Why this works neurologically: Translation activates different cognitive pathways than single-direction programming. When students convert blocks to text, they're retrieving syntax rules from memory. When they visualize text as blocks, they're applying abstract comprehension to spatial representation. This dual encoding makes the knowledge more durable and transferable to novel problems—precisely the outcome you need before advancing to complex projects.
Step 6: Introduce Variables and Functions Using Robot-Specific Examples
Once students can write basic sequential programs (move, turn, wait commands), the next conceptual leap is variables and functions—the building blocks of modular, reusable code. This is where text-based programming diverges dramatically from block-based work. While blocks often abstract variable management, text code forces explicit declaration, type specification (in C++), and scope understanding.
Start with variables tied to physical robot behaviors. Instead of hardcoding robot.move_forward(50) everywhere, introduce:
distance = 50
robot.move_forward(distance)
Then modify distance in one place and watch all movement commands update. This demonstrates variables' power: they let you adjust behaviors globally without hunting through code. Make it tangible: "You're building a maze-solving robot. The maze dimensions change weekly. Would you rather change 15 lines of code or just change one variable at the top?"
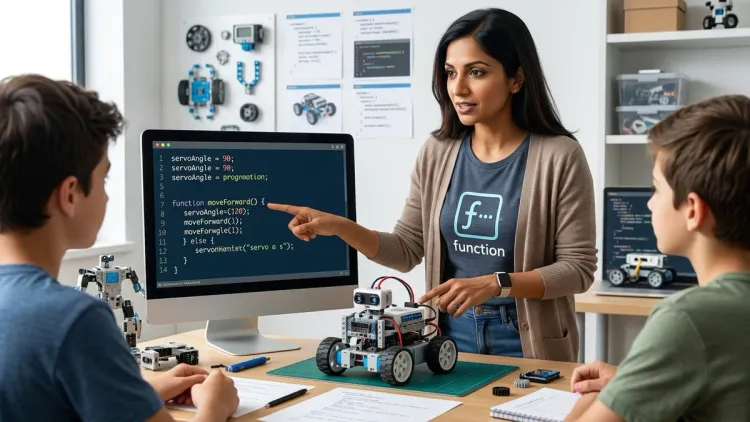
Functions come next. After writing the same "turn 90 degrees and move forward 30 cm" sequence five times, students feel the pain of repetition. Introduce functions as labor-saving tools:
def square_turn():
    robot.turn_right(90)
    robot.move_forward(30)

# Now use it:
square_turn()
square_turn()
square_turn()
square_turn()
The transition from block to text robot coding accelerates here because text-based functions are far more flexible than block-based "My Blocks" or custom blocks. Students can add parameters, return values, and create libraries of reusable behaviors—skills directly transferable to professional software engineering.
Lab Specs consideration: Some robot platforms (especially Arduino-based kits) require you to define functions before setup() or loop(), while Python is more forgiving about function placement. Teach the conventions of your chosen platform explicitly. Arduino's requirement that functions appear above their first call or be declared with forward declarations confuses many beginners who come from Python's more relaxed structure.
I've seen students grasp variables quickly but struggle with function scope—why a variable defined inside a function isn't accessible outside it. Use robot examples: "This variable is like the robot's memory while it's executing this specific task. Once the task ends, that memory clears. If you need to remember something longer, define the variable outside the function." Physical metaphors stick better than abstract explanations about stack frames and namespaces.
Step 7: Build Conditionals and Loops With Sensor-Driven Logic

The final piece of foundational text-based robot programming is conditionals (if/else statements) and loops—the control structures that make robots respond dynamically to their environment. This is where your learner transitions from choreographing predetermined movements to writing robots that make decisions.
Start with sensor-driven conditionals. If your robot has an ultrasonic distance sensor:
if robot.distance() < 20:
    robot.turn_right(90)
else:
    robot.move_forward(10)
This simple structure—"if there's an obstacle within 20 cm, turn; otherwise, keep moving"—mirrors real autonomous vehicle logic. It's not a toy example; it's the foundation of collision avoidance systems in warehouse robots and self-driving cars. Frame it that way to maintain engagement.
Loop syntax varies significantly between languages, and this is where students who mastered loops in blocks sometimes stumble. A Scratch "repeat 10" block becomes for i in range(10): in Python or for(int i = 0; i < 10; i++) in C++. The Arduino C++ version, with its three-part structure (initialization; condition; increment), confuses many learners initially.
Break it down explicitly using the robot's behavior:
- Initialization (
int i = 0): "Start counting at 0" - Condition (
i < 10): "Keep looping while the count is less than 10" - Increment (
i++): "Add 1 to the count after each loop"
Then show how all three pieces work together to repeat the motor command exactly 10 times. Run the program with a serial monitor or console output that prints i each iteration so students see the count incrementing.
While loops introduce a new complexity: loops that continue until a condition changes, not for a predetermined count. A classic robot example:
while robot.distance() > 20:
    robot.move_forward(5)
robot.stop()
This loop runs indefinitely until an obstacle appears within 20 cm. It's perfect for teaching the difference between counted iteration (for loops) and condition-based iteration (while loops). But it's also where students write their first infinite loops accidentally. When the robot never stops moving because the condition never becomes false, they learn the critical importance of loop exit conditions.
Use these mistakes as teaching moments. Don't rescue them immediately. Let them watch the robot crash into a wall (safely, with low motor speeds) while their while loop runs forever because they forgot to update the conditional variable. Then debug together: "What would need to change for this loop to stop? How do we make sure that thing actually changes?"
The Complete Robotics Learning Path Checklist positions these control structures as the bridge between beginner and intermediate programming—once students master sensor-driven conditionals and loops, they're ready for multi-sensor fusion, state machines, and eventually ROS-based programming used in research labs and industry.
Step 8: Graduate to Independent Projects With Incremental Complexity
Your learner has now completed 8-12 weeks of structured transition work. They can write basic Python or Arduino C++ programs that control motors, read sensors, use variables and functions, and implement conditionals and loops. The final step is independent project work—not following tutorials, but designing and implementing their own robot behaviors from scratch.
Start with constrained creativity: "Design a robot that navigates a 3-foot square course and returns to its starting position. You must use at least one loop, one function, and one conditional." These parameters provide enough structure to prevent choice paralysis while requiring students to synthesize all the skills they've developed.
Many families stop too soon, when students can "kind of" write code with heavy reference to examples. But true skill transfer—the ability to apply programming knowledge to genuinely novel problems—requires 3-5 independent projects of increasing complexity. Structure a progression:
- Project 1 (Week 9-10): Line-following robot using single light sensor, 30-40 lines of code
- Project 2 (Week 11-12): Obstacle-avoiding robot with distance sensor and turn-decision logic, 50-60 lines
- Project 3 (Week 13-14): Maze-solving robot combining multiple sensors, functions for different behaviors, 80-100 lines
- Project 4 (Week 15-16): Student's choice—design and implement a behavior, minimum 100 lines with modular function structure
Debugging becomes the primary learning activity during independent projects. Students will write code that doesn't work on the first attempt—that's normal and healthy. Your role shifts from instructor to consultant: ask guiding questions rather than providing solutions. "What does that error message tell you?" "What line is it happening on?" "What's the value of that variable when the error occurs—how could you check?"
This is also when expandability and durability specs matter intensely. Can your robot platform accommodate additional sensors for Project 3? Will it physically withstand the repeated testing and crashes inevitable during maze-solving work? The VEX IQ Robotics Kit handles this progression well—it's modular, supports both Python and C++, connects to dozens of sensor types, and its metal construction survives thousands of test runs. Budget platforms with limited expandability become frustrating constraints at this stage.
Documentation skills emerge here too. As projects grow beyond 50 lines, students need to comment their code, organize functions logically, and potentially collaborate with others. Introduce professional practices: "Before you write any code, write comments describing what each section will do. Then fill in the actual commands." This top-down planning approach, common in software engineering, prevents the "spaghetti code" that results from diving straight into writing without structure.
If your learner succeeds at all four independent projects—writing functional, sensor-responsive robot code largely without reference examples or heavy guidance—they've completed the transition from block to text robot coding. They're now positioned to explore advanced topics: object-oriented programming, library integration, integration with platforms like Raspberry Pi for computer vision tasks, or even ROS for multi-robot systems. The How to Build Your First Robot with a Kids Robotics Kit guide provides next-step project ideas once text-based fundamentals are solid.
Pro Tips & Common Mistakes
Pro Tip: Use serial/console output liberally. The biggest difference between block-based and text-based debugging is visibility. Blocks often show real-time feedback on screen. Text code runs invisibly unless you add print() statements in Python or Serial.println() in Arduino C++. Teach students to output variable values, sensor readings, and "checkpoint reached" messages throughout their code. This practice mirrors professional debugging with logging tools.
Pro Tip: Build a snippet library. Create a shared document where students save every working code snippet—motor control, sensor reading, loops, functions. When they start new projects, they copy-paste and adapt rather than writing from scratch every time. This is exactly how professional programmers work; no one memorizes every syntax detail.
Common Mistake: Attempting object-oriented programming too early. Classes, objects, inheritance—these concepts are powerful but premature during initial text-based transition. Students need 6+ months of procedural programming (functions, variables, basic data structures) before OOP makes sense. Introducing it earlier creates confusion that undermines confidence.
Common Mistake: Inconsistent practice cadence. Programming skills atrophy faster than you'd expect. Three sessions per week for four weeks builds more durable knowledge than once-weekly sessions for twelve weeks, even though total hours are similar. The brain needs frequent reinforcement while forming new neural pathways. If your schedule only allows once-weekly sessions, assign short (15-20 minute) practice exercises between meetings.
Common Mistake: Comparing your learner's pace to online examples. You'll encounter claims of "10-year-old codes Python robotics in two weeks!" Ignore them. Those stories omit crucial context—prior experience, adult assistance, existing math/logic skills. Your learner's trajectory is individual. The goal isn't speed; it's building genuine understanding that transfers to novel problems.
Pro Tip: Celebrate compilation success before execution success. When a student's code compiles or runs without syntax errors—even if it makes the robot do something wrong—acknowledge that milestone. "Your code is grammatically correct! Now let's fix the logic to make it do what you intended." This separates syntax mastery from algorithmic thinking, making debugging less overwhelming.
Frequently Asked Questions
How long does the transition from block to text robot coding typically take?
The transition from block to text robot coding typically requires 8-12 weeks with consistent practice (2-3 sessions of 45-60 minutes per week), though individual timelines vary based on prior experience, age, and typing proficiency. Students who've completed 30+ hours of block-based programming and have basic algebra understanding usually progress faster than those with minimal preparation. You'll know the transition is complete when your learner can independently write a 100+ line program that uses variables, functions, conditionals, and loops to solve a novel problem with minimal reference to examples, which usually occurs around week 12-16 of structured practice.
Should we transition to Python or Arduino C++ first?
Choose Python if your learner is 10-12 years old, prefers readable syntax, and wants to eventually explore AI, machine learning, or data science applications—Python's versatility makes it an excellent first text language that transfers to countless domains beyond robotics. Choose Arduino C++ if your learner is 13+ years old, specifically interested in electronics and embedded systems, and plans to work with industry-standard microcontrollers—Arduino C++ teaches low-level hardware control and memory management concepts essential for engineering careers, though its syntax is less forgiving for beginners. Many families successfully start with Python for 6-8 months, then introduce Arduino C++ as a second language once text-based programming fundamentals are solid.
Can my child transition directly from block-based coding to text without a hybrid platform?
Transitioning directly from block-based to text-based robot coding without a hybrid platform is possible but significantly harder—students must simultaneously learn new syntax rules and new hardware behavior, which overloads working memory and increases frustration. If you don't have access to a hybrid platform, mitigate the difficulty by using the same robot hardware throughout the transition (keeping motors, sensors, and chassis familiar) while introducing text-based programming through detailed "translation guides" that show block-to-text equivalents for every command your learner already knows. This approach requires you to create those translation documents manually, which is time-intensive but pedagogically sound if hybrid platforms aren't available.
What signs indicate my learner is ready to transition from blocks to text?

Your learner is ready to transition from blocks to text when they can independently build block-based programs with 30+ blocks that include loops, conditionals, and variables; explain what their program does line-by-line without running it; debug logical errors by predicting outcomes and testing systematically; and demonstrate comfort with sequential thinking and basic algebra concepts like variables and expressions. Additionally, they should type at least 15 words per minute with basic punctuation accuracy and show intrinsic motivation to understand "how the code really works" rather than just making the robot move—curiosity about the underlying mechanics is the strongest predictor of transition success in my classroom experience with hundreds of middle-schoolers.
Summary
The transition from block to text robot coding represents one of the most significant milestones in a young programmer's development—it's the bridge from visual exploration to industry-standard skills. By choosing hybrid platforms, starting with dual-view programming, scaffolding text-first challenges carefully, teaching syntax explicitly, practicing bidirectional translation, mastering variables and functions, implementing sensor-driven logic, and graduating to independent projects, you'll guide your learner through this cognitive leap systematically. This 12-16 week journey demands patience, consistent practice, and strategic scaffolding, but it positions students to write real code used in professional robotics labs, autonomous vehicles, and manufacturing systems. Your role isn't to accelerate the timeline—it's to build durable understanding that transfers across programming languages, platforms, and problem domains for years to come.