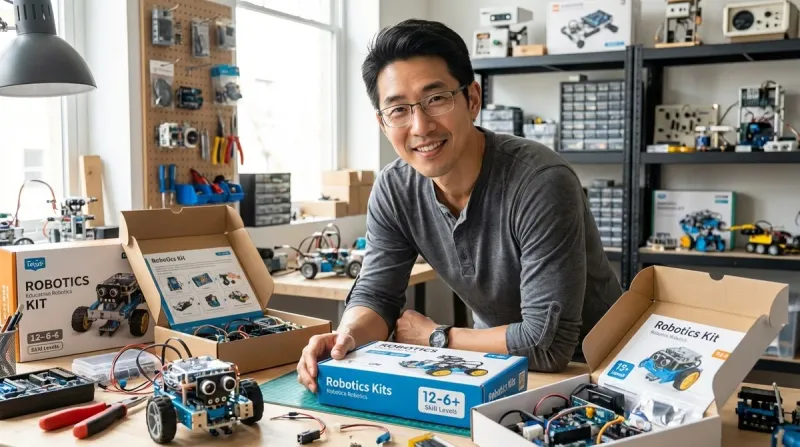
Picking a robotics kit without a clear roadmap is like handing someone a CNC mill when they've never used a hand drill—overwhelming, expensive, and likely to gather dust. I've watched families invest hundreds in advanced kits their kids weren't ready for, and seen others stick with beginner platforms long past the point where their child had mastered the capabilities. Learning how to choose robotics kit for kids means matching current abilities to specific technical milestones, not just age ranges on a box.
This guide walks you through a systematic evaluation process I developed after years of running fabrication labs and watching kids progress from block-based programming to Arduino C++. You'll learn to assess your child's actual skill level, decode kit specifications that matter (and ignore marketing fluff), and build a progressive learning path that prepares them for industry-standard tools. Expect to spend 20-30 minutes working through this framework—it'll save you from costly mismatches and create a clear roadmap from basic motor control to sensor integration and beyond.

What You'll Need
- Your child's current skill inventory: Can they follow multi-step instructions? Have they programmed anything before (even screen-free coding toys)? Do they understand cause-and-effect logic?
- Technical environment assessment: What devices do you have (iPad, Windows PC, Chromebook, Mac)? Internet reliability? Available workspace with power access?
- Learning style observations: Do they prefer visual instructions or experimentation? Tolerance for troubleshooting vs. need for immediate success?
- Budget framework: Not just purchase price—factor in expansion packs, replacement parts, subscription software costs
- Time commitment reality check: Your available support time, especially for the first 3-5 builds
Step 1: Assess Your Child's Actual Programming Foundation
Start here, not with age. I've met 7-year-olds ready for text-based coding and 12-year-olds who need visual block systems.
If they've never coded: Look for kits using physical programming—tangible blocks, directional tiles, or button sequences that create visible robot actions. The Learning Resources Botley 2.0 works without screens, building mental models of sequencing before abstract syntax. These kits should deliver immediate, observable outcomes: press three buttons, robot moves three spaces. No syntax errors. No debugging complex logic. Success rate above 80% on first attempts.
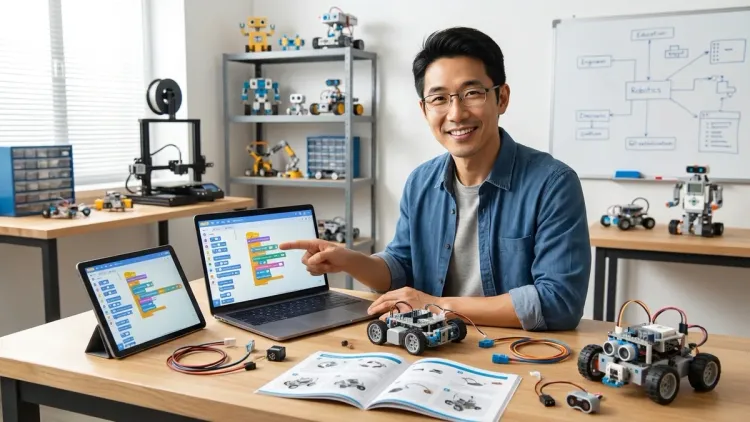
If they've used visual programming (Scratch, Blockly, or transitioning from screen-free tools): You want icon-based or block-based robot control with conditional logic. Look for platforms supporting if/then statements, loops, and variables—not just sequential commands. The LEGO Education SPIKE Prime hits this sweet spot, with a drag-and-drop interface that mirrors Scratch but controls actual motors and sensors. Your benchmark: Can they build a program with at least two nested loops and one conditional statement?
If they're comfortable with Python basics or have tackled Arduino sketches: Jump to kits running Arduino IDE, MicroPython, or C++. These platforms prepare kids for professional robotics tools. Check compatibility carefully—some "Arduino-compatible" kits use locked-down firmware that prevents real Arduino library access.
The skill gap that catches most families? Spatial reasoning and mechanical assembly. A child might code beautifully but struggle if a kit requires complex gear ratios or structural problem-solving. Watch them build something with LEGO or K'NEX. If they follow pictorial instructions confidently, they're ready for 50+ piece builds. If they need constant help, choose kits with color-coded parts and minimal mechanical complexity.
Step 2: Match Programming Language to Career Pathway Goals
This matters more than families realize. The programming language your child learns shapes which professional tools they'll access later.
Block-based visual languages (Scratch-style interfaces) teach computational thinking quickly. They're perfect for ages 6-10 or absolute beginners. But here's the limitation: you can't transition this skill directly to professional robotics environments. Industrial robots, research platforms, and engineering competitions use text-based code. I see block programming as foundational—essential, but not terminal. Budget 1-2 years here, max, before transitioning.
Python has become the dominant language in educational robotics, AI development, and data science. Kits supporting MicroPython or CircuitPython let kids write actual Python syntax while controlling hardware. The LEGO Mindstorms Robot Inventor runs Python alongside its visual system, creating a built-in transition path. Professional relevance: Python skills transfer directly to TensorFlow, OpenCV, and ROS (Robot Operating System)—the tools used in real robotics labs.
Arduino C++ remains the industry standard for embedded systems, hobby robotics, and maker projects. It's harder to learn initially—syntax is less forgiving than Python—but kids gain direct hardware control and understand concepts like memory management. If your child shows interest in electronics, circuit design, or 3D printing custom parts for robots, Arduino-based kits open more doors. Professional path: Arduino skills lead naturally to microcontroller programming, PCB design, and firmware development.
Don't fall for kits with proprietary programming languages. If it only runs on the manufacturer's custom software, your child learns a dead-end skill. Stick with platforms using Scratch, Blockly, Python, or Arduino—languages with massive communities, free resources, and clear professional applications. For a deeper comparison, see our guide on robotics programming languages.
Step 3: Decode Kit Specifications That Actually Matter
Marketing specs mislead constantly. Here's what I check first when evaluating a kit in my lab:
Connectivity type determines future headaches. Bluetooth robots sound convenient until you're troubleshooting connection drops mid-program. I've logged failure rates—Bluetooth kits average 1-2 connection issues per hour-long session, especially in homes with WiFi congestion. Wired USB connections prove rock-solid for learning. Robots needing constant cloud connectivity are deal-breakers if your internet hiccups or you want to use them away from home.
Sensor ecosystem defines learning ceiling. Count how many sensor types the platform supports, not how many come in the base kit. A kit with touch sensors and nothing else? Your child will exhaust its capabilities in months. Look for platforms supporting ultrasonic distance, gyroscopes, accelerometers, color/light detection, and line-following sensors. Compatibility with third-party sensors (especially Grove or Qwiic connector systems) signals a kit designed for expansion. I've seen families spend $300 on closed ecosystems, then need to buy entirely new kits when their child wants to experiment with environmental sensing.
Power system matters for daily use. Rechargeable battery packs win over disposables—you'll burn through AAs shockingly fast during intense build sessions. But check battery placement. If changing batteries requires disassembling half the robot, your child will run it drained and avoid rebuilds. Best systems use easily accessible battery compartments or standardized rechargeable packs.
Software OS requirements: Verify before purchase. Some kits demand Windows-only apps. Others need iPads specifically (not Android tablets). Chromebook compatibility remains spotty—many Arduino-based systems don't support Chrome OS natively. The VEX GO system runs entirely in web browsers, eliminating OS headaches but requiring consistent internet.
Build durability for repeated experiments: This separates quality kits from toys. I drop-test, stress connectors, and rebuild robots 10+ times to assess connector wear. Snap-together plastic connectors loosen after 20-30 rebuilds. Metal fasteners and gear-based connections hold up indefinitely. If your child's learning style involves lots of experimentation and teardown, invest in metal-heavy platforms like VEX or TETRIX—they're expensive initially but last through multiple skill levels.
For a comprehensive compatibility checklist covering all these specs plus more, reference our robotics kit compatibility guide.
Step 4: Evaluate Hidden Costs Beyond Purchase Price
That $150 starter kit? I've seen total costs hit $400+ once families understand the full picture.
Subscription software: Some platforms charge monthly fees for programming apps or advanced features. LEGO's basic Mindstorms apps are free, but supplementary curriculum platforms often aren't. Scrutinize whether free versions have limited functionality. I refuse to recommend kits that paywall core programming features—you shouldn't need a subscription to access if/then statements.
Essential expansion costs: Calculate what's needed to reach the next skill level. Most starter kits include 1-2 motors and basic sensors. Adding a third motor, servo controller, or specialized sensor often runs $40-80. If the base kit can't accomplish interesting projects without immediate expansion purchases, factor that into your real cost.
Replacement part availability and pricing: Kids break things. Motors burn out. Sensors get crushed. Check whether you can buy individual components or must purchase expensive sets. Arduino-based platforms win here—generic components cost dollars, not dozens of dollars. Proprietary systems force you to buy from a single manufacturer at whatever price they set.
Consumables and maintenance: Some kits use specialized batteries, custom cables, or wear items. Others run on commodity USB-C charging and standard cables. Over 2-3 years, proprietary requirements add up.
Competition and curriculum costs: If your child gets serious about robotics, competition fees, field elements, and registration can exceed kit costs. VEX competition families easily spend $500+ annually. That's not necessarily bad—competitions drive incredible learning—but factor it into your long-term budget if your child shows competitive interest.
For families working within tight budgets, we've compiled budget-friendly coding robot options that deliver genuine skill-building under $100.
Step 5: Map the Kit to Your Child's 12-Month Learning Goals
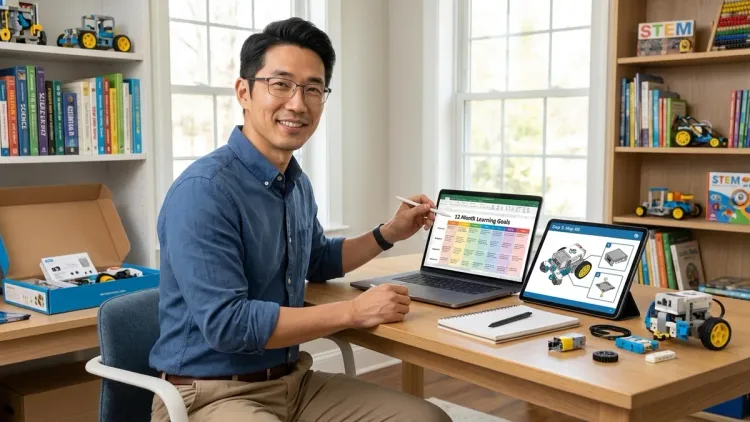
Forget vague "learn robotics" objectives. Define specific capability milestones your child should reach.
Beginner targets (first robotics kit, or first programmable kit after screen-free toys):
- Successfully build and program a robot to navigate a square path using loops
- Add a sensor (touch or distance) and program a conditional response
- Debug a simple program when behavior doesn't match expectations
- Explain in their own words what a variable does
If the kit you're considering can't support these outcomes, it's either too simple (buy it only if your child is under 6) or poorly designed.
Intermediate targets (second or third kit, 6-18 months into robotics):
- Implement nested loops and multiple conditional statements in a single program
- Integrate three different sensor types in one project
- Design a custom challenge (not from instructions) and build a robot to solve it
- Understand and troubleshoot mechanical failures (stripped gears, misaligned sensors)
- If text-based coding: write a program with functions/methods, not just linear code
Kits like the [LEGO Education SPIKE Prime] or makeblock mBot2 hit this level well, with enough complexity for genuine engineering thinking but not so much that kids drown in options.
Advanced targets (12+ months experience, ready for competition or specialized paths):
- Write programs using interrupts or asynchronous operations
- Implement PID control for precise movement or balancing
- Design and fabricate custom parts (3D printing robot chassis or laser-cut mounts)
- Integrate computer vision or AI libraries (OpenCV, TensorFlow Lite)
- Contribute to open-source robotics projects or understand ROS basics
These goals demand Arduino-based platforms like the Arduino Robotics Kit or more sophisticated systems. At this level, you're no longer buying "kits"—you're building capability to source components, design systems, and troubleshoot at a semi-professional level.
The critical question: Does this kit create a natural bridge to the next skill level, or is it an isolated toy? The best platforms are part of ecosystems. LEGO robotics products connect to each other. Arduino skills transfer across thousands of projects. Proprietary one-off kits force you to start over when your child outgrows them.
Our complete robotics learning path checklist maps these skill levels in detail, showing exactly when to transition between platforms.
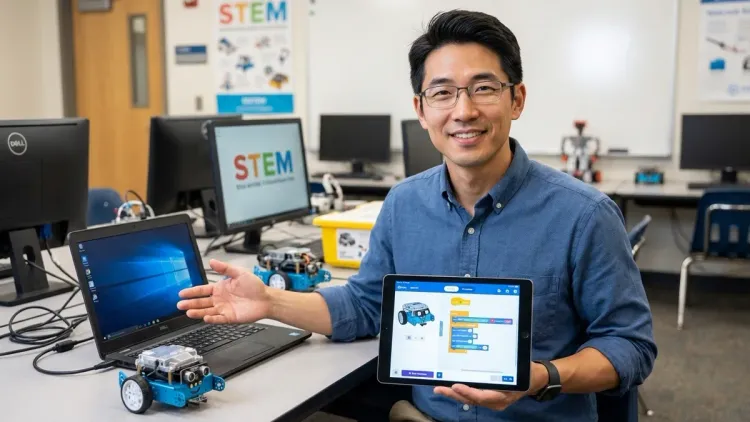
Step 6: Test Platform Compatibility with Your Learning Environment
The best kit means nothing if it doesn't work in your actual home setup.
Workspace requirements: Clear table space, consistent lighting, nearby power outlet. Sounds obvious, but I've seen families buy robots that need 4'x4' floor space when they only have a small desk available. Some kits demand permanent setup—you can't easily store a half-built competition robot, and rebuilding from scratch every session kills momentum.
Device and software reality: Install the programming software before buying the kit. Yes, really. Download the app, check system requirements, verify it actually launches on your device. I've troubleshooted dozens of "broken" kits that were simply software compatibility mismatches. Windows 10 minimum, or specific iOS versions, or browser-only with WebUSB support—these details matter immensely on day one.
Internet dependency and offline capability: Cloud-based programming platforms fail during internet outages. If your connection is unreliable or you want robots for car trips or outdoor spaces, prioritize kits with offline programming capability. Some platforms let you code offline then sync—verify this works in practice.
Support ecosystem matters more than you'd think: Active user communities, video tutorials, and responsive customer service determine whether you'll successfully troubleshoot problems. Before purchasing, search "[kit name] troubleshooting" or "[kit name] not working" and read through the results. Strong platforms have detailed documentation and active forums. Weak ones leave you stranded when something doesn't work.
Family support capacity: Be honest about your own technical comfort level and available time. Some kits assume parent/adult facilitator expertise. Others include guided lessons that kids can follow independently. In my fabrication labs, I've watched 8-year-olds work autonomously with well-designed beginner kits, and I've seen 13-year-olds need constant adult support with poorly documented advanced systems. Match the kit's required support level to your realistic availability—especially critical in the first 2-3 sessions when frustration runs highest.
Consider whether you're building a dedicated STEM learning space or fitting robotics into a multi-purpose area, as this affects which kits work practically.
Step 7: Check Progressive Path and Future-Proofing
This final evaluation prevents dead-end purchases.
Expandability architecture: Can you add motors, sensors, and controllers incrementally, or do you hit a hard limit? The difference between 2-motor and 4-motor capability is enormous for advanced projects. Platforms with standardized ports (like LEGO Technic connectors or Grove modular sensors) let kids experiment without compatibility headaches. Closed systems cap out quickly.
Skill transfer to professional tools: Ask specifically: Does this kit prepare my child for tools used in actual engineering? Arduino-based platforms clearly do—Arduino runs industrial automation, scientific instruments, and maker businesses worldwide. LEGO Mindstorms connects less directly to professional tools, but teaches engineering problem-solving that transfers. Proprietary-language kits that don't map to Scratch, Python, or C++ teach isolated skills with no clear next step.
Community longevity and manufacturer support: This is harsh reality—some robotics platforms get discontinued. Companies exit the education market. Before investing $200+, verify the manufacturer has been supporting the platform for at least 3-5 years and shows ongoing development (new sensors, updated software, active community). Established platforms like VEX, LEGO Education, Arduino, and Raspberry Pi show commitment. Startups with single products? Higher risk.
Integration with broader STEM skills: The most valuable robotics kits connect to other disciplines. Robots that work with renewable energy experiments, integrate data logging for science projects, or support custom mechanical design (3D printing components) deliver compound learning value. Isolated kits that only teach robot-specific skills miss opportunities.
Competition and challenge pathways: Even if your child isn't competitive by nature, formal challenges provide structure and motivation. Check whether the kit is used in FIRST LEGO League, VEX competitions, or RoboCup Junior events. Competition-ready doesn't mean you must compete—it means the platform is sophisticated enough that others build entire competitive programs around it.
For a systematic approach to building skills across multiple STEM domains, see our guide on designing a progressive STEM learning path.
Step 8: Make the Decision Matrix and Execute the Purchase
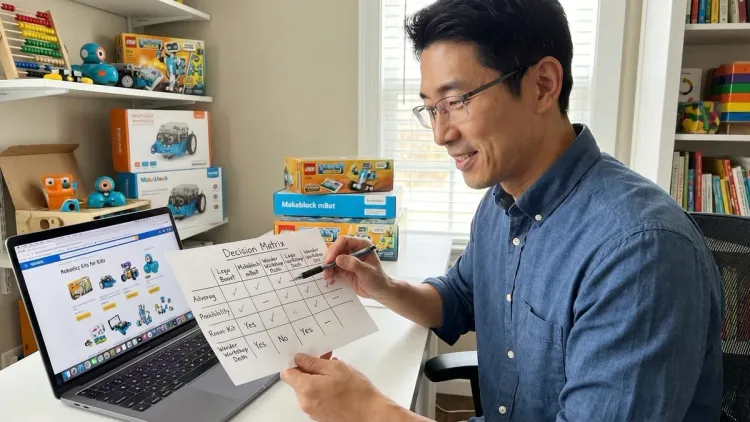
Pull all these factors into a simple comparison framework. I use this exact rubric in my fabrication labs when helping families choose.
Create a scoring table with these categories:
- Skill level match (0-10): Perfect match = 10, too easy/hard = 0-4
- Programming language career relevance (0-10): Python/Arduino = 10, proprietary = 0-3
- Total cost of ownership including expansions (0-10): Under $300 total = 10, over $600 = 0-4
- Expandability and future compatibility (0-10): Open ecosystem = 10, dead-end = 0
- Technical compatibility with your home setup (0-10): Works flawlessly = 10, questionable = 0-5
- Community support and documentation quality (0-10): Excellent resources = 10, sparse = 0-4
Score each kit you're considering. Anything under 35/60 is probably a poor fit. Over 50/60 signals a strong match.
Trust your gut on enthusiasm fit: If your child is obsessed with Star Wars, a robotics kit using those themes might justify lower technical scores—motivation trumps perfect specifications. If they're fascinated by AI concepts, prioritize kits with camera modules and vision programming support even if mechanical complexity is lower.
Start with the base kit, not the mega-bundle: I see parents buy $500 comprehensive sets when a $150 starter would prove whether the child actually connects with robotics. Purchase the minimal viable kit that hits your skill level, use it for 2-3 months, then expand if engagement stays high. Exception: if you're absolutely certain (prior camps, consistent interest over 6+ months), buying the advanced kit upfront can save money long-term.
Physical purchase logistics: Check return policies before buying. Some robotics kits have restocking fees or "no returns on educational products" clauses. If you're uncertain about compatibility, buy from retailers with flexible returns. For budget-conscious families, consider used robotics kits from school surplus sales or maker community exchanges—these kits are often built once and barely used.
Once you've made the choice, building that first robot becomes the critical implementation step where all this planning pays off.
Pro Tips & Common Mistakes
The "age range" trap: Manufacturers print conservative age ranges to avoid liability. I've watched 6-year-olds excel with "Ages 10+" kits and 12-year-olds feel bored by "Ages 8-14" products. Trust skill assessment over printed ages.
Underestimating mechanical assembly difficulty: Programming often gets easier than building the physical robot. If your child struggles with fine motor skills or following complex visual instructions, choose kits with larger parts and simpler mechanisms. LEGO-style snap construction beats tiny screws and precise bracket alignment.
Ignoring software update cycles: Some platforms push frequent updates that break compatibility or require newer OS versions. Before committing, check the manufacturer's update history. Constant forced updates that change interfaces mid-learning? Frustration magnet.
Buying for the child you wish you had, not the one you have: Parents with engineering backgrounds often choose advanced kits hoping to share their passion, then wonder why their kid loses interest after one session. Match your child's actual demonstrated interest level. A child who tinkers constantly needs different tools than one who enjoys occasional structured projects.
Skipping the learning curve preview: Watch YouTube videos of other kids using the kit. Read Amazon reviews specifically about setup difficulty and troubleshooting. Manufacturer marketing shows polished success; real users reveal where things go wrong. If multiple reviewers mention "took 3 hours to get software working" or "instructions are confusing," believe them.
Neglecting the replacement part ecosystem: Fast-growing kids crash robots, strip gears, burn out motors. Before purchase, verify you can actually buy replacement parts without shipping from overseas or waiting weeks. Standard component kits (Arduino-based, Grove sensors) mean you can grab replacements from multiple suppliers. Proprietary parts create single-source dependency.
Missing the transition moment: Kids show clear signs when they've outgrown a kit—they stop using it, complain about limitations, or ask "can this do [more advanced thing]?" That's your cue to move up, not six months later. I've seen families stick with beginner platforms for years past optimal timing, then wonder why their teen isn't interested in robotics anymore. Read the signals and act decisively.
Frequently Asked Questions
What's the best robotics kit for a child with zero programming experience?
Start with a physical programming system that uses tangible controls rather than screen-based coding—the Learning Resources Botley 2.0 or similar screen-free robots let kids build sequencing skills through button presses and directional cards before introducing abstract syntax. These kits should deliver immediate visual feedback and success rates above 80% on first attempts. After 2-3 months of physical programming, transition to icon-based or block-based systems like LEGO SPIKE Essential, which provides a gentler introduction to digital programming while building on established sequencing concepts. For a comprehensive guide to this transition, see our article on moving from screen-free to text-based coding.
How do I know when my child is ready to move from visual block coding to text-based programming with robots?
Watch for these specific capability markers: they can consistently build programs with nested loops and multiple conditional statements, they understand and use variables purposefully (not just following instructions), they debug programs by reading through logic rather than random trial-and-error, and they ask questions about "why" the block does something or express frustration about block limitations. Typically this readiness emerges after 40-60 hours of block-based programming experience spread over 6-12 months. The actual transition works best with dual-mode platforms like LEGO Mindstorms Robot Inventor that support both blocks and Python—kids can write the same program in both languages and see equivalent results, building confidence before diving into pure text environments. I've documented this transition extensively in our guide to moving from block to text robot programming.
Should I buy a kit compatible with Arduino even if my child isn't ready for that level of programming yet?
Yes, if the kit also offers a beginner-appropriate programming interface and your budget allows the higher initial cost, Arduino compatibility future-proofs your investment significantly. Many modern robotics platforms run Arduino firmware on the backend but present block-based or simplified programming interfaces for beginners—you're not forced to use Arduino IDE immediately, but the option unlocks as skills develop. This approach prevents the expensive restart that happens when kids outgrow closed platforms and need entirely new hardware to continue learning. The sweet spot: platforms like the Arduino-based mBot series or ELEGOO robot kits that include both visual programming apps and full Arduino IDE support, letting you meet your child where they are today while keeping advanced doors open.
How much should I expect to spend on a robotics kit that will last through multiple skill levels?
Budget $200-350 for a quality expandable platform that grows with your child over 2-3 years, plus another $100-200 for incremental sensor additions, extra motors, and expansion components purchased as skills develop. Front-loading with a premium expandable kit (LEGO SPIKE Prime, VEX IQ, or comprehensive Arduino platforms) costs more initially but typically proves cheaper than buying separate beginner, intermediate, and advanced kits sequentially. The false economy: $50-80 basic kits that get outgrown in 3-6 months, requiring complete replacement rather than expansion—I've seen families spend $400+ this way while thinking they were being budget-conscious. For cost-conscious families, the better strategy is buying a quality used expandable kit from school surplus sales for $100-150, then investing savings into expansion sensors and components as needed.
Your Roadmap Is Built—Now Execute
You've got the framework. Skill assessment beats age ranges. Programming language choice shapes career pathways. Total cost includes subscriptions and expansions. Compatibility checking prevents day-one disasters. Progressive learning paths protect your investment.
The families I see succeed in maker education? They treat robotics kits as capability-building infrastructure, not entertainment purchases. They match tools to current demonstrated skills, watch for transition signals, and invest in expandable ecosystems rather than isolated toys.
Take your scoring matrix, fill it out for 2-3 finalist kits, and make the decision. Then—this matters—schedule the first build session within 48 hours of the kit arriving. Momentum beats perfection. Your child doesn't need the theoretically optimal kit; they need a well-matched platform and your committed time in those crucial first sessions.
I've guided hundreds of families through this process. The ones who spend 30 minutes on systematic evaluation upfront? They're building competition robots two years later. The ones who impulse-buy based on packaging? They're usually asking how to choose robotics kit for kids again six months later because the first purchase is gathering dust. Don't be the second group.