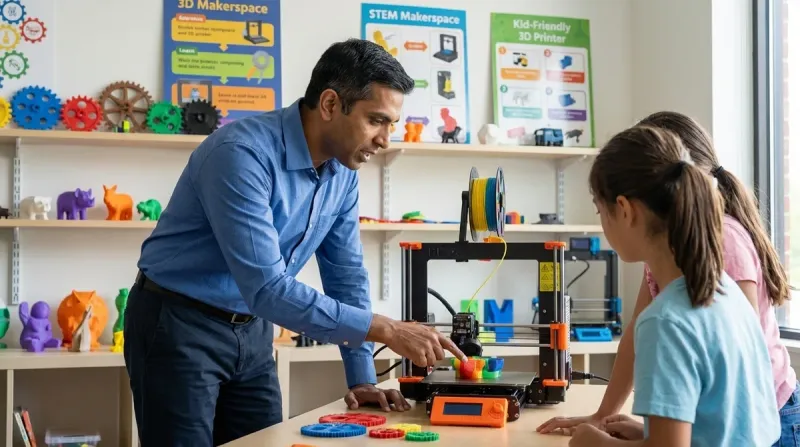
The best 3d printers for kids and teens differ from consumer models in three critical ways: they require minimal troubleshooting that derails learning momentum, they map to industry-standard CAD workflows without artificial simplification, and they survive the repeat failures inherent to skill acquisition. This guide focuses on machines that build employable competencies—not desk ornaments.
What Is a 3D Printer for Educational Use?
A 3D printer translates digital models into physical objects by depositing thermoplastic filament layer by layer. Educational models prioritize reliability over feature density—a distinction that matters when a failed print at 11 PM the night before a science fair submission can't be rescued by tech support.
The fundamental technology is FDM (Fused Deposition Modeling), identical to what's used in automotive prototyping and aerospace R&D. The Creality Ender 3 V3 SE uses the same core process as industrial Stratasys machines—just with smaller build volumes and consumer-grade components. That technical continuity is the entire value proposition: a teen who masters G-code troubleshooting, bed leveling, and slicer optimization on an entry-level printer walks into their first engineering internship with skills that translate directly to $40,000 Markforged systems.
Educational printers fall into two camps: enclosed systems with proprietary ecosystems (think FlashForge Adventurer 5M Pro) that trade flexibility for consistency, and open-frame machines that expose the full mechanical complexity. The latter frustrates beginners but teaches root-cause analysis—a higher-value skill in the 2026 hiring market than clicking "Print" on a black box.
The learning objective isn't the printed object. It's the iterative problem-solving cycle: model in CAD → slice with path optimization → diagnose layer adhesion failures → adjust parameters → repeat. That loop mirrors actual product development workflows at companies currently hiring mechanical engineers and industrial designers.
How 3D Printing Technology Works for Young Learners
An FDM printer requires three skill domains that map to distinct career competencies: CAD modeling (spatial reasoning + parametric design), slicing software configuration (applied physics + quality-cost tradeoffs), and mechanical troubleshooting (root-cause analysis under ambiguous failure modes).
The CAD-to-Physical Workflow
Students design in either Tinkercad (browser-based, limited parametric capabilities, zero install friction) or Fusion 360 (industry-standard, full parametric history, steeper learning curve but directly applicable to mechanical engineering roles). Both export STL files—a mesh format that represents surfaces as triangulated polygons. That mesh then imports into slicing software like Cura, PrusaSlicer, or proprietary alternatives.
The slicer converts 3D geometry into G-code: machine instructions specifying nozzle path, extrusion rate, temperature, and movement speed for each layer. A typical 4-hour print generates 50,000+ lines of G-code. Students don't write it manually, but understanding the relationship between slicer parameters (infill density, layer height, print speed) and resulting G-code teaches the optimization tradeoffs that define manufacturing engineering: strength vs material cost, speed vs surface quality, complexity vs failure risk.
Mechanical Operation and Failure Modes
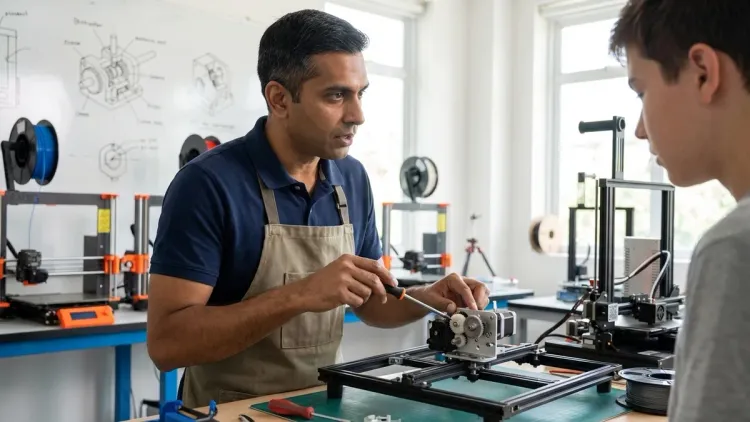
The print head (hotend) melts filament to approximately 200°C for PLA, 240°C for PETG, 250°C for ABS. Material extrudes through a 0.4mm brass nozzle while moving in X/Y coordinates; the bed lowers incrementally (Z-axis) after each layer. First-layer adhesion determines print success more than any other variable—it requires bed leveling accurate to 0.05mm across the entire surface.
This is where educational value separates from entertainment value. Cheap enclosed printers auto-level and hide the process. Better learning happens when students manually adjust bed springs with a feeler gauge, building tactile intuition for mechanical tolerances that apply equally to gearbox assembly or PCB mounting hardware.
Common failure modes include warping (differential thermal contraction causing corners to lift), stringing (excess plastic deposited during non-printing moves), layer delamination (insufficient interlayer bonding from temperature miscalibration), and clogging (heat creep causing filament to expand and jam inside the hotend). Each failure mode has 4-6 potential root causes. Diagnosing them requires hypothesis generation, controlled variable testing, and documentation—the scientific method applied to hardware debugging.
Slicer Configuration as Applied Physics
Layer height trades resolution for speed: 0.12mm layers produce smooth surfaces but take 3× longer than 0.28mm layers. Infill density affects structural strength and material cost—20% honeycomb infill uses half the filament of 40% but reduces compressive strength by approximately 60%. Print speed impacts cooling time; pushing a Creality Ender above 60mm/s on detailed geometry causes insufficient solidification before the next layer deposits.
Students who engage with these tradeoffs learn engineering constraint optimization more effectively than any textbook problem set. They're making real decisions with immediate physical feedback, iterating on designs with material and time costs they feel personally.
Why This Technology Matters for Skill Development
The 2026 hiring landscape prioritizes hands-on prototyping ability over theoretical knowledge. Engineering managers at firms I consult with consistently report that entry-level candidates lack practical troubleshooting skills—they can calculate stress concentrations but can't diagnose why a physical part failed during testing.
Employable Competencies Developed
A teen who runs 50+ prints across 6 months acquires:
CAD proficiency: Fusion 360 skills listed on a resume signal readiness for mechanical design roles. I've watched hiring managers move candidates from "maybe" to "interview" piles based solely on portfolio projects showing parametric modeling competency.
Manufacturing constraint awareness: Understanding that a 45° overhang requires support material (adding cost and post-processing time) while a 30° overhang doesn't—that's the foundation of design for manufacturability, a $15,000-$20,000 salary differentiator in mechanical engineering roles.
Systematic debugging: The process of isolating whether a failed print stems from bed adhesion, temperature calibration, filament moisture content, or slicer settings mirrors software debugging, circuit troubleshooting, and experimental design across all technical disciplines.
Material science fundamentals: Experiencing how PLA becomes brittle below 10°C, how PETG resists UV degradation better than ABS, how layer orientation affects tensile strength—these aren't abstract concepts when you've personally broken test specimens and correlated failure modes to material properties.
Integration with Robotics and Electronics Projects

3D printing transforms from isolated activity to enabling infrastructure when combined with Arduino robotics kits or AI learning projects. Students design custom sensor mounts, prototype chassis modifications, create enclosures for circuit boards—bridging digital and physical domains in ways that mirror actual product development cycles.
I've run my own children through this exact progression: block-based coding with screen-free robotics, transition to Scratch and Python, then CAD and 3D printing to manufacture custom parts for their robots. That integrated skill stack—software + electronics + mechanical design—is what distinguishes candidates who get summer internship offers from those who don't.
Types and Variations: Architectural Differences That Affect Learning Outcomes
Enclosed vs Open-Frame Designs
Enclosed printers like the Bambu Lab A1 Mini maintain stable thermal environments, reducing warping and enabling ABS printing without room-temperature sensitivity. They're safer (no exposed hot components) but hide mechanical complexity. Students learn operation but not maintenance or modification.
Open-frame designs like the Creality Ender 3 V3 KE expose all mechanical systems. Belt tension, lead screw alignment, stepper motor operation, cooling fan placement—every component is visible and user-serviceable. This transparency has pedagogical value but requires parental acceptance that learning includes failed prints and troubleshooting sessions.
For comprehensive safety comparisons, see our enclosed vs open frame analysis.
Cartesian vs CoreXY Motion Systems
Most educational printers use Cartesian kinematics: independent motors for X, Y, and Z axes. Simple to understand, straightforward to troubleshoot, directly maps to CNC milling and laser cutting systems students encounter later.
CoreXY designs (Bambu Lab P1S, Prusa XL) use two motors working in tandem to control X and Y movement. Faster acceleration, better high-speed performance, reduced moving mass—but adds kinematic complexity that offers limited educational value for beginners.
Proprietary vs Open-Source Ecosystems
Proprietary systems (FlashForge, Dremel, XYZprinting) lock students into manufacturer filament, cloud slicing software, and walled-garden model repositories. They reduce troubleshooting burden but cap skill development at operational proficiency.
Open-source printers running Marlin firmware accept any filament, work with Cura/PrusaSlicer/Simplify3D, and expose configuration files for direct editing. Students graduate from using a product to understanding a system—the difference between a video game player and a game engine developer.
For budget-conscious families, our under-$300 printer guide covers entry points that don't compromise on open-source flexibility.
Key Selection Criteria: Lab Specs and Capability Milestones
Technical Compatibility Requirements
Operating system support varies dramatically. Browser-based slicers (MakerBot CloudPrint, FlashForge FlashPrint Cloud) work across Windows/macOS/Linux but sacrifice advanced features. Desktop slicers offer full control but PrusaSlicer requires Windows 10+ or macOS 11+, while Cura runs on older systems including Linux distributions.
Connectivity options determine workflow friction. SD card transfer (universal but tedious) vs USB direct connection (occasionally unstable) vs networked printing (requires static IP configuration and router access). The AnkerMake M5C offers Wi-Fi with mobile app control, reducing friction but adding cloud dependency—fine for home use, problematic for school networks with content filtering.
Firmware ecosystem matters for expandability. Marlin-based printers accept community-developed improvements (linear advance, pressure advance, input shaping). Proprietary firmware limits students to manufacturer-approved features.
Build Volume and Material Compatibility
Build volume determines project scope. The standard 220×220×250mm envelope handles 90% of educational projects. Larger volumes (300×300×300mm+) enable architectural models and multi-part assemblies but increase footprint and cost.
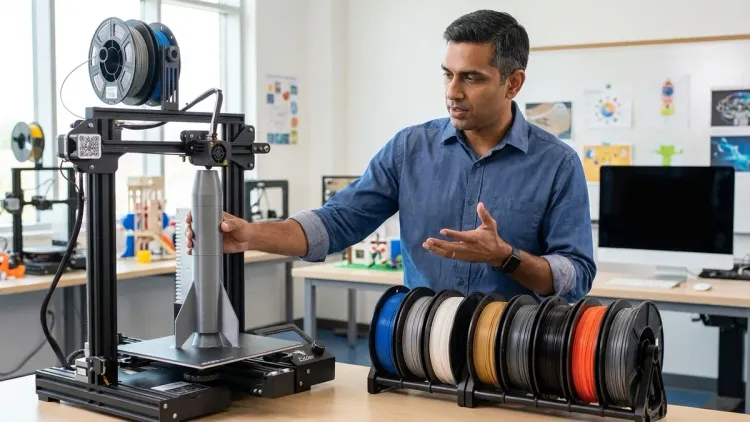
Filament compatibility gates material science exploration. PLA-only machines (common in enclosed educational models) simplify operation but prevent students from experiencing mechanical property differences across materials. PETG capability adds chemical resistance and layer adhesion strength. ABS enables acetone vapor smoothing and high-temperature applications but requires enclosed build chambers.
For material science fundamentals, see our filament types guide covering strength/flexibility/temperature tradeoffs.
Power Requirements and Safety Infrastructure
Most desktop printers draw 150-250W during printing, similar to a desktop computer. They require grounded 120V AC outlets and should not share circuits with space heaters or power tools.
Thermal safety features vary substantially. Quality printers include thermal runaway protection (firmware monitors temperature sensors and shuts down if readings exceed safe ranges) and auto-shutoff on print completion. Cheaper units lack these protections—a legitimate fire risk when left unattended.
Ventilation requirements depend on materials. PLA emits minimal VOCs; ABS and PETG require exhaust ventilation or activated carbon filtration. Our 3D printing station setup guide covers infrastructure requirements for sustained home use.
Durability and Maintenance Expectations
MTBF (mean time between failures) isn't published for educational printers, but observational data from school deployments suggests:
- Cheap printers (<$250): expect component replacement (nozzle, hot end, cooling fan) every 200-300 hours
- Mid-tier ($300-$600): 500-800 hours between major maintenance
- Premium (>$600): 1000+ hours, but still require regular consumable replacement (nozzles, build surfaces, belts)
User-serviceable design determines whether maintenance teaches or frustrates. Printers requiring hex keys and published assembly diagrams enable student-performed repairs. Models with glued components or security screws force reliance on manufacturer service—pedagogically worthless.
Product Evaluation Framework: Matching Machines to Skill Progression
Elementary School Entry Point (Ages 8-11)
Primary objective: Build confidence through successful prints while introducing CAD basics.
Technical requirements:
- Enclosed design with automatic bed leveling
- Print resume capability (power failure recovery)
- PLA-only compatibility acceptable at this stage
- Maximum 2-step startup process
- Visual/audio status indicators
Skill milestones: By 50 hours of use, students should independently: import STL files, adjust scale and orientation, initiate prints, remove completed parts without damage, identify when support material is required.
The FlashForge Adventurer 5M Pro fits this profile with one significant limitation: proprietary filament cartridges that cost approximately 40% more than commodity spools. That premium buys reliability—students in this age range can't troubleshoot extrusion problems during a print.
For skill-appropriate alternatives, see our elementary school printer guide.
Middle School Development (Ages 12-14)
Primary objective: Transition from operator to engineer—understanding why settings matter, not just which buttons to press.
Technical requirements:
- Open or enclosed acceptable; open-frame preferred for mechanical visibility
- Manual bed leveling capability (builds troubleshooting skills)
- Multi-material support (PLA, PETG minimum)
- Direct drive or Bowden tube—both teach relevant principles
- Requires desktop slicer with exposed parameters
Skill milestones: By 100 hours of use, students should: create original CAD designs in Tinkercad/Fusion 360, optimize slicer settings for specific geometries, diagnose and correct first-layer adhesion failures, measure dimensional accuracy and iterate designs, calculate material costs for projects.
The Creality Ender 3 V3 SE occupies the sweet spot here. It's mechanically simple enough for students to fully comprehend, frustrating enough to require actual problem-solving, and costs little enough that modification/experimentation carries low risk. The build volume (220×220×250mm) handles science fair projects without spatial constraints.
The specific flaw: bed leveling requires patience and repeated adjustment—springs lose tension after thermal cycling. Some students find this tedious; I consider it essential skill-building for mechanical tolerance awareness.
High School Advancement (Ages 15-18)

Primary objective: Match or exceed capabilities of college makerspace equipment, enabling portfolio-quality work for university applications.
Technical requirements:
- Direct drive extruder (better flexible filament handling)
- Input shaping or pressure advance firmware (higher speed without quality loss)
- Networked operation with remote monitoring
- Build volume 250mm+ (enables multi-part assemblies)
- Compatible with engineering-grade materials (nylon, carbon fiber composites)
Skill milestones: By 200 hours of use, students should: design parts with manufacturing constraints in mind (draft angles, wall thickness, tolerance allocation), select materials based on mechanical requirements, modify firmware parameters for custom materials, design and print functional mechanical assemblies (gears, linkages, enclosures), document projects with CAD/CAM workflow suitable for portfolio submission.
The Bambu Lab P1S delivers professional-grade output with minimal tuning. CoreXY motion enables 250mm/s print speeds without quality degradation. The enclosed chamber handles ABS and ASA without warping. Multi-color capability via AMS (Automatic Material System) isn't pedagogically critical but enables complex projects.
The flaw: it's almost too reliable. Students can operate it successfully without learning the underlying mechanical principles that open-frame printers force them to confront. For pure output quality, it's excellent. For maximizing learning-per-hour, the Prusa MK4 offers comparable performance with more transparent system architecture.
For detailed head-to-head analysis, see our Creality vs FlashForge comparison.
Progressive Learning Path Integration
3D printing capability doesn't exist in isolation—it's infrastructure for broader STEM skill development.
Month 1-2: Operational Proficiency
- Print pre-made models from Thingiverse/Printables
- Learn slicer basics (supports, orientation, scale)
- Build intuition for print time vs quality tradeoffs
- Establish maintenance routine (bed cleaning, filament storage)
Month 3-4: CAD Fundamentals
- Complete Tinkercad tutorials (approximately 8 hours)
- Design simple geometric objects (boxes, cylinders, nameplates)
- Learn Boolean operations (union, difference, intersection)
- Iterate on designs based on printed results
For structured CAD curriculum, see our teaching 3D design guide.
Month 5-6: Applied Problem-Solving
- Design custom parts for existing projects (robotics, electronics, science experiments)
- Measure existing objects and create replacement parts
- Learn calipers usage and dimensional accuracy verification
- Document design decisions and iteration cycle
This phase integrates with robotics projects and renewable energy experiments—students design turbine blades, sensor mounts, gear trains, and structural components.
Month 7-12: Advanced Manufacturing Concepts
- Multi-part assemblies with mechanical constraints (clearances, press-fits, snap-fits)
- Material selection based on mechanical requirements
- Cost optimization through topology optimization and infill strategies
- Fusion 360 progression (parametric modeling, simulation, generative design)
Students operating at this level produce portfolio-quality work suitable for university applications and internship discussions. They understand manufacturing constraints that most mechanical engineering undergraduates don't encounter until junior year.
Infrastructure Requirements: Setting Up for Sustained Success
Physical Space Allocation
Minimum 4×3 foot workspace accommodates printer, filament storage, tool kit, and post-processing area. Printers vibrate during operation—place on solid tables, not particle board or lightweight desks that amplify noise.
Dedicated circuits prevent tripped breakers during long prints. I've lost 18-hour prints to power interruptions from unrelated appliances on the same circuit.
Essential Accessories and Consumables
Filament storage: PLA and PETG absorb moisture from air, degrading print quality. Store in sealed containers with desiccant packs. Budget $20-30 for airtight bins.
Tool kit: Flush cutters (removing support material), needle files (cleaning holes), calipers (dimensional verification), hex key set (assembly/maintenance), scraper (part removal). Total cost approximately $40-60.
Replacement parts inventory: Extra nozzles (brass wears out, $15 for 10-pack), spare PTFE tubing ($10), replacement build surface ($20-40 depending on type). Budget $50-80 for initial inventory.
For complete equipment lists, see our 3D printing station checklist.
Safety Protocols and Risk Mitigation
Thermal hazards: Nozzles reach 250°C, beds reach 100°C. Establish no-touch rules during and immediately after printing. Silicone finger guards ($8) prevent burns during part removal.
Ventilation: Even PLA emits ultrafine particles during printing. Run HEPA air purifiers ($80-150) or print near open windows. For ABS, use activated carbon filters or exhaust fans venting outdoors.
Fire risk: Thermal runaway is rare but catastrophic. Never leave budget printers unattended. Install smoke detectors near printing area. Consider remote monitoring cameras ($30-50) for visibility during unsupervised hours.
Our complete safety checklist covers detailed protocols by age group.
Cost Analysis: ROI on Educational Investment
Initial Capital Outlay
- Budget tier ($200-350): Sufficient for skill development through middle school
- Mid-range ($350-700): Supports high school projects and portfolio work
- Premium ($700-1200): Matches college makerspace capabilities, suitable for serious pre-engineering students
Ongoing Operational Costs
Filament consumption: PLA costs approximately $18-22 per kg. Typical science fair project uses 100-300g ($2-6). Budget $15-30/month for active users.
Electricity: 200-hour print time per month at 200W average = 40 kWh = $5-6 at national average rates.
Replacement parts: Budget $50-100/year for consumables (nozzles, build surfaces, belts).
Comparative Value vs Alternatives
Makerspace memberships run $60-120/month in most metro areas. A $400 printer pays for itself in 4-7 months of use, while delivering on-demand access that doesn't require transportation or schedule coordination.
University application benefit is difficult to quantify but observable: students with documented CAD/manufacturing projects demonstrate initiative and practical capability that distinguishes applications. I've seen marginally-qualified candidates secure engineering program admission based primarily on strong maker portfolios.
Frequently Asked Questions
Q: What age should a child start using a 3D printer?
Children as young as 8 can operate enclosed, user-friendly printers like the FlashForge Adventurer series under supervision, but meaningful learning begins around age 10-11 when students have sufficient spatial reasoning and patience for the iterative design process. Before age 10, focus on screen-free spatial reasoning toys that build prerequisite skills. The limiting factor isn't printer operation—it's CAD proficiency, which requires abstract thinking about 3D transformations that develops during middle childhood.
Q: Do I need to buy expensive proprietary filament or can I use any brand?
Open-source printers (Creality, Prusa, AnkerMake) accept any filament that matches diameter specifications (1.75mm standard). Proprietary systems (some FlashForge models, XYZprinting, Dremel) require manufacturer cartridges or chips that lock out third-party materials. The cost premium for proprietary filament is approximately 40-60% over commodity PLA, adding $200-400 to total cost of ownership over two years of regular use. For educational purposes, open-filament compatibility offers better long-term value and enables material science exploration.
Q: How loud are 3D printers and can they run overnight in a bedroom?
Sound output varies from 45-65 dB depending on design and print speed. Enclosed printers with CoreXY motion (Bambu Lab A1 Mini) operate at conversational volume levels suitable for bedroom use. Open-frame Cartesian printers (Creality Ender series) generate mechanical noise from stepper motors and fans that most people find disruptive during sleep. Plan for dedicated workspace separate from sleeping areas, or limit overnight printing to quieter models. Rubber damping feet reduce vibration transmission by approximately 20-30% but don't eliminate motor noise.
Q: What's the difference between cheap $200 printers and $800 models?
Price primarily buys reliability and time-to-first-successful-print. Budget printers require assembly (2-4 hours), manual calibration, and troubleshooting before producing quality output. Premium models print successfully out-of-box with auto-calibration and quality-of-life features like automatic bed leveling, filament runout detection, and print failure recovery. Fundamental technology is identical—both use FDM process with similar resolution capabilities. The $600 premium pays for frustration reduction, not capability expansion. For learning purposes, I prefer mid-tier options ($350-500 range) that balance reliability with mechanical transparency.
Q: Can 3D printers make functional parts or just decorative objects?
FDM printers produce mechanically functional parts suitable for robotics assemblies, replacement components, tooling, and structural applications. Layer adhesion creates anisotropic strength properties—parts are stronger in X/Y directions than Z-axis, requiring design consideration for load-bearing applications. Properly printed PETG parts withstand approximately 50 MPa tensile stress, suitable for most educational robotics and mechanical projects. Students learn to design around manufacturing constraints (wall thickness, infill density, load orientation) that directly translate to injection molding and CNC machining workflows in professional contexts.
Summary
The best 3d printers for kids and teens prioritize learning value over convenience—machines that expose mechanical principles, integrate with industry-standard software workflows, and survive the repeated failures that characterize actual skill development. Entry-level students benefit from enclosed designs that build confidence through early success. Mid-tier learners need open-source platforms that require troubleshooting and iteration. Advanced students preparing for engineering programs require capabilities that match college makerspace equipment.
The educational objective isn't printing objects—it's developing the iterative design → test → debug → refine cycle that defines all engineering disciplines. A student who has independently diagnosed and corrected 20 failed prints has learned root-cause analysis methodology worth more than any classroom lecture. Combined with CAD education, robotics projects, and electronics work, 3D printing becomes infrastructure for integrated STEM capability that translates directly to internship readiness and university-level project work.
Budget $400-600 for a capable platform, $100-150 for essential accessories and initial filament inventory, and $30-50/month for ongoing consumables. The return on that investment—measured in portfolio quality, practical troubleshooting skills, and differentiated university applications—exceeds any comparable educational expenditure I've evaluated.