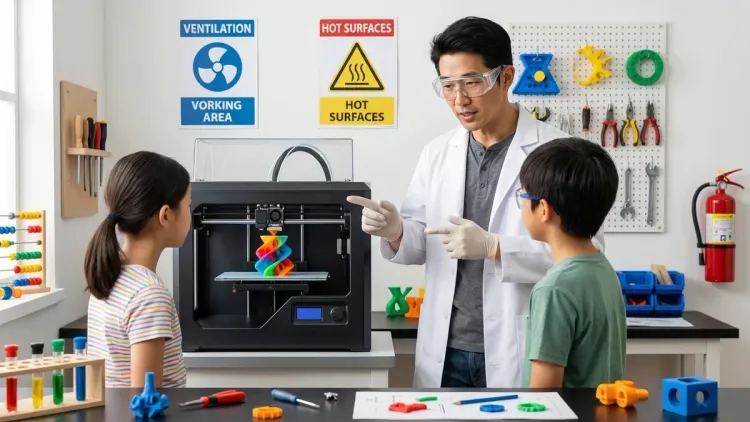
I've spent the last eight years running fabrication labs where kids as young as eight fire up their first prints, and I've seen every possible safety scenario—some hilarious, a few scary, all instructive. This 3D printer safety checklist for kids covers the essential physical, electrical, and operational safety measures you need before your young maker hits "print." Whether you're setting up an enclosed vs open frame printer, preparing your first 3D printing station, or just want to know what hazards actually matter (spoiler: most internet panic is overblown), this checklist gives you the concrete steps. I've organized these by environment, equipment, materials, and supervision protocols—the same framework I use when auditing maker spaces for insurance compliance.
Physical Environment and Workspace Setup
Your workspace determines 80% of your safety outcomes. I've seen families skip this step and end up with a printer on a wobbly card table next to a curtain—not ideal.

Stable, heat-resistant surface at appropriate height: Place your printer on a solid table or desk that won't wobble during print movements. The surface should handle temperatures up to 80°C (heated bed temp) without warping. For younger kids (ages 8-12), position the printer so the build plate sits roughly at their chest level—this prevents them from reaching over hot components. I use a dedicated steel workshop table, but a solid wood desk works fine if you add a silicone mat underneath.
Adequate clearance from walls and combustibles: Maintain at least 15cm clearance on all sides for air circulation and access to controls. Keep the printer 1 meter minimum from curtains, paper storage, or anything flammable. FDM printers exhaust heat—I've measured ambient temps 10-15°C higher within 30cm of an operating printer. Check your home STEM lab safety requirements for ventilation standards.
Dedicated electrical circuit with proper amperage: Most entry-level printers draw 200-300W during heat-up (comparable to a desktop computer), but larger models with heated enclosures can pull 500W+. Use a grounded outlet on a 15A circuit that isn't shared with high-draw appliances. I've tripped breakers by running a printer, laser cutter, and space heater simultaneously—learn from my mistakes.
Non-conductive flooring or mat beneath printer: If your workspace has concrete or tile flooring, add a rubber anti-fatigue mat. This prevents static discharge issues (rare but annoying) and cushions dropped tools. More importantly, it defines the "work zone" visually for younger kids—a behavioral cue that says "this is the maker space, pay attention here."
Proper lighting without glare on control screens: Install task lighting that illuminates the build plate from above and slightly to the side. You need enough light to inspect first layers and spot failed prints early, but avoid direct overhead lights that create glare on touchscreen interfaces. I use a swing-arm LED desk lamp with adjustable color temperature—warm light for supervision, cool light for detailed inspection work.
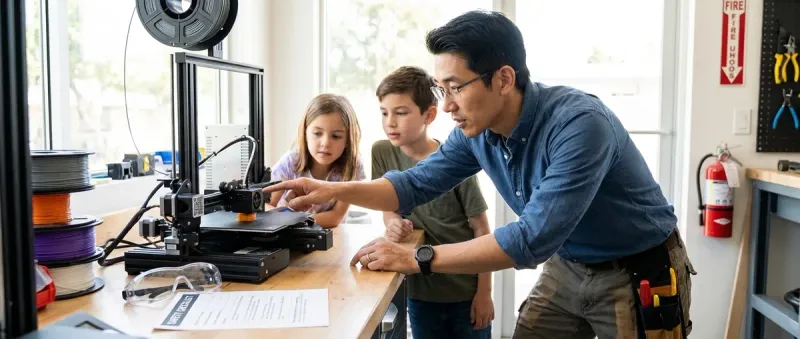
Fire extinguisher rated for electrical fires (Class C) within 3 meters: Mount a 2.5kg ABC or BC-rated extinguisher where kids can't accidentally discharge it but adults can grab it instantly. I've never needed mine in 200+ hours of supervised kid printing, but the one time a power supply failed and started smoking, I was grateful it was there. Check the pressure gauge monthly—this is a good recurring task to assign to teens learning lab maintenance.
Smoke detector positioned above printer area: Install a photoelectric smoke detector (better for detecting smoldering) directly above or within 1 meter of the printer. Test it monthly. Some filaments produce visible fumes during printing—your detector shouldn't false-trigger constantly, but it should catch actual thermal events. If you're getting false alarms, you have a ventilation problem, not a detector problem.
First aid kit with burn gel and tweezers: Keep a basic kit with sterile gauze, burn gel, tweezers (for removing stuck filament from skin—yes, it happens), and bandages within arm's reach. Most 3D printing injuries are minor: touching a hot nozzle, pinching skin in moving parts, or small cuts from removing prints with scrapers. I've treated dozens of minor burns; none required medical attention beyond cool water and aloe.
Printer Equipment and Hardware Safety
Hardware safety starts during choosing your first printer and continues through daily operation. These checks prevent the majority of mechanical injuries.
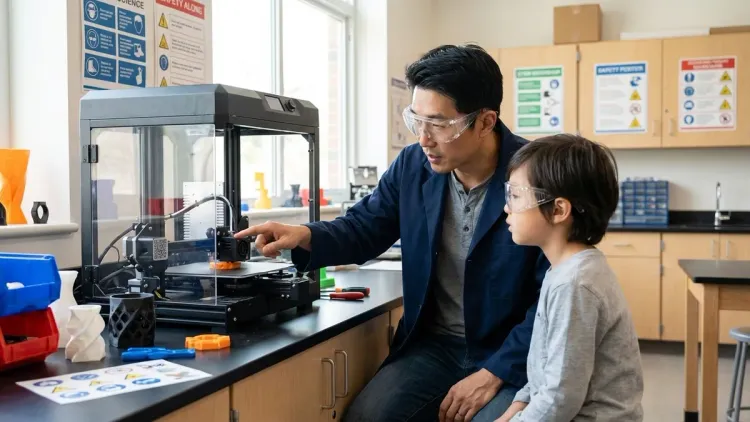
Enclosed build chamber for printers used by kids under 14: If your young maker is under 14 or prone to distraction, invest in a fully enclosed printer like the Flashforge Adventurer 5M Pro. The enclosure prevents fingers from reaching moving belts, hot nozzles, or the heated bed during operation. I've watched kids instinctively reach for a "cool looking print" mid-job—enclosures eliminate that risk. Open-frame printers are fine for focused teens 15+, but require stricter supervision protocols.
Emergency stop button tested and accessible: Verify your printer has a physical E-stop or power cutoff button that halts all movement instantly. Test it before every new user's first print. I make kids demonstrate they can hit the stop button with their eyes closed—muscle memory matters when they're startled by a sudden movement or noise.
Proper bed leveling and first-layer adhesion to prevent nozzle crashes: A poorly leveled bed can cause the nozzle to dig into the build plate or collide during homing. For manual-leveling printers, teach kids the paper-drag test and supervise their first 5-10 leveling sessions. Auto-leveling printers (BLTouch, CR Touch) reduce this risk but still need periodic verification. I've seen nozzle crashes crack glass beds—scary, but mostly an equipment hazard rather than a personal injury risk.
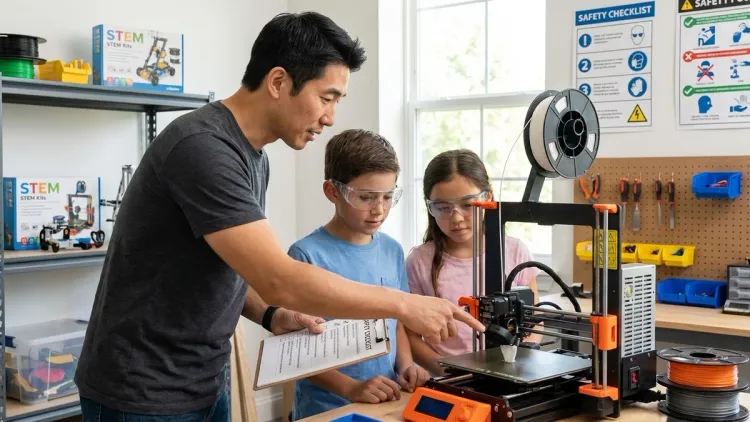
All moving parts (belts, rods, lead screws) have proper guards or clearance markings: Mark high-risk zones with colored tape or labels. I use yellow electrical tape to outline the "danger zone" around moving Y-axis beds—a visual reminder not to place hands there during operation. For open-frame printers, add 3D-printed belt guards (ironically, one of the best first safety projects for teens to design).
Hot end and heated bed temperatures appropriate for selected filament: Configure your slicer profiles with maximum temperature limits—for PLA, cap hot end at 220°C and bed at 70°C. Kids learning filament types sometimes assume "hotter is better" and crank temps unnecessarily. Use slicer parental controls (Cura has a "custom mode lock") to prevent unauthorized temperature changes until they understand FDM printing fundamentals.
Filament pathway clear of obstructions and tangles: Before starting any print, verify the filament spool rotates freely and the feed path has no kinks. Tangles can cause extruder jams, which lead kids to "help" by pulling on hot filament—a common burn scenario. I use spool holders with bearings rather than friction holders; the small upgrade eliminates 90% of tangle-related issues.
All firmware and safety features enabled: Check that thermal runaway protection is enabled in firmware—this shuts down the printer if temperatures exceed safe thresholds or the thermistor fails. Most modern printers ship with this on, but budget models sometimes don't. If you're teaching teens to flash custom firmware (Marlin, Klipper), make thermal runaway one of the first concepts they learn. I've tested this by simulating a thermistor disconnect; the printer should halt within 15 seconds.
Wear safety glasses when removing prints with scrapers or tools: I mandate safety glasses during print removal—flying print chunks or snapped scraper blades are the most common "sent to urgent care" events in maker spaces. Polycarbonate safety glasses cost less than a single roll of filament. Even if you're using flexible build plates (which reduce scraper use), enforce the habit. This prepares kids for proper PPE protocols they'll encounter in professional fabrication environments.
Filament and Material Handling
Different filaments present different hazards. I've run comparison tests on fume emissions, dust generation, and handling risks across all common materials.
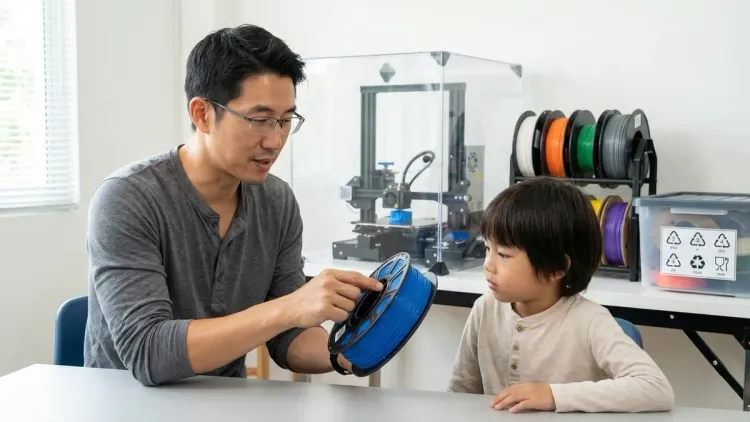
PLA for all beginner and younger user projects: PLA produces minimal fumes (mostly lactide monomers, relatively benign), prints at lower temps (190-220°C vs 230-260°C for ABS), and doesn't require heated enclosures. It's biodegradable but tough enough for most learning projects. I restrict kids under 16 to PLA exclusively unless they're in a supervised advanced course. Understand material properties and safety profiles before introducing other materials.
Proper ventilation when printing ABS, PETG, or specialty filaments: ABS emits styrene fumes—not immediately dangerous but unpleasant and potentially problematic with extended exposure. If printing ABS is necessary (it has superior mechanical properties for functional parts), use a printer with a HEPA/activated carbon filter or place the printer near an open window with a fan exhausting air outside. I've measured VOC levels with an air quality monitor; unventilated ABS printing in a small room spikes readings noticeably. PETG is gentler but still warrants ventilation.
Filament stored in sealed containers with desiccant: Moisture-absorbed filament (especially nylon and PETG) causes print failures, excessive stringing, and popping sounds during extrusion—kids often investigate by getting too close to the hot end. Store filament in airtight bins with rechargeable silica gel packs. I check hygrometers inside storage bins monthly; target <20% relative humidity. This is also a good opportunity to teach teens about material science—how hygroscopic materials behave, why moisture matters for dimensional accuracy.
Age-appropriate handling of specialty materials (carbon fiber, glow-in-dark): Carbon fiber–filled filaments require hardened nozzles (standard brass wears out quickly) and produce dust when trimming supports—mandate masks and ventilation. Glow-in-the-dark filaments contain strontium aluminate particles that are mildly abrasive and can cause nozzle clogs; supervise their first use closely. I introduce these materials only after a student has logged 50+ hours with PLA and demonstrates consistent safety practices.
No eating or drinking in the printing area: Establish a "no food/drink within 1 meter of the printer" rule. Hot end temps can vaporize filament additives and colorants; you don't want hand-to-mouth contamination. I enforce this strictly even though the actual risk is low—it's about building clean room habits that transfer to professional environments (electronics labs, cleanrooms) where contamination has serious consequences.
Hand washing after handling filament or touching printer components: Some filament colorants contain trace heavy metals (especially older bright reds and oranges—quality brands have mostly phased these out, but you may encounter them in discount spools). After print removal, tool changes, or maintenance, wash hands with soap. This is basic shop hygiene that kids need to internalize before they move to more hazardous fabrication tools (laser cutters, CNC routers, soldering).
Operational and Supervision Protocols
Hardware and environment are easy; enforcing behavioral safety is harder. These protocols have evolved through hundreds of hours of supervised kid printing.
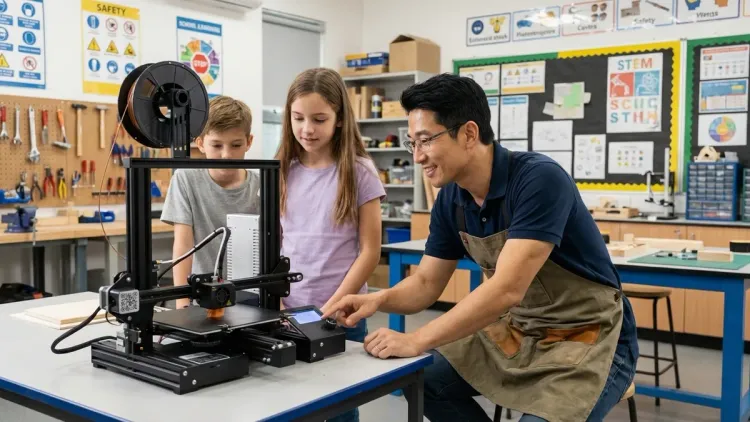
Adult line-of-sight supervision for users under 12: For elementary-age makers (8-11), an adult should be in the same room and visually check the printer every 5-10 minutes during operation. They don't need to hover constantly, but they should catch first-layer failures, filament tangles, or a kid reaching toward moving parts. This age group can load designs and start prints, but shouldn't troubleshoot hardware issues independently.
Same-room presence for users 12-14 during first 10 minutes of print: Teens can handle more independence, but the first layer is when most failures occur (adhesion issues, crashes, warping). Stay in the room while the first layer completes, then check back every 30 minutes. If they're using slicer software independently, review their settings before they hit print. I've caught multiple instances of accidental 300°C bed temperatures or 5000mm/s print speeds—typos happen.
Remote monitoring via camera for experienced users 15+: Once a teen demonstrates consistent safety practices and successful print completion, allow them to start supervised prints while you're elsewhere in the house, using a WiFi camera or the printer's built-in camera feed. Set up alerts for print completion or errors. I use a cheap Wyze cam pointed at the build plate; $25 buys significant peace of mind and lets me verify remotely that they're following protocols.
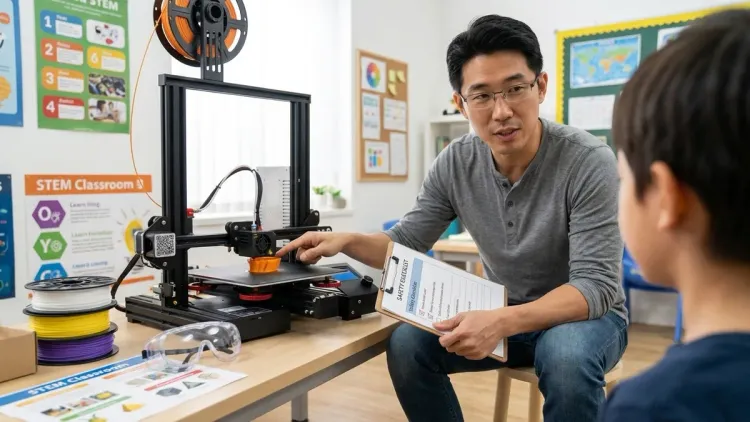
Mandatory "print plan" review before starting any job: Before hitting print, users must verbally state: material type, expected print duration, first layer temperature, and when they'll check progress. This 30-second review catches most setup errors and forces them to think through the process rather than just clicking "print." I adapted this from aviation's pre-flight checklist concept—it feels formal at first, but becomes automatic and prevents careless mistakes.
No overnight or unsupervised prints until 50+ hours logged with zero incidents: This is my hard rule. Overnight prints are convenient for long jobs, but they require trust in the equipment and the user's preparation. After 50 supervised hours (roughly 3-6 months of regular use), evaluate whether they've demonstrated consistent safety practices: proper leveling, temperature verification, filament checks, workspace tidiness. If yes, allow overnight prints with remote monitoring. If they're still having frequent failures or skipping safety steps, delay this milestone.
Clear protocol for pausing or stopping prints if issues arise: Teach users to pause (not stop) prints if they notice problems: weird noises, stringing, layer shifts, or strange smells. A pause preserves progress and lets you troubleshoot; hitting stop wastes hours of printing. Practice this during a supervised print—simulate a filament tangle and have them demonstrate the pause procedure. I've seen kids panic and yank the power cord (bad—you lose your print and risk Z-axis misalignment).
Post-print cooling period before handling components: After print completion, wait 5 minutes for the hot end to drop below 50°C and the bed to reach room temperature before removing the print. Many kids see "print complete" and immediately grab the part—PLA at 60°C feels lukewarm but can still cause surface burns on sensitive skin. The printer should display nozzle and bed temps; teach them to check these before touching anything. I've added a printed label above my printer: "WAIT 5 MINUTES AFTER COMPLETION."
Dedicated tool usage: scrapers, pliers, flush cutters only—no improvised tools: Kids are resourceful, which sometimes means using a kitchen knife to pry a stuck print. Mandate proper tools: metal or plastic scrapers for print removal, flush cutters for support removal, needlenose pliers for pulling failed prints from the nozzle. I keep a dedicated tool set at each printer, labeled with colored tape. Using proper tools reduces injury risk and teaches them that professional makers don't improvise when proper equipment is available.
Lab Specs: Technical Safety Requirements
Here's what you need to verify before your first supervised print—the infrastructure checklist I use when setting up maker spaces.
Electrical: 120V/15A grounded outlet, GFCI protection recommended if in garage/basement. Power strip with surge protection (minimum 1000J rating). If printer draws >400W, dedicated circuit.
Ventilation: Minimum 2 complete air changes per hour (ACH) for PLA in enclosed spaces. Open window + fan or HVAC return vent within 3 meters. For ABS, increase to 4 ACH or use localized filtration (HEPA + activated carbon).
Connectivity: WiFi or Ethernet for remote monitoring; SD card backup for offline operation. Verify firmware update capability—safety patches matter.
Expandability: Modular design allowing addition of enclosure, filtration system, or upgraded hot end as user advances. Printers that lock you into proprietary filament or restrict hardware modifications limit long-term safety improvements.
Durability: Metal frame (not acrylic) for printers used >10 hours/week. Bed surface that survives 200+ print cycles without degradation (PEI, powder-coated steel, or glass—avoid cheap BuildTak clones that peel after 20 prints).
Power requirements: Total wattage consumption, standby vs. active power draw, UPS compatibility if you want backup power during brief outages (prevents mid-print failures that lead to frustration and unsafe troubleshooting shortcuts).
Final Check Before You Go
Print this condensed 3D printer safety checklist for kids and post it at your printing station—I've laminated mine and attached it with magnets to my printer frame.
Pre-Print Verification (every time):
- Workspace clear of flammables, work surface stable
- Printer firmware current, thermal runaway protection enabled
- Correct filament loaded (PLA for beginners), spool rotates freely
- Bed leveled, first layer adhesion verified
- Appropriate temperatures for material selected
- Safety glasses and scrapers within reach
- Fire extinguisher in place, tested this month
- Supervising adult identified and briefed on print duration
- First aid kit accessible, burn gel fresh
During Print (check every 15-30 minutes):
- First layer adhered properly, no warping or lifting
- Filament feeding smoothly, no tangles or binding
- No unusual noises (grinding, clicking, scraping)
- Temperatures stable within 5°C of target
- User maintaining proper distance from moving parts
Post-Print (after every job):
- Printer shows temps below 50°C before touching anything
- Parts removed with proper tools (scrapers, not knives)
- Work area cleaned, scraps disposed of properly
- Filament returned to sealed storage with desiccant
- Hands washed after handling equipment
- Print logged (duration, material, outcome, issues)
Frequently Asked Questions
What age can kids safely use a 3D printer with proper supervision?
Kids as young as eight can successfully operate an enclosed 3D printer with direct adult supervision, starting with pre-sliced designs and PLA filament only. They'll develop design skills through Tinkercad and Fusion 360 while you manage printer setup, temperature verification, and print removal. By ages 12-14, most students can handle complete workflows independently with periodic check-ins, and by 15-16, responsible teens can manage advanced materials and overnight prints after logging sufficient supervised hours and demonstrating consistent safety practices.
Do we need special ventilation for printing PLA filament, or just for ABS and other materials?
PLA produces minimal fumes compared to ABS or nylon—mostly lactide and sweet-smelling compounds—but proper air circulation improves comfort and long-term air quality, especially in small rooms. For PLA, an open window or standard room ventilation suffices; you don't need specialized filtration unless printing 20+ hours weekly in an enclosed space. Upgrading to materials like ABS, PETG, or TPU requires active ventilation with a fan exhausting air outdoors or a printer-mounted HEPA/carbon filter, since those materials emit styrene, volatile organics, or other compounds that build up noticeably in unventilated rooms.
Can kids use 3D printers unsupervised once they've learned the basics, or do they always need adult oversight?
Unsupervised printing depends on age, experience level, and your risk tolerance—not just "knowing the basics." I recommend direct supervision until age 12, same-room presence during the critical first layer for ages 12-14, and remote monitoring for experienced users 15+ who've logged 50+ hours with zero safety incidents. Even then, establish clear protocols: what materials are approved, maximum print duration without check-ins, and exactly when to pause and ask for help. Professional fabrication labs require operator certifications for a reason; apply similar progressive independence rather than treating printing as a binary "supervised or not" decision.
Final Thoughts
The three most common safety mistakes I see families make are treating 3D printing like a plug-and-play appliance (it's not—it's a fabrication tool), skipping environmental setup because the printer "seems safe," and pushing kids to independence too quickly because they're excited and capable with design software. Safety capability and design capability develop at different rates.
Build your protocols around your specific child's focus level and maturity, not just their age or technical skills. I've supervised focused 10-year-olds who needed less intervention than distracted 14-year-olds. The 3D printer safety checklist for kids I've outlined here isn't about preventing all possible problems—it's about creating a framework where problems that do occur (and they will—filament jams, failed prints, minor burns from impatience) become learning experiences rather than dangerous situations.
Your goal isn't zero risk; it's appropriate risk with proper controls. When your teen can correctly diagnose a failed first layer, pause the print, adjust Z-offset, and resume without calling for help—while wearing safety glasses and waiting for proper cooldown—they're not just learning 3D printing. They're learning the safety mindset that carries into every fabrication skill they'll encounter next: laser cutting, CNC routing, electronics assembly, and eventually professional engineering work. That capability is the real outcome you're building.