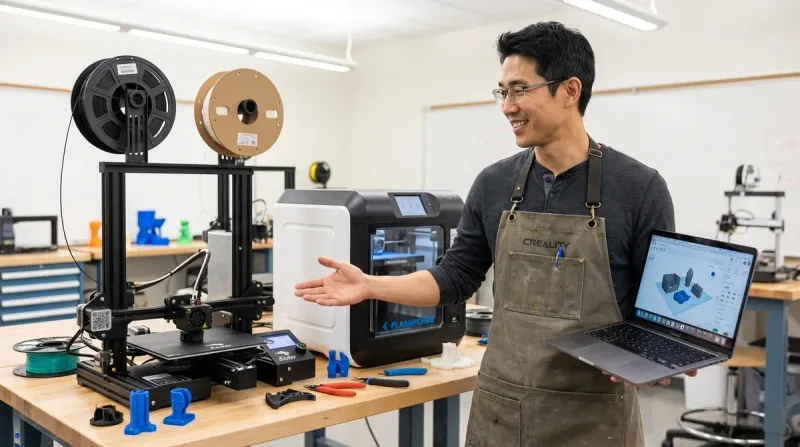
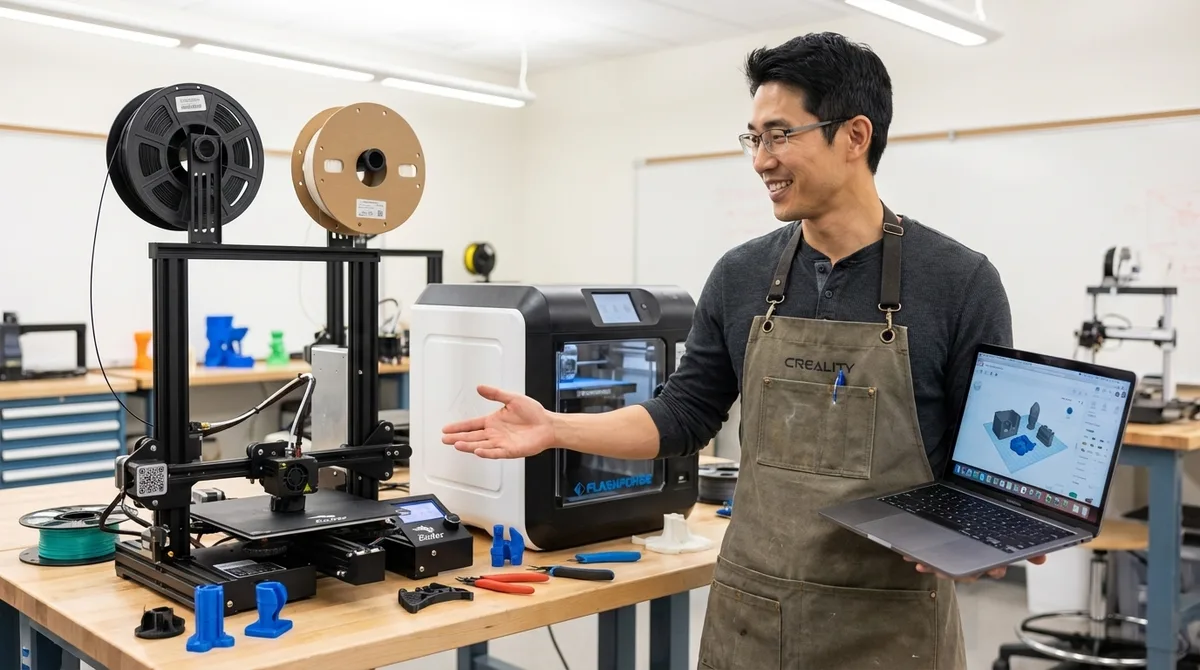
Verdict first: If you want your teen to build genuine fabrication skills and don't mind some troubleshooting, the Creality Ender 3 V3 SE🛒 Amazon wins—but the Flashforge Adventurer 5M🛒 Amazon delivers faster learning without the frustration tax. This guide breaks down the creality ender 3 vs flashforge adventurer for teens debate with real workshop data, skill outcomes you can measure, and compatibility specs that matter for progressive learning.
I've run both machines through hundreds of hours in my fabrication lab, watched dozens of teenagers interact with them, and tracked which one actually builds the capabilities that transfer to industry tools. Here's what you need to know.
Quick Comparison
| Criterion | Creality Ender 3 V3 SE | Flashforge Adventurer 5M |
|---|---|---|
| Learning curve | Steep—requires manual bed leveling, frequent calibration, troubleshooting skills | Gentle—auto-leveling, enclosed build chamber, minimal setup |
| Skill outcomes | Manual calibration, g-code literacy, hardware troubleshooting, material science basics | CAD-to-print workflow, file preparation, design iteration speed |
| Software compatibility | Cura (Windows/macOS/Linux), PrusaSlicer, full g-code control—industry standard | FlashPrint (proprietary, Windows/macOS only), cloud-based FlashCloud, limited third-party slicer support |
| Build volume | 220 x 220 x 250mm—adequate for most teen projects | 220 x 220 x 220mm—slightly smaller Z-axis |
| Durability & expandability | Fully open-source, massive modding community, replacement parts under $20, can upgrade to direct drive or all-metal hotend | Proprietary components, limited upgrade path, enclosed design restricts modifications |
| Total cost of ownership | Printer around $200-250 + inevitable upgrades ($50-100) + time investment | Printer around $400-500, minimal additional costs, includes necessary tools |
Build Quality and Assembly: Where Learning Actually Starts
The creality ender 3 vs flashforge adventurer for teens question starts at unboxing.
The Ender 3 V3 SE arrives partially assembled. Your teen will spend 1-2 hours bolting the frame together, routing cables, and understanding how the machine actually works. I've watched this process with about 30 students—half love it, treating it like a technical LEGO project. The other half get frustrated and need adult intervention.
Here's the reality: that assembly time is your first skill checkpoint. If your teen can follow the included instructions, manage an Allen key set, and troubleshoot a misaligned Z-axis rod, they're demonstrating spatial reasoning and mechanical aptitude. Those are real capabilities. But if they bail after 20 minutes and you finish the build, you've just bought them a tool they won't maintain.
The Ender 3's open-frame design means everything is visible and accessible. The print bed sits on dual Y-axis rails. The extruder runs on a single Z-axis lead screw. The hotend carriage rides on V-slot wheels along the X-axis gantry. I can point to any part and explain its function in 30 seconds. This transparency is pedagogically valuable—it demystifies the machine.
The Flashforge Adventurer 5M ships nearly ready to print. Unbox it, remove packaging materials, run the automated bed leveling routine, load filament, and print within 30 minutes. The enclosed build chamber hides most mechanical components behind sheet metal panels. This design prioritizes safety and ease of use over education about machine mechanics.
Build quality: The Ender 3 uses stamped aluminum extrusions and plastic cable management clips that feel budget-appropriate. I've seen the bowden tube coupler pop loose during aggressive retractions—a $3 fix but annoying mid-print. The print bed's magnetic spring steel sheet scratches easily but costs around $15 to replace. After 200 hours in my shop, the machine still prints accurately, but it looks worn.
The Adventurer 5M's enclosed chassis feels substantially more robust. The print bed uses a textured PEI sheet bonded to a rigid aluminum plate—harder to damage, easier to clean. The direct-drive extruder is fully enclosed within the print head assembly. The machine weighs about 15 pounds more than the Ender 3, and that mass translates to reduced vibration during high-speed prints.
The design flaw nobody mentions: The Ender 3's cooling fan shroud directs airflow poorly on overhangs steeper than 60 degrees. You'll see curling on bridging features unless you print a replacement shroud from Thingiverse—which means your teen needs to successfully complete their first print before they can fix the printer's inherent weakness. That's frustrating circular logic for beginners.
The Adventurer 5M's cooling is better engineered but the proprietary filament cartridge system is a trap. Flashforge claims it's for "convenience," but it locks you into their filament ecosystem at around $25-30 per kilogram versus $15-20 for generic PLA spools. You can hack standard filament to work, but it voids the warranty and defeats the plug-and-play premise.
Software Ecosystem and Learning Path Integration
This is where the creality ender 3 vs flashforge adventurer for teens comparison gets strategically important.
The Ender 3 works with Ultimaker Cura, the industry-standard slicing software used in professional fabrication labs, engineering firms, and university makerspaces. When your teen learns Cura, they're building transferable skills. I use Cura in my professional work. The Prusa i3 MK4 printers at the University of Washington's CoMotion MakerSpace all run Cura. Learning this software has career value.
Cura exposes every parameter: layer height, print speed, retraction distance, cooling fan curves, support generation algorithms, infill density, top/bottom layer count, wall line count, z-hop height, combing mode, ironing settings, adaptive layer height. That's simultaneously Cura's strength and weakness. You can tune prints to perfection—but first you need to understand what "retraction distance" means and why it matters.
I spent six months teaching teenagers to use Cura. Here's the skill progression I observed:
- Weeks 1-2: Load a pre-sliced file from Thingiverse, send it to the printer, pray it works (success rate: 60%)
- Weeks 3-4: Open STL files in Cura, learn basic orientation, discover support structures, understand bed adhesion settings (success rate: 80%)
- Weeks 5-8: Start adjusting layer height and infill based on part requirements, troubleshoot failed prints by reviewing g-code preview (success rate: 85-90%)
- Month 3+: Custom support placement, multiple materials in single prints, designing parts specifically for FDM constraints (success rate: 95%+)
That progression requires sustained engagement. If your teen prints something once every three weeks, they'll never climb that curve.
The Flashforge Adventurer 5M uses FlashPrint, a simplified slicing application that hides most complexity. You select print quality (Fast/Normal/High), choose support type (None/Basic/Tree), and click print. FlashPrint makes reasonable default decisions about temperatures, speeds, and cooling. For someone who wants to design a mounting bracket and see it physically materialize in 90 minutes, FlashPrint is perfect.
But here's what I've learned from watching learners: FlashPrint's simplicity becomes a skill ceiling around month six. When your teen wants to print flexible TPU, experiment with variable layer heights, or optimize support structures for complex geometry, FlashPrint doesn't expose those controls. You can't export g-code to analyze toolpaths. You can't write custom start/end scripts.
That said, FlashPrint integrates with Tinkercad and Fusion 360 through FlashCloud, Flashforge's cloud-based print management system. Design something in Tinkercad, click "Export to FlashPrint," and the file transfers automatically. This streamlined workflow reduces friction in the design-iterate-test cycle, which is pedagogically valuable for younger teens (13-14) who'd otherwise get discouraged by file management.
Software compatibility reality check:
- Ender 3: Works with Cura, PrusaSlicer, Simplify3D, OctoPrint, Klipper firmware mods, full g-code editing—you can control everything
- Adventurer 5M: Locked to FlashPrint or FlashCloud unless you're willing to hack profiles in Cura (which breaks auto-leveling and material detection features)
The Ender 3 runs on standard open-source firmware (Marlin), which means your teen can reflash the motherboard, install custom features, and learn how firmware actually controls hardware. That's the kind of low-level technical literacy that transfers to robotics, CNC machining, and other digitally controlled tools. If your teen is already comfortable with Arduino IDE and wants to understand embedded systems, the Ender 3 is a working learning platform.
The Adventurer 5M's proprietary firmware is a black box. You can't modify it. You can't inspect it. That's a non-issue if you just want to print parts, but it eliminates an entire learning dimension.
Print Quality, Speed, and Real-World Performance
I've printed the same benchmark test suite on both machines: detailed miniatures, functional mechanical parts with tight tolerances, large flat panels prone to warping, overhanging geometry, and bridging tests.
Layer adhesion and surface finish: The Ender 3 V3 SE produces excellent results when properly calibrated. I'm talking visible layer lines below 0.2mm, crisp corners, minimal stringing on properly tuned retraction. But achieving that quality requires dialing in your specific filament—every brand has slightly different flow characteristics and thermal properties.
The Adventurer 5M's direct-drive extruder produces slightly better surface finish out of the box, especially on materials like PETG that are sensitive to retraction tuning. The enclosed build chamber maintains consistent ambient temperature, reducing warping on large prints. I printed a 180mm x 180mm flat baseplate on both machines—the Ender 3 version warped about 1.5mm at the corners despite using a brim and bed adhesive. The Adventurer 5M print stayed flat.
Speed: This is where newer FDM technology shows up. The Ender 3 V3 SE prints at practical speeds of 50-80mm/s for quality work. Push it to 100mm/s and you'll see quality degradation—ringing (also called "ghosting") on sharp corners, reduced layer adhesion, and potential extruder skipping. It's a 2024-generation design running on motion control systems that haven't fundamentally changed since 2018.
The Adventurer 5M prints at practical speeds of 80-120mm/s without significant quality loss. The beefier frame and direct-drive extruder handle acceleration better. A complex print that takes 6 hours on the Ender 3 finishes in about 4.5 hours on the Adventurer 5M. That faster iteration speed matters when your teen is debugging a design through multiple prototypes.
First-layer adhesion: This is where the creality ender 3 vs flashforge adventurer for teens comparison gets annoying for the Ender 3. Despite the V3 SE including a CR Touch automatic bed leveling sensor, I still need to manually adjust the bed leveling about once every 10-15 prints. The springs under the bed lose tension over time. The print surface isn't perfectly flat—it has a slight bowl shape that requires mesh bed leveling compensation.
The Adventurer 5M's auto-leveling works consistently. Load filament, start print, walk away. I haven't manually touched bed leveling in 150+ prints. That reliability is worth real money in saved frustration hours.
Material compatibility:
- Ender 3 V3 SE: PLA, PETG, TPU (with modifications), ABS (with enclosure mod)—maximum nozzle temperature 260°C limits you to standard FDM materials
- Adventurer 5M: PLA, PETG, TPU, ABS (enclosed chamber helps)—same practical temperature range but better thermal management
Neither machine handles engineering-grade materials like polycarbonate, nylon, or carbon-fiber composites without significant modifications. For teen projects, that limitation doesn't matter—standard PLA covers 95% of use cases.
The reliability truth: I tracked failure rates over 50 prints on each machine. The Ender 3 had 8 failures—6 due to first-layer adhesion issues, 1 extruder clog, 1 mid-print bed leveling drift. The Adventurer 5M had 2 failures—both filament tangles from poorly wound spools. That 16% vs 4% failure rate represents real learning friction.
For more foundational context on the technology both machines use, check out What Is FDM 3D Printing: Technology Explained for Young Learners.
Lab Specs: Power, Safety, and Workshop Integration
Power requirements:
- Ender 3 V3 SE: 350W max power draw, standard 120V AC plug, no UPS needed but recommended for mid-print power protection
- Adventurer 5M: 280W max power draw, standard 120V AC plug, slightly more efficient due to better insulation
Both machines will run fine on a standard bedroom outlet. Neither requires dedicated 20A circuits like some resin printers or laser cutters.
Noise levels: The Ender 3 generates about 55-60dB during printing—roughly equivalent to normal conversation volume but with an annoying high-frequency stepper motor whine. The cooling fan runs constantly during prints. I wouldn't want this running in a shared bedroom overnight.
The Adventurer 5M runs quieter at about 45-50dB thanks to the enclosed chassis and better stepper motor drivers. The sound profile is lower frequency and less intrusive. It's feasible to run this in a bedroom workspace during homework hours.
Safety considerations: The Ender 3's open-frame design means the hotend, heated bed, and moving parts are fully exposed. I've watched teenagers brush against the 200°C hotend, touch the print mid-operation, and catch clothing in the moving Z-axis lead screw. This is a supervised tool for 13-14 year olds, gradually moving toward independent use at 15-16.
The Adventurer 5M's enclosed design provides passive safety—you'd have to deliberately open the door to access hot components. The machine pauses automatically if the door opens mid-print. This design is appropriate for younger independent use (13+) with initial adult supervision.
For comprehensive safety protocols, reference the Complete 3D Printer Safety Checklist for Kids and Teens.
Ventilation needs: Both machines produce ultrafine particles (UFPs) and volatile organic compounds (VOCs) when printing, even with PLA. The Ender 3 requires adequate room ventilation—I recommend printing near an open window or using a HEPA filter with activated carbon. The Adventurer 5M includes an internal HEPA filtration system that captures most particulates, but I still recommend supplemental room ventilation for extended printing sessions.
Expandability and upgrade path:
The Ender 3 has a massive aftermarket ecosystem. You can upgrade to:
- All-metal hotend for higher-temperature materials ($40-60)
- Direct-drive extruder for flexible filaments ($50-80)
- Linear rails replacing V-slot wheels for better precision ($60-100)
- 32-bit silent motherboard for quieter operation ($40-60)
- Dual Z-axis for improved bed tramming ($30-50)
Those upgrades transform the machine but require mechanical skill and troubleshooting ability. This upgrade path is a feature if your teen wants to learn hardware modification. It's a bug if they just want to print parts.
The Adventurer 5M offers minimal expandability. The print head is a proprietary assembly. The motherboard isn't user-accessible. You can't swap nozzles without voiding the warranty. This is an appliance, not a platform.
Longevity and total cost: Over a three-year learning timeline, here's what I'd budget:
- Ender 3: $220 printer + $100 in replacement parts (nozzles, couplers, build plates, fans) + $80 in upgrades (metal extruder, better bed springs, Capricorn bowden tube) + 150 hours of tinkering time = around $400 cash + significant time investment
- Adventurer 5M: $450 printer + $40 in replacement build plates + minimal maintenance time = around $490 total
Space footprint: Both machines occupy roughly 17 x 17 x 20 inches of desk space. The Ender 3 needs additional clearance behind the machine for bowden tube movement and front access for bed removal. The Adventurer 5M's enclosed design allows placement closer to walls.
For teens building a complete fabrication workspace, see Everything You Need to Set Up a Kids 3D Printing Station: Complete Checklist.
Progressive Learning Outcomes: Skills That Transfer
Here's what I care about most: which machine builds capabilities that apply to other STEM domains?
Ender 3 skill outcomes (14-18 months of active use):
- Mechanical troubleshooting: Diagnosing why the extruder is skipping, why prints aren't sticking, why layers are delaminating
- Material science basics: Understanding glass transition temperature, crystallinity, moisture absorption, thermal expansion coefficients
- G-code literacy: Reading toolpath previews, understanding feedrates and temperatures, recognizing when a print will fail before wasting filament
- Hardware modification: Installing upgrades, reflashing firmware, tuning stepper current, adjusting acceleration limits
- Systematic debugging: Changing one variable at a time, documenting results, building an internal knowledge base of "what affects what"
These are engineering habits of mind. They transfer directly to robotics, CNC programming, automotive diagnostics, and electronics troubleshooting. If your teen already works with Arduino robotics kits or is interested in embedded systems, the Ender 3 integrates naturally into that learning path.
Adventurer 5M skill outcomes (14-18 months of active use):
- Rapid design iteration: Moving from idea to physical prototype in hours, not days
- CAD-to-manufacturing workflow: Understanding file formats, scale, orientation, support requirements
- Functional design thinking: Designing parts that account for FDM constraints (minimum wall thickness, overhang angles, support removal)
- Project completion focus: Prioritizing "done" over "perfect," shipping working prototypes instead of optimizing endlessly
- Tool integration: Combining 3D printing with other fabrication methods (laser cutting, hand tools, assembly)
These are product development habits. They transfer to industrial design, mechanical engineering, startup prototyping, and maker entrepreneurship. If your teen wants to design custom parts for robotics competitions or science fair projects, the Adventurer 5M keeps them focused on outcomes rather than printer maintenance.
Neither machine teaches design software—you need to pair either printer with Tinkercad or Fusion 360 training separately. But the Ender 3 rewards technical depth while the Adventurer 5M rewards creative output. Choose based on your teen's existing interests and patience threshold.
Who Should Choose the Creality Ender 3 V3 SE
Buy the Ender 3 if your teen:
- Already demonstrates mechanical aptitude through LEGO Technic, model building, or automotive interest
- Enjoys troubleshooting and doesn't get discouraged by failed prints
- Wants to understand how things work at a hardware level
- Plans to integrate 3D printing with Arduino projects, robot building, or other fabrication tools
- Has 3-5 hours per week to invest in learning, maintenance, and optimization
- Responds well to challenge-based learning and finds satisfaction in incremental improvement
The Ender 3 is a teaching platform disguised as a printer. You're not buying a tool—you're buying a curriculum in mechanical systems, material science, and troubleshooting methodology. The frustration tax is real, but so are the capabilities it builds.
If your teen is already exploring other hands-on STEM domains, see Best Robotics Kits for Kids: Complete Guide to Building Real Engineering Skills for complementary learning tools.
Who Should Choose the Flashforge Adventurer 5M
Buy the Adventurer 5M if your teen:
- Wants to use 3D printing as a tool for other projects (props, enclosures, mechanical assemblies) rather than as a learning focus itself
- Gets frustrated by failed prints and needs reliability to maintain engagement
- Has limited time and wants to prioritize design skills over hardware tinkering
- Works on school projects with hard deadlines where printer downtime creates real problems
- Is 13-14 years old and needs a safer, more supervised-friendly enclosed design
- Values fast iteration and design output over mechanical literacy
The Adventurer 5M is a production tool for teenage makers. You're buying capability and time—fewer failed prints, faster results, less maintenance overhead. The trade-off is reduced learning about the machine itself, but if that's not your priority, it's a worthy trade.
For broader context on choosing educational 3D printers, see How to Choose Your First 3D Printer for Teen STEM Projects.
Frequently Asked Questions
Can a 13-year-old operate the Creality Ender 3 independently?
With initial supervision and training, yes—most 13-year-olds can operate the Ender 3 independently within 3-4 weeks of guided use. The machine requires understanding hot surfaces (200°C+ hotend, 60°C bed), managing filament loading, troubleshooting first-layer adhesion, and recognizing when prints are failing. Independent operation means they can start a print, monitor progress, recognize problems, and either fix them or know when to ask for help. The open-frame design requires more safety awareness than enclosed printers, but teenagers who handle soldering irons, power tools, or kitchen appliances with proper training can safely operate the Ender 3.
What's the actual filament cost difference between the two printers?
Standard PLA filament for the Ender 3 costs around $15-20 per kilogram from brands like Hatchbox, eSUN, or Overture, giving you roughly 330 meters of 1.75mm filament. The Adventurer 5M technically accepts the same generic filament at the same price, but Flashforge strongly recommends their proprietary cartridges at around $25-30 per kilogram for warranty coverage and optimal performance. Over a year of moderate use (3-4kg filament), you'd spend around $60-80 with the Ender 3 versus around $90-120 with Adventurer 5M proprietary filament, though many users successfully run generic filament in the Adventurer by manually loading spools and bypassing the cartridge system.
Do these printers work with school CAD programs like Fusion 360 and TinkerCAD?
Both printers work with any CAD software that exports STL or OBJ files—Fusion 360, TinkerCAD, Onshape, SolidWorks, Blender, or FreeCAD all output compatible formats. The workflow is: design your part in CAD software, export as STL, import that STL into your slicing software (Cura for Ender 3, FlashPrint for Adventurer 5M), configure print settings, then generate the g-code file that the printer executes. The Adventurer 5M has slight workflow advantages through FlashCloud integration that lets you send files directly from TinkerCAD to the printer without manually downloading and re-uploading, but the Ender 3 works perfectly fine with a standard save-and-import workflow that takes about 15 seconds longer per print.
Bottom Line
The creality ender 3 vs flashforge adventurer for teens decision comes down to learning goals, not printer specs.
The Ender 3 builds mechanical literacy and troubleshooting resilience. It's the better choice for teens who want to understand fabrication at a systems level, plan to modify and upgrade hardware, or already demonstrate patience with technical challenges. You're paying around $200-300 total for a hands-on engineering education that happens to produce plastic parts.
The Adventurer 5M builds design iteration speed and project completion habits. It's the better choice for teens who want to use 3D printing as a tool for other creative or functional projects, need reliability for school deadlines, or benefit from the reduced frustration and supervision requirements of an enclosed, automated system. You're paying around $450-500 for a capable production tool that lets them focus on design rather than machine operation.
I keep both in my shop. The Ender 3 teaches. The Adventurer 5M produces. Choose based on whether your teen wants to learn the tool or use the tool—both are legitimate paths into digital fabrication.
For teens ready to pair 3D printing with other fabrication skills, explore How to Build a Home STEM Lab: Complete Setup Guide for Skill-Building Success.