You're not shopping for toys—you're architecting a learning system. Building a stem learning path by age means sequencing skill-building tools so each one prepares your child for the next, avoiding gaps and dead-ends. In this guide, you'll learn how to map developmental milestones to specific product categories, identify which capabilities unlock future learning stages, and design a multi-year progression that moves from tactile problem-solving to industry-standard programming platforms. We'll cover concrete age brackets, technical prerequisites, and how to avoid the expensive mistake of buying tools your child won't be ready to use for another two years.
Time investment: 2-3 hours for initial planning; ongoing assessment every 6-12 months
Skill level: No technical background needed—this is about understanding developmental readiness, not engineering expertise
Outcome: A clear, documented learning sequence that builds computational thinking, spatial reasoning, and engineering fundamentals from preschool through middle school

What You'll Need
- Current assessment of your child's abilities: Fine motor control (can they manipulate small pieces?), attention span for independent work, existing exposure to cause-and-effect toys, and comfort with frustration during problem-solving
- Physical learning space: Clear workspace with adequate lighting, storage for components, and access to power outlets for later stages (see dedicated STEM room vs multi-purpose learning space for setup considerations)
- Documentation system: Digital or physical notebook to track skill milestones, product acquisition dates, and observed capability gaps
- Budget projection tool: Spreadsheet or simple list mapping age ranges to estimated product costs (expect $150-300 per year for a well-structured path)
- Technical compatibility checklist: Device inventory (tablets, laptops, operating systems) to verify software requirements before purchasing screen-dependent tools
- Access to manufacturer resources: Account creation for platforms that offer downloadable curricula, expansion packs, or community forums
Step 1: Establish Your Starting Point with Developmental Capability Mapping
Before you buy a single kit, you need an honest inventory of where your child actually is—not where you hope they are or where their age "should" place them. Sit down with paper and observe your child during unstructured play for 30-60 minutes. Can they follow multi-step instructions without reminders? Do they persist when a puzzle piece doesn't fit, or do they abandon the task? How long do they sustain focus on self-directed activities?
These observations matter more than age ranges printed on packaging. A five-year-old with advanced fine motor skills and high frustration tolerance might be ready for products marketed to seven-year-olds, while a precocious seven-year-old who struggles with sequential reasoning needs to backfill foundational skills first.
Map three specific capabilities: manual dexterity (manipulating small components without dropping or forcing), logical sequencing (understanding that step A must happen before step B), and symbolic thinking (recognizing that one object can represent another). These are the cognitive pillars that determine whether a child will succeed with or bounce off a particular STEM tool.
Create a simple three-column chart: "Can do independently," "Can do with scaffolding," "Not yet ready." Be brutally specific. "Follows instructions" is too vague; "Can assemble a four-piece sequence by referencing a visual diagram without verbal prompts" gives you actionable data. This assessment becomes your baseline for selecting entry-level products and projecting when to introduce next-stage tools.
Step 2: Build Your Ages 3-5 Foundation with Tactile Cause-and-Effect Systems
Your stem learning path by age starts with tools that make abstract concepts physically tangible. Children aged three to five need toys where they can see, touch, and immediately observe the results of their actions. This is not the time for screens or symbolic representation—their brains are building neural pathways through sensory-motor integration.
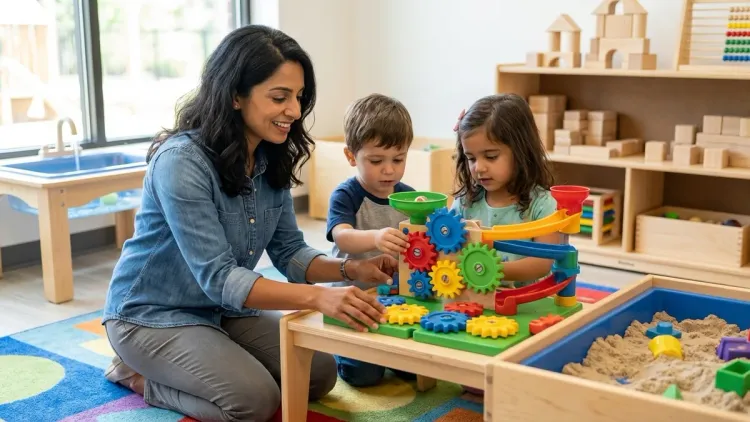
Start with marble runs, gear sets, and simple engineering blocks. The Learning Resources Gears! Gears! Gears! Super Building Set exemplifies this category—125 interlocking plastic gears and connectors that demonstrate mechanical advantage, rotational direction, and force transfer through direct manipulation. Lab Specs: Requires no power, no screens, and no consumables. Pieces are dishwasher-safe for repeated sanitization in classroom or multi-child settings. Expandable through additional Gears! sets with compatible connector standards.
Skill outcomes at this stage: Your child should develop spatial reasoning (understanding how pieces fit together in three dimensions), cause-and-effect prediction (gear A turns gear B, which turns gear C), and iteration comfort (trying different configurations when one doesn't work). These aren't toy skills—they're the cognitive foundations for debugging code and engineering design thinking.
By age five, introduce screen-free coding toys like the Learning Resources Code & Go Robot Mouse Activity Set. It uses physical programming cards placed in sequence to direct a robot through a maze. Lab Specs: Requires 3 AAA batteries for the mouse unit; no software, subscriptions, or device connectivity. The mouse responds to color-coded directional cards, making the logic of sequential instructions concrete and reversible. Storage for 16 maze pieces, 22 maze walls, and 30 coding cards requires approximately 12"×12" of shelf space.
Avoid the temptation to skip ahead. I've worked with families who bought block-based coding platforms for four-year-olds because they seemed "advanced," only to watch the toys gather dust for two years while the child's developmental stage caught up. You're not delaying progress—you're preventing gaps that create frustration later. For more on selecting appropriate tools, see how to choose age-appropriate STEM toys that build sequential skills.
Step 3: Transition to Symbolic Logic and Pattern Recognition (Ages 6-7)
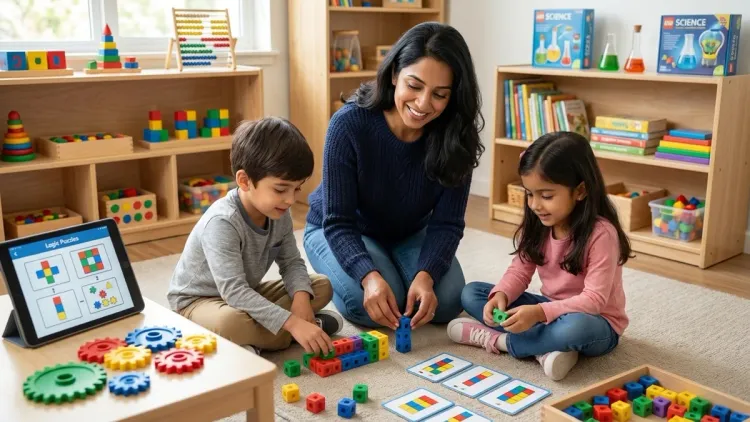
At six and seven, children's cognitive development shifts toward representational thinking—they can hold symbols in working memory and manipulate them mentally before acting physically. This is your bridge year between tactile play and abstract coding. Your stem learning path by age should now introduce tools that require planning before execution.
Board games become powerful learning tools here. Robot Turtles teaches function calls and debugging through card-based gameplay where children program a turtle to reach a goal, then "debug" by reviewing their card sequence. No batteries, no screens, no subscriptions—just strategic thinking made social. The game scales difficulty by adding obstacles, functions, and increasingly complex logic puzzles.
Simultaneously introduce construction kits with documented engineering challenges. KEVA Planks or similar precision-cut wooden blocks come with challenge cards that require specific structural outcomes—a bridge spanning X distance, a tower supporting Y weight, a cantilevered platform extending Z inches. Lab Specs: Planks measure 0.25"×0.75"×4.5" with tolerance under 0.01", meaning structures behave predictably and teach genuine physics constraints. No power required; unlimited reusability. Storage needs approximately 16"×8"×3" for a 200-piece set.
Skill milestone check: By the end of age seven, your child should be able to plan a 5-7 step sequence before beginning execution, recognize when a failed attempt reveals a pattern (not just random bad luck), and articulate why a solution didn't work using specific observations. If they're not there yet, don't advance to screen-based coding—they'll hit a frustration wall and disengage. Instead, extend this stage with more complex board games and building challenges.
Watch for the moment they start narrating their own debugging process aloud: "This didn't work because the robot turned before it moved forward, so I need to swap these two cards." That self-talk signals metacognitive readiness for abstract programming environments.
Step 4: Introduce Screen-Based Block Coding with Immediate Physical Feedback (Ages 8-9)
Now you're ready for tools that translate screen-based logic into physical outcomes—the crucial bridge between abstract code and tangible results. Your stem learning path by age hits its first major technology decision point: choosing a platform that will grow with your child for 2-3 years while teaching industry-relevant concepts.
The Makeblock mBot Robot Kit represents this transition well. Children program the robot using Scratch-based block coding (mBlock software) on tablets or computers, then watch the physical robot execute their instructions. Lab Specs: Requires Windows 7+, macOS 10.10+, or iOS 9+/Android 4.4+ tablets. Uses Bluetooth 4.0 for wireless programming or USB cable for wired connection. The kit includes ultrasonic sensor, line-follower module, light sensors, and expandable mounting points compatible with LEGO Technic pieces. Rechargeable lithium battery provides 4-6 hours of runtime; USB charging cable included.
Software ecosystem matters tremendously here. mBlock is free, works offline after initial download, and allows seamless transition from block-based coding to Python text-based programming without changing hardware platforms. This is what we mean by a progressive learning path—the robot your child programs at eight is the same one they'll write Python functions for at eleven.
Critical compatibility check: Before purchasing, verify your household devices meet software requirements. Many families discover too late that their aging iPad doesn't support the necessary app versions, or that their Chromebook can't install the required IDE. Budget $30-50 for a Bluetooth USB dongle if your desktop lacks built-in Bluetooth 4.0.
Pair the robot with structured challenges that build specific skills. Online communities like the Makeblock Education forum provide grade-leveled projects: line-following mazes, object-avoidance programming, and sensor-triggered behaviors. Each project introduces one new concept while reinforcing previous learning—this is scaffolded skill acquisition, not random tinkering.
Expect this resistance: Around eight to nine, children who've had unlimited screen access for entertainment often struggle to accept that STEM screen time requires sustained problem-solving, not passive consumption. You're retraining the brain's reward systems. Give it six weeks of consistent, short sessions (20-30 minutes) before evaluating engagement.
Step 5: Expand to Multi-Component Systems and Tool-Based Assembly (Ages 9-11)
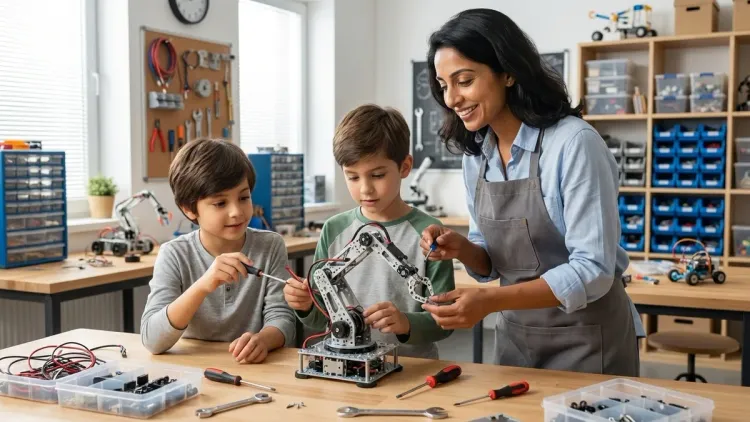
Between nine and eleven, children develop the cognitive capacity for systems thinking—understanding how multiple subsystems interact to create complex behaviors. This is when your stem learning path by age should introduce platforms that require assembly, wiring, and troubleshooting across mechanical, electrical, and software domains simultaneously.
Arduino-based robotics kits mark this milestone. The ELEGOO UNO R3 Project Complete Starter Kit provides the industry-standard Arduino microcontroller, breadboard for circuit prototyping, sensors (ultrasonic, temperature, moisture, PIR motion), actuators (servo motors, DC motors, stepper motors), LEDs, resistors, and jumper wires. Lab Specs: Requires Arduino IDE software (free, compatible with Windows, macOS, Linux). Programs upload via USB-A to USB-B cable (included). Power options include 9V battery, USB power, or 7-12V DC adapter (adapter sold separately—expect $8-12 for appropriate amperage).
This is not a toy—it's the same microcontroller platform used in university engineering programs and professional prototyping. Your child is learning skills that transfer directly to industry applications: circuit design, sensor calibration, interrupt handling, and modular code structure.
The learning curve steepens here. Children transition from drag-and-drop blocks to text-based C++ syntax in the Arduino IDE. Expect syntax errors, frustrating troubleshooting sessions, and the need for parental support during the first 5-10 projects. ELEGOO includes a detailed tutorial PDF with 33 lessons progressing from "Blink an LED" to "Build a distance-measuring sensor with LCD display." Each lesson introduces one new component or programming concept.
Storage and workspace requirements expand significantly. You'll need organized component storage (small drawer units or tackle boxes), adequate lighting for close work with small wires, and a stable work surface where projects can remain assembled between sessions. Anti-static mats ($15-25) become important when handling circuit boards. See how to organize a home STEM lab for progressive skill development for detailed workspace setup guidance.
Consumables reality check: While the kit itself is reusable, expect to replace burnt-out LEDs (user error during circuit testing), lost jumper wires, and depleted 9V batteries. Budget $30-50 annually for replacement components and expansion modules (additional sensors, motor drivers, wireless communication shields).
At this stage, introduce Understanding 3D Printer Filament Types as supplementary reading if you're considering adding fabrication capabilities—many Arduino projects benefit from custom-designed enclosures and mounting brackets.
Step 6: Integrate Multiple Disciplines and Design Your Own Projects (Ages 11-13)
By ages eleven through thirteen, your stem learning path by age should emphasize self-directed project design and integration across multiple STEM domains. Children at this stage are ready to identify problems, research solutions, prototype implementations, and iterate based on testing outcomes—the complete engineering design cycle.
This is when platforms that combine programming, electronics, mechanical design, and data analysis become powerful. Raspberry Pi systems, advanced LEGO robotics (SPIKE Prime or Mindstorms EV3), or VEX Robotics kits represent this integration level. These platforms don't teach one skill—they require simultaneous application of computational thinking, physics principles, troubleshooting methodology, and project planning.
Critical decision point: Competition-oriented vs. open-ended platforms. VEX Robotics and FIRST LEGO League systems are designed around structured competitions with specific engineering challenges, scoring rubrics, and tournament seasons. These provide external motivation and community but require subscription fees (team registrations typically $200-300 annually) and scheduled commitment to competition prep. Open-ended platforms like Raspberry Pi offer unlimited creative freedom but require more self-direction and parental facilitation. Neither is superior—match the platform to your child's personality and your family's capacity for structured extracurricular involvement.
For competition-track learners, LEGO Mindstorms vs VEX Robotics provides detailed comparison of build complexity, programming depth, and career skill alignment.
Lab Specs for Raspberry Pi 5 systems (representative of this category): Requires 5V USB-C power supply rated for 5A minimum ($12-18; many phone chargers are inadequate), microSD card for operating system (32GB minimum, Class 10; $10-15), USB keyboard and mouse, HDMI-compatible monitor, and internet connectivity for software updates and package installation. The Pi runs Raspbian OS (Debian Linux), teaching command-line navigation, Python programming, and system administration basics—skills that align with actual software development careers.
At this stage, your child should be initiating projects based on observed problems: "I want to build an automatic plant watering system that checks soil moisture and only waters when needed." They'll research sensor options, diagram system architecture, write pseudocode logic flows before programming, and troubleshoot systematically when components don't behave as expected. This is authentic engineering practice, not scripted learning.
Simultaneously introduce professional CAD software for designing enclosures and custom parts. How to teach kids 3D design skills with Tinkercad and Fusion 360 walks through the progression from browser-based beginner tools to industry-standard parametric modeling. If you're adding 3D printing capabilities, best 3D printers for kids and teens evaluates safety, supervision requirements, and project complexity alignment.
Financial reality: This stage represents your highest annual investment in the stem learning path by age—expect $400-700 for core platform, expansion modules, and supporting infrastructure. However, these tools remain relevant through high school and potentially into college coursework, making them multi-year investments rather than age-specific purchases.
Step 7: Add Industry-Standard Tools and Career-Aligned Skills (Ages 13+)

Once your child demonstrates consistent self-directed project completion and troubleshooting competence, introduce the same tools professionals use daily. This isn't about acceleration—it's about removing the training wheels so they experience authentic workflows, constraints, and problem-solving approaches.
Text-based programming languages become primary. If your child has been using block-based coding in Scratch or Blockly, now is the transition to Python, C++, or JavaScript depending on their interest areas. Python dominates data science, machine learning, and scientific computing; C++ is essential for performance-critical robotics and embedded systems; JavaScript powers web development and IoT interfaces. See how to transition from screen-free coding to Scratch and Python programming for sequenced learning resources.
Professional development environments replace educational IDEs. Install Visual Studio Code, PyCharm, or Arduino IDE (if not already in use) and teach version control with Git and GitHub. Yes, thirteen-year-olds can learn distributed version control—it's exactly the right time to establish habits around code documentation, commit messages, and project organization before bad practices solidify.
Advanced project categories at this stage:
- Machine learning and AI: Teachable Machine, TensorFlow Lite for microcontrollers, basic neural network training with Python. How to teach kids AI & machine learning provides age-appropriate entry points and project progressions.
- Renewable energy systems: Solar panel efficiency testing, wind turbine design optimization, battery management systems. Renewable energy science projects details measurement techniques and experimental design.
- Advanced robotics: Competition-level builds with custom PCBs, PID control loops, computer vision integration. Complete robotics learning path checklist maps skill dependencies.
- Digital fabrication: CNC router programming, laser cutting with vector design, multi-material 3D printing. How to choose your first 3D printer for teen STEM projects evaluates build volume, material compatibility, and maintenance requirements.
Lab infrastructure expands significantly. You now need dedicated storage for multiple concurrent projects, power management for devices running extended computations, ventilation for soldering or 3D printing, and backup systems for protecting project files. Home STEM lab safety checklist covers electrical load calculations, ventilation CFM requirements, and fire safety considerations for labs with multiple powered tools.
The role of online communities becomes crucial. Your teenager should be participating in forums like Arduino Stack Exchange, Raspberry Pi Forums, or GitHub project discussions—asking questions, reading others' code, and eventually helping less experienced makers. This peer learning accelerates skill development faster than any curriculum. Monitor for healthy online participation habits, but don't block access to these essential professional communities.
By fifteen or sixteen, many students are ready for paid freelance work (designing PCBs for local makerspaces, tutoring younger students, creating open-source hardware documentation) or structured internships with engineering firms. The stem learning path by age you built from ages three to thirteen makes this transition natural rather than aspirational.
Step 8: Establish Ongoing Assessment and Adaptation Protocols
A stem learning path by age isn't a one-time plan—it's a living document that adapts to your child's demonstrated capabilities, emerging interests, and gaps that reveal themselves during project work. Every 6-12 months, schedule a formal assessment session.
Review completed projects together. What skills did they apply successfully? Where did they struggle? Were the struggles productive (learning through challenge) or frustrating (missing prerequisite skills)? If a child repeatedly abandons projects at the same stage—for instance, always losing motivation during the coding phase—that signals a skill gap or interest mismatch that needs addressing.
Document capability milestones achieved. Create a simple checklist: Can they troubleshoot circuit problems systematically using a multimeter? Do they write functions and loops without prompting? Can they read technical documentation and implement solutions independently? These concrete capabilities matter more than completed project counts.
Identify the next skill frontier. Based on current capabilities and interest areas, what's the single most valuable skill to develop over the next 6-12 months? This prevents scattered, unfocused tool acquisition and maintains progression momentum. If they've mastered Arduino programming but never designed an enclosure, the next investment should be CAD software practice and possibly 3D printing access—not another microcontroller platform.
Adjust the timeline as needed. Some children race through stages, mastering skills in months that typically take a year. Others need extended time at particular stages, building confidence and fluency before advancing. Both paths are valid. The framework provides structure, not rigidity.
Budget projection and cost management: Track actual spending against your initial projections. Many families underestimate consumable costs (replacement components, filament, batteries) and subscription fees (online courses, competition team memberships, software licenses). Build a realistic ongoing budget that accounts for the expanding infrastructure needs at each stage.
For families managing multiple children, see what is a home STEM lab for guidance on shared resource management and age-staggered learning paths.
Pro Tips & Common Mistakes
Pro tip: Buy one high-quality, expandable platform at each stage rather than multiple single-purpose toys. A good Arduino kit with expansion modules will provide two years of learning; three separate "robotics toys" that don't interconnect create dead-end skill paths and wasted money.
Pro tip: Prioritize platforms with active online communities and long market presence. A product released in 2026 has minimal documentation and no established troubleshooting resources; an Arduino or Raspberry Pi has fifteen years of forum posts, project tutorials, and community support. When your child gets stuck at 8pm on a Saturday, that community becomes your teaching assistant.
Pro tip: Document projects with photos and brief descriptions. Three years from now, you'll want to see the progression from simple LED circuits to multi-sensor robotic systems. That documentation also becomes portfolio material for scholarship applications or STEM program admissions.
Common mistake: Buying tools based on marketing hype rather than prerequisite skill requirements. "AI robot kits for kids age 8+" often require text-based programming, sensor calibration, and systems thinking that most eight-year-olds haven't developed yet. Read detailed reviews, check technical specifications, and verify your child has the prerequisite capabilities before purchasing.
Common mistake: Skipping the screen-free coding stage because it seems "too basic." Those physical logic toys build spatial reasoning and algorithmic thinking without the cognitive load of learning screen interface navigation, typing, syntax rules, and debugging tools simultaneously. Children who start coding on screens at age five often struggle with abstract logic because they're learning too many things at once.
Common mistake: Neglecting storage and organization systems until components become chaotic. Once you have Arduino projects, LEGO robotics, 3D printing supplies, and soldering tools, disorganization kills learning momentum. Children waste 15 minutes searching for a specific sensor instead of actually building. Invest in labeled storage early.
Common mistake: Treating advanced tools as rewards for good behavior rather than skill-appropriate progressions. "If you finish your homework all week, we'll buy the robotics kit" creates problematic associations. STEM tools should arrive when your child demonstrates readiness through prerequisite skill mastery, not as behavior management leverage.
Frequently Asked Questions
How do I know when my child is ready to move to the next stage in their STEM learning path?
Watch for three simultaneous indicators: they complete projects independently from start to finish without prompting, they begin proposing modifications or extensions to existing projects, and they can articulate why specific approaches failed using technical vocabulary appropriate to their current tools. If a child building with gears says "the big gear makes the small one spin faster because it has more teeth," they're showing systems-level understanding and readiness for more complex mechanical challenges. Conversely, if they need your intervention to complete most projects at their current level, extending time at that stage prevents frustration at the next level.
Should I follow the age ranges on product packaging or adjust based on my child's demonstrated abilities?
Adjust based on demonstrated abilities, always. Packaging age ranges reflect legal safety standards (choking hazards, toxic materials) and broad developmental averages, not individual readiness. A child with advanced fine motor skills and high frustration tolerance can often succeed with products marketed 1-2 years above their chronological age, while children who are still building focus and persistence benefit from starting at the lower end of recommended ranges. The exception is tools with legitimate safety requirements—soldering irons, 3D printers, power tools—where adult supervision matters regardless of cognitive readiness.
Can I skip stages if my child already has coding experience from school?
It depends entirely on what type of coding experience they have. If school provides structured, project-based programming with debugging practice and systems thinking, they may have developed prerequisite skills despite not owning specific tools at home. However, many school programs offer surface-level exposure—one Hour of Code session, or gamified apps that teach isolated concepts without integration. Assess actual capabilities, not exposure hours. Can your child write a 20-line program that uses conditionals and loops to solve a novel problem? Do they troubleshoot systematically when code doesn't work? If yes, you can potentially skip a stage; if no, the gaps will create problems later.
How much should I budget annually for a well-structured STEM learning path?
Expect $150-300 annually for ages 3-8, increasing to $400-700 annually for ages 9-13 as platforms become more sophisticated and require supporting infrastructure. This includes initial tool purchases, expansion modules, consumable supplies (batteries, filament, replacement components), and occasional software or subscription costs. The highest single-year investment typically occurs around age 10-11 when transitioning to platforms like Arduino or Raspberry Pi that require supporting electronics, power supplies, storage systems, and expanded workspace setup. Quality tools retain resale value or get reused with younger siblings—view this as infrastructure investment, not disposable toy spending.
Building Learning Momentum That Compounds

Your stem learning path by age creates something more valuable than technical skills—it builds learning confidence and the identity of "someone who can figure things out." That confidence, established through hundreds of small successes from age three forward, makes the teenager who tackles challenging projects without fear of failure. It's the child who sees a problem and instinctively thinks "I could build something to solve that," rather than waiting for adults to provide solutions.
The tools change every few years. The platforms evolve. But the progression from tactile cause-and-effect to abstract systems thinking, from guided projects to self-directed design, from basic logic to industry-standard practices—that sequence remains constant. You're not preparing your child for a specific job that may not exist in fifteen years; you're developing cognitive flexibility, systematic problem-solving, and the resilience to persist through technical challenges. Those capabilities transfer across any future context.
Start with where your child is today—not where you wish they were, not where their peers are, not where social media suggests they should be. Observe, assess, select the appropriate entry point, and trust the progression. The path forward becomes clear when you build one solid skill at a time.