The difference between a functional home STEM lab and an expensive equipment graveyard comes down to organization strategy. I've audited dozens of home setups through consulting work and seen the pattern: labs fail when families buy for excitement rather than building systematic pathways. This guide shows how to organize a home STEM lab around capability milestones, not age ranges or product categories. You'll learn space allocation frameworks, equipment staging protocols, and progression tracking systems that align with actual industry skill requirements.
Time commitment: 6-8 hours for initial setup; ongoing 30-minute monthly audits. Skill level: requires no technical background, demands planning discipline.

This organizational framework has direct career relevance. Engineering hiring managers cite "systems thinking" and "tool chain fluency" as differentiators between junior candidates. Labs organized around progressive skill development demonstrate both.
What You'll Need
Physical Infrastructure:
- Dedicated work surface (minimum 4'x2' per active learner)
- Power distribution with surge protection (8+ outlets per station)
- Adequate task lighting (minimum 500 lux at work surface)
- Ventilation capacity for soldering/3D printing (if applicable)
- Storage system with categorical divisions (raw materials, active projects, reference equipment)
Documentation Systems:
- Project tracking method (physical lab notebook or digital system like Notion)
- Equipment compatibility matrix
- Skill milestone checklist aligned to specific capabilities
- Budget allocation spreadsheet with ROI tracking
Prerequisites:
- Understanding of your learner's current capability level (not grade level)
- 3-month minimum commitment horizon
- Defined learning objectives tied to measurable outcomes
- Reference to home STEM lab safety requirements
Step 1: Map Current Skills to Industry-Standard Tool Chains
Start with capability assessment, not equipment inventory. I ran my own children through this diagnostic: what can they actually build today, without assistance? Document concrete outputs—"assembles 3-component circuit from diagram" or "writes 15-line Python script with functions"—not vague descriptors like "good at coding."
Cross-reference these capabilities against industry-standard tool progression. Arduino IDE represents entry to embedded systems. CAD software like Fusion 360 mirrors professional mechanical design workflows. Python with NumPy/Pandas directly translates to data science roles commanding $95K+ median salaries in 2026.
Create a visual tool chain map. Physical or digital, it must show: current capability → next milestone → industry-standard endpoint. For example: Scratch block programming → Python basics → API integration → machine learning libraries. This becomes your organizational spine.
Most families skip this step and default to age-based product recommendations. That's backward. Age correlates poorly with capability in STEM domains. A motivated 9-year-old can master Arduino robotics that stumps an uninterested 13-year-old.
Zone your physical lab space around these tool chains, not arbitrary categories like "electronics" or "coding." One station might span Scratch through Python. Another progresses from hand tools through CAD to FDM printing. Spatial organization should mirror skill progression.
Step 2: Implement Zone-Based Equipment Staging
Physical organization must match cognitive load management. Equipment should appear exactly when learners achieve prerequisite capabilities—not before, not after. I use a three-tier staging protocol adapted from manufacturing environments.
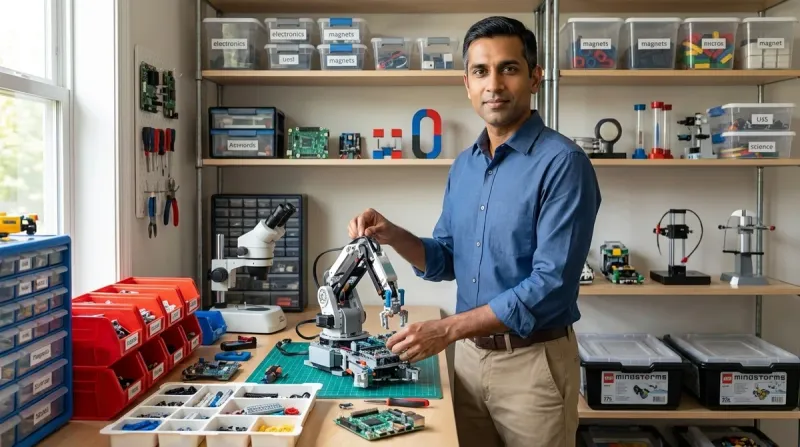
Tier 1: Active Learning Zone contains only tools/materials for current skill level projects. For a learner working on basic circuits, this means breadboards, jumper wires, resistors, LEDs, 9V batteries—nothing more. The [Elegoo Electronics Component Kit] includes 200+ discrete components organized in labeled compartments, reducing search friction during builds.
Tier 2: Next-Milestone Staging stores equipment for the immediate next capability level. Visible but not immediately accessible. Creates motivation through anticipation. When my daughter completed her first self-designed circuit, the Arduino Uno I'd staged became reward and tool simultaneously.
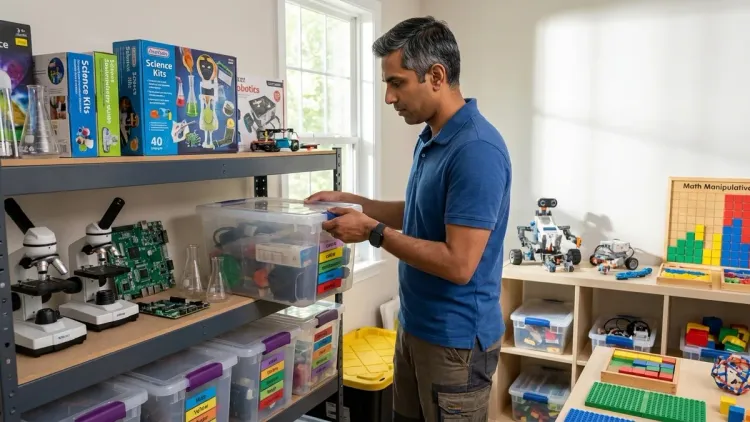
Tier 3: Archive/Advanced Storage holds reference materials, completed project documentation, and equipment requiring prerequisite skills not yet achieved. Climate-controlled if possible. Separate from active workspace.
This staging prevents two failure modes: paralysis from overwhelming choice and frustration from missing required tools mid-project. Both kill momentum. Clear storage labels using capability descriptors rather than component names helps: "After completing 5 functional Scratch games" not "Advanced sensors."
Expandability matters here. The IKEA RÅSKOG utility cart provides mobile staging that adapts as skill zones shift. Three tiers map perfectly to the staging protocol. Cost runs around $30, durability handles repeated reorganization cycles.
Step 3: Create Equipment Compatibility and Dependency Documentation
Technical debt accumulates fast in home labs. A Raspberry Pi 5 project kit requiring Python 3.11+ won't run on an older Pi Zero W. That Arduino shield needs 5V logic, but the newer boards run 3.3V. Hours evaporate troubleshooting compatibility gaps that proper documentation prevents.
Build a compatibility matrix before equipment purchases compound. Minimum viable columns: equipment name, required OS/software versions, power specifications, connectivity protocols (USB-A/C, WiFi standards, Bluetooth generations), cross-compatibility notes.
I maintain this in Airtable for filtering flexibility, but a spreadsheet suffices. Critical insight: document what won't work together as rigorously as what will. My matrix flagged that our Creality Ender 3 V3 uses USB-C while our older Windows laptop lacks that port—$12 adapter solved it before frustration set in.
Include subscription and consumable requirements. Some robotics platforms require ongoing software licensing (VEX Robotics charges around $150 annually for competition-level tools). 3D printers consume filament at $20-30/kg, which adds $200+ annually for active makers. Factor these into ROI calculations.
Cloud-dependent vs. offline capability significantly impacts learning flow. Platforms requiring internet connectivity fail during outages and add latency to simple tasks. Document this clearly—it affects whether projects can travel, function at competitions, or work at locations with limited connectivity.
Track expandability pathways. Can sensors be added? Does it integrate with other platforms you're building toward? The LEGO Mindstorms vs VEX Robotics comparison reveals dramatically different expansion roadmaps despite similar entry points.
Step 4: Design Milestone-Driven Project Queues

Random project selection produces random skill development. Queue management borrowed from Agile development frameworks creates intentional progression. Each project in queue must target specific capability gaps identified in your tool chain map.
Structure queues in three categories: Reinforcement Projects (80% success probability, cement existing skills), Stretch Projects (50% success probability, push capability boundaries), and Integration Projects (combine multiple previously-mastered skills into complex builds). Ratio should approximate 50/30/20 respectively.
Document prerequisites explicitly for each queued project. "Requires competency with: multimeter usage, Ohm's law calculations, Arduino Serial Monitor" prevents mid-project skill gaps. If prerequisites aren't met, the project stays queued and prerequisite skill-builders take priority.
I track this in physical form: index cards on a corkboard divided into the three categories. Each card includes: project name, skill targets, estimated duration, required equipment (with compatibility check reference), and success criteria. Learners select projects from available options—autonomy matters—but options are curated to maintain progression.
Success criteria must be measurable and demonstrate capability transfer, not just project completion. "Circuit functions when assembled" is insufficient. Better: "Can troubleshoot and fix three deliberate errors introduced into circuit schematic." That second version proves understanding over rote assembly.
Integration projects become portfolio pieces. When my son completed an AI machine learning project combining Python programming, data set manipulation, and model training—all skills built sequentially over six months—he had documentation proving capability chains to eventual admissions committees or employers.
Step 5: Establish Systematic Consumable and Maintenance Protocols
Labs die from consumable exhaustion and maintenance neglect. I've witnessed $2,000 equipment collections rendered inoperable by missing $5 components. Prevention requires systems, not intentions.
Create a Critical Consumables List for each active tool chain. For electronics work: assorted resistors, LEDs, jumper wires, breadboards, 9V batteries. For 3D printing: PLA filament (minimum two colors for multi-material learning), isopropyl alcohol (bed adhesion), replacement nozzles. For robotics programming: spare USB cables (they fail frequently), rechargeable batteries with documented charge cycle counts.
Implement a two-tier restocking trigger: reorder when inventory hits 50% and 25% of baseline. The 50% trigger allows standard shipping. The 25% trigger justifies expedited delivery to prevent project interruption. Document baseline quantities through usage tracking over 2-3 months—it varies significantly by project intensity.
Maintenance schedules prevent degradation. 3D printers require monthly calibration checks, quarterly nozzle inspection, and bi-annual belt tension verification. Proper maintenance protocols extend functional life from 18 months to 4+ years—material ROI difference.
Battery management alone saves hundreds annually. Rechargeable AA/AAA packs (I use Eneloop Pro) pay for themselves within 8 charge cycles versus alkaline costs. LiPo batteries powering robotics projects require dedicated charging/storage protocols—fire risk isn't theoretical. Document charge cycles; capacity degrades 10-15% per 100 cycles.
Storage organization reduces effective consumable costs. Clear compartmentalized containers with visual inventory levels (I mark containers at 25/50/75/100% fill lines with colored tape) make stock assessment instant. The [Elegoo Electronics Component Kit] I mentioned earlier models this well—labeled compartments with clear lids showing current inventory at a glance.
Step 6: Build Capability Tracking and Portfolio Systems

Learning happens whether you track it or not. Career value requires documentation. Engineering hiring shifted dramatically toward portfolio-based evaluation; 67% of technical recruiters report prioritizing demonstrated project work over degree credentials alone in 2026 surveys.
Implement a dual-tracking system: skill progression checklist and project portfolio. The checklist maps to your tool chain framework—specific capabilities achieved, proficiency level (introductory/intermediate/advanced), date achieved, and evidence project. Digital works (Notion, Airtable) but physical tracking surfaces progress more viscerally for younger learners.
Portfolio documentation must include: project objective, technical skills demonstrated, challenges encountered, problem-solving approaches taken, final outcome assessment, and integration with prior learning. I require my children to complete portfolio entries immediately post-project while details remain accessible. Template consistency matters—it becomes writing practice simultaneously with technical documentation skill.
Photography documentation carries weight. Progress photos showing iterative development matter more than final glamour shots. A robotics build sequence revealing troubleshooting and adaptation demonstrates engineering thinking. Version control for code projects (GitHub becomes relevant around age 12) shows professional workflow adoption early.
Code repositories, CAD files, and circuit schematics should be organized hierarchically: by capability domain, then chronologically. Naming conventions matter: "2026-03_Arduino_Traffic_Light_v2" contains date, platform, function, iteration. Searchability and professional habits form simultaneously.
External validation opportunities amplify portfolio value. Science fair projects, robotics competitions, open-source contributions, and documentation published to platforms like Instructables create third-party verification. When my daughter published a renewable energy science project to her blog, the 2,000+ views provided evidence of clear communication skill alongside technical capability.
Capability tracking informs purchasing decisions. Gap analysis—documented skills versus target tool chain requirements—reveals highest-value next equipment investments. This prevents reactive buying and maintains progression focus.
Step 7: Implement Quarterly Lab Audits and Reorganization Cycles
Static organization fails because learners progress. Quarterly audit cycles maintain alignment between physical space, equipment inventory, current capabilities, and target skill development.
Audit Protocol (approximately 2 hours):
- Capability Assessment: What can learners build independently today versus last quarter? Document concrete capability gains.
- Equipment Utilization Review: Which tools saw active use? Which sat idle? Idle equipment should move to archive storage or sell to fund actively-needed items.
- Staging Advancement: Promote Tier 2 equipment to Tier 1 if prerequisite skills achieved. Stage new Tier 2 equipment aligned to next milestones.
- Consumable Burn Rate Analysis: Adjust baseline quantities if usage patterns shifted. Budget accordingly.
- Safety Compliance Check: Verify ventilation remains adequate. Confirm power distribution hasn't developed daisy-chain hazards as equipment accumulated. Review safety protocols against current activities.
- Tool Chain Progress Mapping: Update visual tool chain map with achieved milestones. Identify bottlenecks or skill gaps impeding progression to next levels.
Physical reorganization follows audit findings. Equipment might migrate between zones as capabilities evolve. A learner transitioning from screen-free coding to Scratch and Python needs workspace reconfiguration—tablet/computer station replaces physical manipulative area.
Budget reallocation occurs quarterly. Equipment delivering low utilization relative to cost gets liquidated. High-value consumables get budget priority. I maintain a 70/20/10 split: 70% allocated to known progression pathway items, 20% to consumables and maintenance, 10% to experimental tools outside main learning track but potentially opening new interests.
Documentation updates: compatibility matrix, project queue, and portfolio tracking systems all receive quarterly refresh. Dead links get removed, new platforms get documented, achieved projects move to archive section.
This rhythmic reorganization prevents two common failure modes: stagnation (learners keep repeating mastered skills because lab organization doesn't surface new challenges) and chaos (equipment accumulation without systematic integration paralyzes decision-making).
Step 8: Establish Knowledge Transfer and Collaboration Mechanisms

Labs optimized for individual learning plateau faster than those incorporating peer learning and teaching opportunities. Knowledge transfer mechanisms accelerate skill development while building communication capabilities essential for technical careers.
Implement teaching-back protocols: learners must demonstrate ability to teach a completed project's core concepts to someone else before moving to next milestone. This reveals comprehension gaps and cements understanding. When my daughter explained her solar panel efficiency measurement project to her younger brother, she caught calculation errors her initial work glossed over.
If multiple learners share the lab, create collaboration projects every fourth milestone. Force integration of different skill levels through role delegation. A joint robotics build might assign mechanical design to one learner, programming to another, documentation to a third—mirroring professional team structures. The VEX Robotics platform explicitly supports this model with expandable team-scale kits.
External collaboration channels matter beyond household. Online communities (Reddit's r/arduino, Stack Overflow for programming questions, Thingiverse for 3D printing) expose learners to professional collaboration norms. I supervise these interactions initially but permit increasing autonomy as digital citizenship skills develop.
Documentation for teaching differs from personal notes. Require creation of instructional documentation for key milestone projects: step-by-step procedures someone else could follow independently. This writing exercise builds technical communication skills while creating reusable resources for future learners or reference.
Knowledge capture prevents rework. When troubleshooting solutions get discovered (why isn't the Arduino sketch uploading? USB cable was data-incapable, not just power-incapable), document them systematically. I maintain a lab wiki—simple Markdown files in a GitHub repo—searchable and version-controlled. Problems solved once stay solved.
Guest collaboration sessions with other STEM-focused families create cross-pollination. Different equipment, different skill specializations, different problem-solving approaches all expose learners to broader methodologies. Schedule quarterly at minimum. These sessions often reveal organizational strategies worth adopting or equipment combinations with unexpected synergies.
Pro Tips & Common Mistakes
Most effective optimization I've implemented: monthly skill-gap reviews instead of quarterly. Capability development happens faster than I initially estimated; quarterly cycles left learners treading water on mastered skills for weeks. Monthly check-ins (15 minutes suffices) keep progression responsive without bureaucratic overhead.
Mistake that cost us two months of progress: buying equipment outside our documented tool chain map because it was "on sale." A laser cutter deal seemed too good to pass, but we had zero prerequisite skills and no clear integration pathway. It collected dust for eight months before I acknowledged the error and resold it. Opportunity cost was substantial—that capital could have funded five projects in our active progression path.
Non-obvious insight from corporate systems work: version control matters for physical projects, not just code. Dating and photographing circuit configurations, CAD file iterations, even breadboard layouts creates rollback capability when experiments fail. We've saved hours by referencing "what worked on 2026-02-15" rather than reconstructing from degraded memory.
Common spatial mistake: insufficient buffer zones between incompatible activities. 3D printing and electronics breadboarding don't mix—filament dust causes intermittent connections. Soldering and CAD work conflict—fumes reduce screen time comfort. Dedicated STEM room versus multi-purpose space analysis helps, but even dedicated rooms need internal zoning with at least 3 feet separation between incompatible process areas.
Durability reality check: "educational grade" equipment frequently means "overpriced and underpowered." Industry-standard tools often cost less and teach relevant workflows. Arduino Uno boards run around $25 for official versions, $8 for functionally-identical clones. Both teach industry-standard Arduino IDE—the official version's marginal quality advantage rarely justifies 3x cost multiplier for learning contexts. Put savings toward consumables and next-milestone equipment.
Success metric that actually predicts long-term engagement: project initiation rate, not completion rate. If learners regularly start new projects independently, organizational systems work—the lab invites experimentation. Completion rates stay around 60-70% even in well-run labs because experimentation involves dead ends. That's appropriate. Hunt for 100% completion suggests overly conservative project selection that prevents skill stretching.
Frequently Asked Questions
How often should I completely reorganize the home STEM lab as skills progress? Reorganize zones and staging tiers quarterly, but avoid complete overhauls unless you're transitioning between major skill domains—for example, moving from primarily electronics work to primarily CAD and 3D printing. Major reorganizations cost 6-8 hours and disrupt momentum; incremental quarterly adjustments take 30-60 minutes and maintain progression alignment without workflow interruption. Track utilization patterns during monthly check-ins to inform quarterly reorganization scope.
Should I organize a home STEM lab by age ranges or by specific technical skills? Organize strictly by technical capability, not age. Age-based organization creates artificial ceilings and fails to account for variable progression rates across different skill domains. A single learner might work at "advanced" level in programming while remaining "introductory" in mechanical design—spatial organization must accommodate simultaneous multi-level work. Use the industry tool chain mapping from Step 1 to define organizational categories, then let individual capability determine which zones see active use regardless of chronological age.
What's the minimum budget needed to organize a functional home STEM lab with progressive skill development? Initial setup costs $300-500 depending on starting skill level and chosen domains. This covers adequate workspace furniture (used desk acceptable), basic power distribution and lighting, initial equipment for one skill domain at entry level, consumables for 2-3 months, and organizational infrastructure (storage containers, documentation systems). Monthly ongoing costs run $30-60 for consumables plus equipment purchases aligned to progression milestones—budget $200-400 quarterly for next-tier equipment as skills advance. The home STEM lab setup checklist breaks down domain-specific minimums.
How do I organize lab space when working with multiple children at different skill levels? Implement separate staging zones per learner with shared resource library for common consumables. Each learner gets dedicated Tier 1 workspace (4'x2' minimum) containing only their current-capability equipment, but Tier 2/3 staging and consumables storage can be shared with clear organizational systems indicating ownership or allocation. Use the collaboration mechanisms from Step 8 to create regular joint projects that bridge skill gaps productively rather than treating different levels as organizational problems to isolate. Rotating workspace assignments weekly prevents territorial behavior while maintaining individual progression pathways.
Summary
Lab organization determines skill progression velocity more than equipment quality or budget size. The framework presented—tool chain mapping, zone-based staging, capability tracking, and rhythmic audits—translates corporate systems integration methodology to home learning environments. Start with capability assessment, not equipment shopping. Build documentation systems before complexity compounds. Maintain quarterly reorganization discipline.
Most home STEM labs fail from organizational drift, not equipment inadequacy. The staged progression protocol prevents both overwhelming choice paralysis and frustrating capability gaps. Portfolio documentation converts private learning into career-relevant evidence of technical capability. Combined with systematic consumable management and knowledge transfer protocols, these organizational approaches produce measurable skill development aligned with industry-standard tool chains.
Physical space organization should mirror cognitive progression pathways—that's the non-negotiable insight. Everything else adapts to your specific context, available space, and learning objectives. The quarterly audit cycle maintains alignment as learners advance. How you organize a home STEM lab matters substantially more than what equipment fills it.