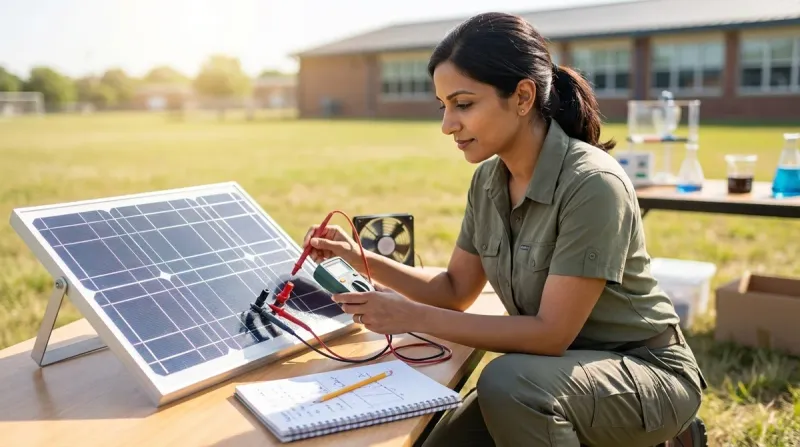
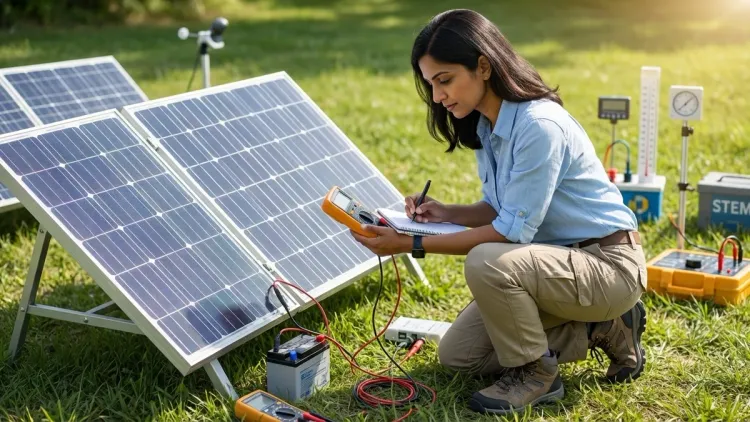
When you're guiding a student through a how to measure solar panel efficiency project, you're not just building another cardboard display—you're scaffolding authentic energy engineering concepts that power real industries. This guide walks you through the complete measurement process, from circuit setup to data analysis, using equipment and techniques that mirror professional photovoltaic testing. You'll learn to calculate efficiency percentages, identify performance variables, and document results with the precision expected in NGSS-aligned middle school physical science standards.
Skill Level: Intermediate (grades 5-8 with adult support; grades 9+ independently)
Time Estimate: 2-3 hours for initial setup and data collection; add 1-2 hours for variable testing
Prerequisites: Basic understanding of electrical circuits, comfort using a multimeter, ability to record and calculate percentages
What You'll Need
Essential Equipment
- Small solar panel (1-6V output recommended; crystalline or amorphous silicon types both work)
- Digital multimeter with voltage and current measurement capabilities
- Resistive load (10-100Ω resistor, small DC motor, or LED as test load)
- Light source with known wattage (60-100W incandescent bulb or adjustable LED lamp)
- Ruler or measuring tape (to measure panel dimensions and distance from light source)
- Lux meter or smartphone light meter app (to measure incident light intensity)
- Connecting wires with alligator clips
- Calculator (for efficiency calculations)
Optional but Valuable
- Protractor or angle-measuring app (to test angle of incidence effects)
- Neutral density filters or translucent materials (to simulate cloud cover)
- Heat lamp or ice pack (for temperature variable testing)
- Infrared thermometer (to measure panel surface temperature)
Lab Specs Note
Your workspace needs adequate electrical outlets for light sources, stable mounting surface for consistent light-to-panel distances, and ventilation if using high-wattage incandescent bulbs that generate heat. Most setups run on household 120V AC for light sources while the panel itself produces low-voltage DC—no special power requirements beyond standard outlets.
Step 1: Understand the Efficiency Formula and What It Actually Measures
Before you connect a single wire, you need to grasp what solar panel efficiency really means. Efficiency is the ratio of electrical power output to light power input, expressed as a percentage. The formula looks like this:
Efficiency (%) = (Electrical Power Out / Light Power In) × 100
Here's where I've watched hundreds of sixth-graders stumble: they think measuring voltage alone tells them efficiency. It doesn't. You need both voltage (V) and current (A) to calculate electrical power using P = V × I. That's why your multimeter becomes essential—you'll measure both parameters under load conditions.
The light power input requires knowing two things: the intensity of light hitting your panel (measured in watts per square meter, or W/m²) and the surface area of your solar panel. Multiply intensity by area, and you get total input power. Professional solar engineers use pyranometers for precise irradiance measurement; for educational projects, you'll estimate based on your light source specifications and distance.
This approach scaffolds energy transformation concepts beautifully—students visualize light energy converting to electrical energy while encountering inevitable losses due to material properties, heat generation, and reflection. Real-world solar panels achieve 15-22% efficiency for commercial silicon panels, with laboratory prototypes reaching above 40% using specialized multi-junction cells. Your educational panel will likely perform in the 5-15% range, which creates excellent discussion opportunities about real vs. theoretical efficiency.
Step 2: Measure Your Solar Panel's Physical Dimensions and Calculate Surface Area

Pull out your ruler and measure the active photovoltaic surface of your panel—this means the actual solar cell area, not the plastic or metal frame surrounding it. Record length and width in centimeters for easier calculation.
Surface Area (cm²) = Length × Width
Convert this to square meters by dividing by 10,000, since there are 10,000 cm² in 1 m². For example, a panel measuring 10 cm × 15 cm has 150 cm² of surface area, or 0.015 m². Keep this number handy—you'll use it repeatedly in efficiency calculations.
I recommend photographing your panel next to the ruler and recording measurements in a data table immediately. Students often remeasure incorrectly later when they realize they need the number, creating error propagation through all subsequent calculations. Frame this as practicing the documentation standards that professional engineers follow in technical reports.
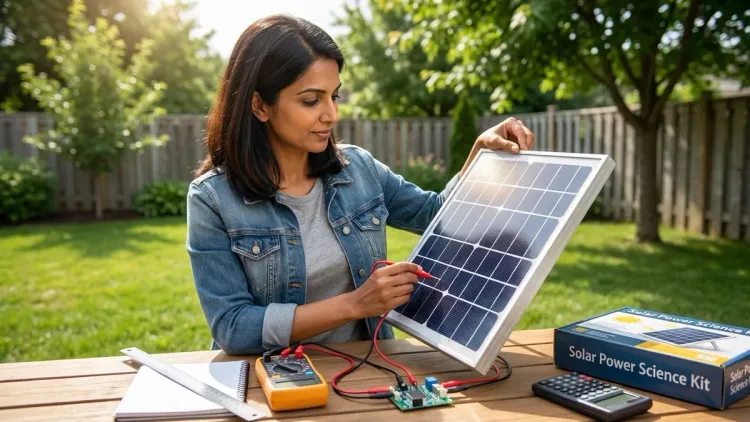
If your panel has multiple discrete cells, measure the entire array. Some educational kits like the Thames & Kosmos Solar Power include panels with visible individual cells—count them and note the configuration (series vs. parallel) since this affects voltage and current characteristics. This observation connects to circuit concepts they'll encounter in more advanced electronics work.
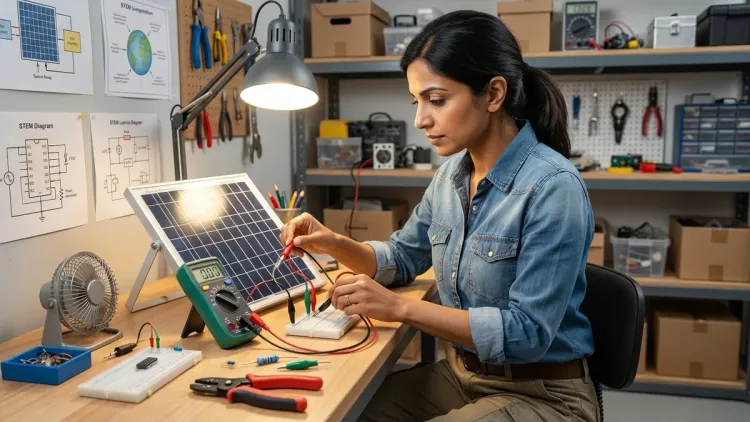
Step 3: Set Up Your Controlled Light Source and Measure Incident Light Intensity
Position your light source at a consistent, measured distance from the panel. Start with 30 cm (about 12 inches) as your baseline. The inverse square law means light intensity drops dramatically with distance—doubling the distance quarters the intensity—so consistency matters enormously here.
If you're using a 100W incandescent bulb, you can estimate the light intensity reaching your panel. A 100W incandescent bulb produces roughly 1,700 lumens. At 30 cm distance, this creates approximately 1,500 lux at the panel surface. To convert lux to W/m² (the units we need), use the approximation that 1 W/m² ≈ 120 lux for incandescent sources. This gives you roughly 12.5 W/m² of irradiance.
Here's the catch: these conversions involve assumptions about light spectrum and efficiency. Professional solar testing uses standard test conditions (STC) with 1,000 W/m² irradiance at a specific spectrum. Your kitchen-table setup won't match that, and that's pedagogically valuable—it opens discussions about controlled variables and standardized testing protocols.
If you have access to a lux meter or smartphone app, measure the actual light intensity directly at the panel location before placing the panel there. Record this value. Keep the light source powered on for 3-5 minutes before measurements to allow bulb output to stabilize, especially with incandescent bulbs that change temperature.
This step connects directly to renewable energy science experiment supplies considerations—the precision of your measurements depends heavily on equipment quality and setup consistency.
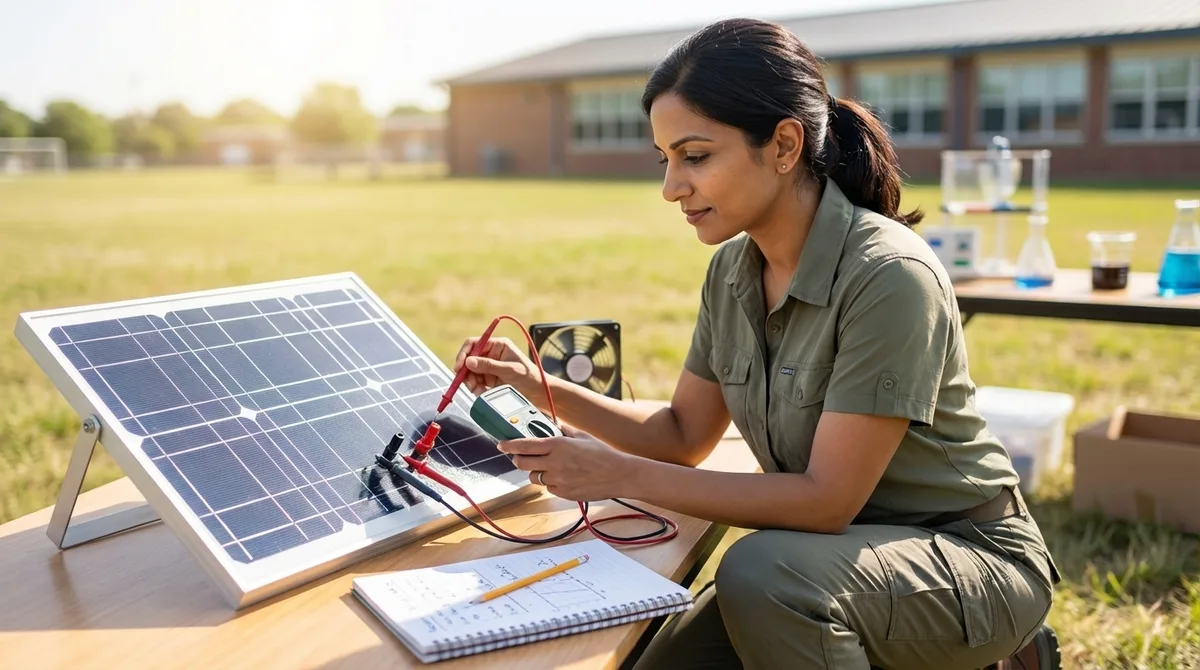
Step 4: Connect Your Circuit and Measure Open-Circuit Voltage
With your panel positioned and light source stabilized, set your multimeter to DC voltage mode. Connect the red probe to the positive terminal of your solar panel and the black probe to the negative terminal. Don't connect any load yet—this measures open-circuit voltage (Voc), the maximum voltage your panel produces when no current flows.
Record this voltage value. For small educational panels, you'll typically see 0.5V to 6V depending on panel size and construction. This number represents the theoretical maximum—as soon as you draw current to power something, voltage drops due to the panel's internal resistance.
Open-circuit voltage stays relatively constant across different light intensities (it decreases slightly with dimmer light), but it increases noticeably with cooler temperatures. This is counterintuitive for students—they often assume more heat equals more energy output. In reality, semiconductor physics means higher temperatures reduce the voltage output even while light absorption continues. If you're testing temperature effects later, you'll observe this fascinating relationship.
Now switch your multimeter to DC current mode (often labeled "A" or "mA"). Short-circuit the panel by connecting both probes directly to the positive and negative terminals with nothing else in the circuit. This measures short-circuit current (Isc), the maximum current flow when resistance approaches zero. Record this value carefully—you'll see anywhere from 50 mA to 500 mA (0.05A to 0.5A) for typical educational panels.
These two parameters—Voc and Isc—represent the extreme operating points, but neither represents actual working conditions. Real devices operate somewhere between these limits, which is why the next step matters.
Step 5: Measure Voltage and Current Under Load Conditions
Now you'll measure the operating point where the panel actually produces usable power. Connect your resistor, small motor, or LED as a load between the panel terminals. This is where students see the solar panel actually doing something—lighting an LED or spinning a motor—which makes the abstract measurements feel purposeful.
With the load connected, measure the voltage across the load using your multimeter in DC voltage mode. Then, without changing anything else, switch to current mode and measure the current flowing through the circuit. Some digital multimeters require moving the red probe to a different jack for current measurement—consult your device's manual to avoid damage.
Record both values. You'll notice the voltage is lower than your Voc measurement from Step 4, and the current is lower than your Isc value. This is the realistic operating point where the panel delivers power to a load.
Calculate the electrical power output using:
Power Out (W) = Voltage (V) × Current (A)
For example, if you measure 3.2V and 0.15A under load:
Power Out = 3.2V × 0.15A = 0.48W (or 480 mW)
Here's a teaching moment I emphasize repeatedly: the choice of load resistance dramatically affects where you land on the power curve. Professional solar testing identifies the maximum power point (MPP), the specific voltage-current combination that produces peak power output. For educational projects, test with 2-3 different resistors if possible, calculate power for each, and identify which load gave you maximum power. This scaffolds understanding of impedance matching, a concept that reappears in advanced electronics and RF engineering.
Step 6: Calculate Light Power Input to Your Solar Panel
Return to your light intensity measurement from Step 3. You need to calculate the total light power hitting your panel's surface. Use this formula:
Light Power In (W) = Irradiance (W/m²) × Panel Area (m²)
Using our earlier examples: if your irradiance is 12.5 W/m² and your panel area is 0.015 m²:
Light Power In = 12.5 W/m² × 0.015 m² = 0.1875W (or 187.5 mW)
This is the denominator in your efficiency calculation. Notice it's significantly smaller than the wattage rating of your light bulb—a 100W bulb doesn't deliver 100W to your panel because light spreads in all directions, and only a fraction hits your target surface. This surprises students initially but drives home the importance of concentration and focusing in solar applications (which is why industrial solar farms use tracking systems and sometimes mirrors or lenses).
If you're using natural sunlight instead of artificial light, the calculation simplifies in some ways but complicates in others. Clear midday sunlight provides approximately 1,000 W/m² irradiance at Earth's surface—the same standard used for professional panel ratings. However, atmospheric conditions, time of day, season, and latitude all affect this value. A lux meter becomes invaluable for outdoor testing to capture actual irradiance during your measurement window.
The data layer here matters: document your light source type, wattage, distance, and measurement time. When students present science fair projects, judges consistently ask about controlled variables. Incomplete documentation of light conditions undermines otherwise solid work. This mirrors the rigorous protocols required in published renewable energy research.
Step 7: Calculate Efficiency and Analyze Your Results
Now comes the moment students have been working toward—computing the actual efficiency percentage. Use your measured and calculated values:
Efficiency (%) = (Power Out / Power In) × 100
Continuing our example with 0.48W electrical output and 0.1875W light input:
Efficiency = (0.48W / 0.1875W) × 100 = 256%
Wait—that can't be right. An efficiency over 100% would violate conservation of energy. This is exactly where measurement error analysis becomes essential. If your calculated efficiency exceeds 100% or seems unreasonably high (above 25% for educational silicon panels), troubleshoot:
- Recheck your panel area measurement and conversion to m²
- Verify your light intensity measurement or estimation
- Confirm your distance measurement from light source to panel
- Ensure your multimeter is properly calibrated and you're using the correct measurement ranges
More likely, you'll see efficiency values in the 5-15% range for educational panels under artificial light. This is pedagogically perfect—it's low enough to spark questions about where the "missing" energy went (heat, reflection, wavelength mismatch) but high enough to demonstrate the concept works.
Create a data table comparing your results to real-world benchmarks:
- Your experimental panel: X%
- Commercial silicon panels: 15-22%
- Monocrystalline lab records: 26-27%
- Multi-junction lab records: 40%+
This contextualizes student work within the broader field and often launches discussions about why commercial panels still cost what they do despite decades of research. Connect this to solar vs wind energy projects considerations—efficiency limitations affect real-world renewable energy deployment decisions.
Step 8: Test Variables and Document How Efficiency Changes
The how to measure solar panel efficiency project becomes genuinely sophisticated when you systematically vary conditions. Choose 2-3 variables to test while keeping everything else constant:
Angle of incidence: Position your panel at 0° (perpendicular to light), 30°, 45°, and 60° angles. Measure efficiency at each. You'll observe efficiency drops as angle increases because effective surface area decreases (cosine relationship). This explains why solar tracking systems exist and why roof angle matters in home installations.
Light intensity: Move your light source to different distances (20 cm, 30 cm, 50 cm). Calculate and graph efficiency vs. irradiance. Interestingly, efficiency often stays relatively constant across moderate intensity ranges for silicon panels, though very low light causes proportionally larger losses.
Temperature effects: Use a heat lamp to warm the panel surface to 40-50°C, or briefly cool it with an ice pack (avoid condensation). Measure surface temperature with an infrared thermometer and record efficiency changes. You'll demonstrate that higher temperatures reduce silicon panel efficiency, typically by 0.4-0.5% per degree Celsius—a critical consideration in hot climates.
Spectral filtering: Place colored cellophane or theatrical gels between your light source and panel. Different colors simulate how solar panels respond to varying wavelengths. Silicon responds best to red and near-infrared wavelengths, so red filters often perform better than blue ones.
Graph your results with efficiency on the y-axis and your variable on the x-axis. These visualizations transform your project from simple measurement to genuine experimental investigation. When students present this work, they're demonstrating hypothesis testing, controlled experimentation, and data-driven conclusions—the core practices emphasized in NGSS MS-PS3 Energy and MS-ETS1 Engineering Design standards.
This experimental extension parallels the progression path you'd follow from foundational renewable energy concepts toward how to build a solar panel science project from component cells.
Pro Tips & Common Mistakes
Keep your light source stable and warmed up. I've seen countless students take measurements immediately after switching on a lamp, not realizing incandescent and halogen bulbs need 3-5 minutes to reach stable operating temperature and light output. This single oversight can create 10-15% measurement variance that undermines otherwise careful work.
Don't confuse rated wattage with actual irradiance. Your 100W bulb does not deliver 100W to your panel. Most of that power converts to heat, and the light spreads omnidirectionally. Only a tiny fraction reaches your target surface. Always calculate or measure actual irradiance at the panel location.
Measure current correctly. Multimeters measure voltage in parallel (probes touch across the component) but measure current in series (meter becomes part of the circuit path). Many students blow meter fuses by attempting to measure current in parallel mode. Review your multimeter's manual before the experiment, not during it.
Account for ambient light. If you're working near windows or in a well-lit room, ambient light adds to your test source, artificially inflating your efficiency calculation. Work in a darkened space or shield your panel so only your controlled light source illuminates it. Place cardboard barriers if needed.
Temperature equilibrium matters. When testing temperature effects, allow 5-10 minutes for the panel to reach thermal equilibrium after heating or cooling. Surface temperature and internal junction temperature differ, and the panel's performance responds to the junction temperature, which lags behind surface changes.
Use appropriate load resistance. If your electrical output measurements seem unusually low, your load resistance might be too far from the panel's maximum power point. Calculate approximate ideal load using R = Voc / Isc, then test with resistors near that value. A 5V panel with 200 mA Isc suggests starting around 25Ω resistance.
Document everything immediately. I cannot stress this enough. Students who rely on memory to record measurements later invariably confuse values, transpose numbers, or forget which trial used which distance. Use a printed data table or laboratory notebook to record every measurement the moment you take it, along with ambient conditions and any anomalies you observe.
Frequently Asked Questions
What is the typical efficiency I should expect from an educational solar panel in a how to measure solar panel efficiency project?
You should expect efficiency values between 5% and 15% for most educational silicon solar panels under artificial light sources, with variations depending on panel quality, light intensity, and measurement precision. Commercial rooftop panels achieve 15-22% efficiency under standardized test conditions with 1,000 W/m² irradiance, while your classroom or kitchen setup typically provides much lower irradiance from artificial sources. If your calculated efficiency exceeds 20-25%, recheck your measurements—particularly your panel area conversion to square meters and your light intensity calculation—because measurement error has likely occurred. Lower efficiency in educational settings is normal and creates excellent opportunities to discuss real-world limitations like heat losses, wavelength mismatch between your light source and the panel's peak spectral response, and reflection losses that affect practical solar installations.
Do I need an expensive lux meter to accurately measure light intensity for efficiency calculations?
You can conduct a meaningful how to measure solar panel efficiency project without a dedicated lux meter by using calculated estimates based on your light source specifications and distance, though a lux meter or smartphone light meter app significantly improves accuracy. A 100W incandescent bulb produces approximately 1,700 lumens, and you can estimate lux at your panel location using inverse square law principles, then convert to W/m² irradiance using the approximation that 120 lux equals roughly 1 W/m² for incandescent sources. Smartphone apps using the device's ambient light sensor provide reasonable measurements for educational purposes, typically within 15-20% of laboratory-grade meters, which is adequate for demonstrating concepts even if not publication-grade data. If you're working with natural sunlight, estimation becomes easier since clear midday sun provides approximately 1,000 W/m² at sea level—you can use this standard value and note that your results apply specifically to full-sun conditions, or take measurements at different times to observe how efficiency remains relatively constant despite intensity changes.
Can I use LED lights instead of incandescent bulbs for testing solar panel efficiency?
You can use LED lights for your how to measure solar panel efficiency project, but be aware that LEDs produce narrower wavelength spectra than incandescent bulbs, which affects how well they match your solar panel's spectral response and may reduce apparent efficiency compared to broader-spectrum sources. Incandescent and halogen bulbs produce continuous spectra including substantial infrared wavelengths that silicon solar panels absorb efficiently, while typical white LEDs peak in blue wavelengths with phosphor-converted yellow, creating less optimal spectral overlap with silicon's peak sensitivity in the red and near-infrared range. This doesn't make LED testing wrong—it actually creates an excellent opportunity to explore spectral response concepts—but your efficiency values may measure lower than with incandescent sources at equivalent intensity, and direct comparison between different projects becomes more difficult unless light sources are standardized. If using LEDs, document the LED color temperature (measured in Kelvin) and type (warm white, cool white, daylight) as part of your methodology, and consider testing the same panel under both LED and incandescent sources to demonstrate how light source spectral characteristics affect measured performance, which mirrors real-world considerations in solar panel deployment across different geographic latitudes where atmospheric filtering changes the solar spectrum reaching ground level.
How do I improve measurement accuracy when my multimeter readings keep fluctuating during testing?
Stabilize your multimeter readings in a how to measure solar panel efficiency project by ensuring your light source reaches thermal equilibrium, securing all electrical connections with soldered joints or high-quality alligator clips rather than hand-held probes, allowing 30-60 seconds for each measurement to settle, and recording the stable average value rather than instantaneous peaks or dips. Fluctuating readings typically stem from inconsistent light output during bulb warm-up, intermittent electrical connections at contact points, or load conditions that don't represent steady-state operation—for example, measuring current through a DC motor under varying mechanical load causes continuous variation as motor speed changes resistance. Switch to purely resistive loads like power resistors rather than motors or other dynamic devices to eliminate load-side variability, and ensure your light source has been powered for at least five minutes before beginning measurements. Some multimeters offer averaging modes or smoothing functions that calculate mean values over several seconds, which helps when you're seeing minor fluctuations rather than wild swings; if readings vary by more than 10-15%, troubleshoot your connections and light source stability rather than trying to average erratic data, because significant variation indicates a setup problem rather than normal measurement noise that averaging can address.
Summary
A rigorous how to measure solar panel efficiency project transforms simple solar panel demonstrations into quantitative investigations that mirror professional photovoltaic testing protocols. By measuring both electrical power output (voltage × current under realistic load conditions) and light power input (irradiance × panel area), you calculate efficiency percentages that connect directly to real-world renewable energy engineering challenges.
The measurement process scaffolds essential skills: circuit assembly, multimeter operation, unit conversion, percentage calculations, and controlled variable testing. When students extend the basic procedure to test angle effects, light intensity relationships, or temperature dependencies, they're practicing the experimental design and data analysis capabilities that define genuine scientific inquiry.
Your results—likely 5-15% efficiency for educational panels—contextualize perfectly against commercial technology (15-22%) and laboratory records (40%+), opening discussions about material science limitations, thermal management, and why renewable energy deployment requires both technological advancement and economic considerations. These aren't toy measurements; they're the foundational competencies that prepare students for industry-standard testing equipment and protocols in energy engineering fields.