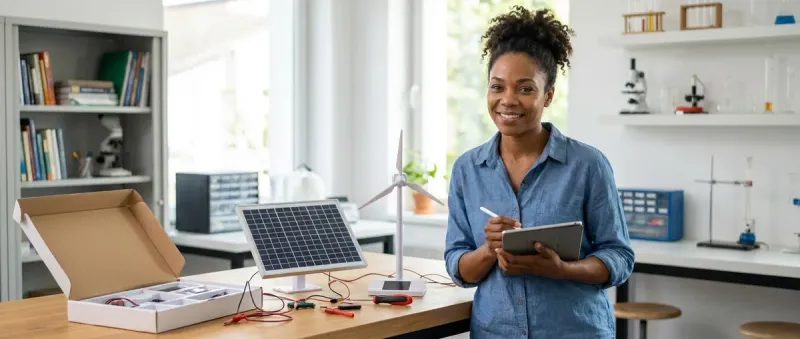
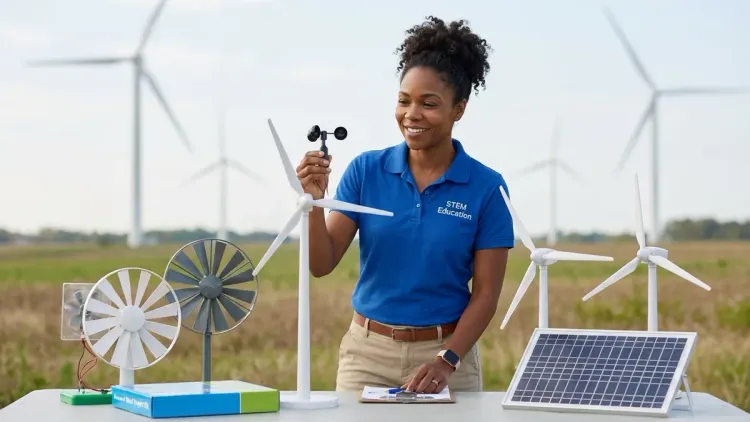
You're standing in the aisle—physical or digital—weighing two renewable energy kits. One harnesses the sun. The other captures the wind. Both promise hands-on learning, but which one actually delivers the engineering fundamentals your child will carry forward? The solar vs wind energy projects comparison isn't about which technology is "greener"—it's about which learning path builds the most transferable skills, which kit survives repeated experimentation, and which one prepares young engineers for the energy systems reshaping our world.
I've built both in my own home lab. I've wrecked turbine blades in Pacific Northwest storms and watched solar panels coated in Seattle drizzle still trickle out power. The answer isn't simple, but it's concrete.

What Is a Solar vs Wind Energy Projects Comparison?
A solar vs wind energy projects comparison evaluates educational kits and DIY project platforms that teach photovoltaic (solar) versus kinetic (wind) energy conversion. You're not just comparing two power sources—you're comparing two distinct skill-building frameworks. Solar kits teach circuit design, voltage regulation, energy storage, and the optoelectronic physics of semiconductors. Wind kits teach mechanical engineering, aerodynamics, gearing ratios, generator physics, and structural load management.
The comparison matters because these aren't interchangeable learning outcomes. A child who masters solar projects understands static systems—panels, charge controllers, battery banks, inverters—and learns to optimize energy capture through positioning, wiring topology, and load matching. This translates directly to skills used in residential solar installation, off-grid system design, and embedded electronics.
A child who masters wind projects understands dynamic systems—turbine blade pitch, rotational inertia, mechanical-to-electrical conversion efficiency, and structural failure modes under variable loads. This translates to skills in mechanical CAD, materials engineering, and robotics drive systems. When you're choosing between these kits, you're choosing which engineering discipline to introduce first.
Most households eventually benefit from exploring both, but sequencing matters. Solar projects offer faster iteration cycles—you can test a circuit change in minutes. Wind projects demand patience and physical experimentation—you're building something that spins, and that means managing friction, balance, and material fatigue. For a detailed breakdown of what you'll need for either path, see our guide on everything you need for a renewable energy science experiment.
How Solar Energy Projects Work (and What Your Child Actually Learns)
Solar energy kits convert photons into electricity using photovoltaic (PV) cells—semiconductor junctions that release electrons when struck by light. The Thames & Kosmos Solar Power and similar educational kits typically include small polycrystalline or monocrystalline panels (usually 1–6 watts), simple DC motors, LED arrays, and basic circuit components.
Here's what happens at the component level: When light hits the PV cell, it excites electrons in the silicon lattice, creating a voltage differential. Your child connects the panel to a load—a motor, an LED, a small fan—and watches current flow. That's the magic moment. But the learning accelerates when things don't work as expected.
Skill progression in solar projects:
- Beginner (ages 6–9): Connecting pre-wired panels to motors, observing that more light equals more power, testing shadow effects. Outcome: cause-and-effect understanding of energy conversion, basic polarity awareness.
- Intermediate (ages 10–13): Series vs parallel wiring, measuring voltage and current with a multimeter, designing circuits with diodes to prevent backflow, integrating battery storage (usually AA rechargeable NiMH cells or small lithium polymer packs). Outcome: circuit design fundamentals, Ohm's law in practice, introduction to energy storage and load matching.
- Advanced (ages 14+): Calculating panel efficiency using lux meters, building charge controllers with Arduino or ESP32 microcontrollers, designing maximum power point tracking (MPPT) algorithms, integrating data logging. Outcome: embedded programming (Arduino IDE, Python with MicroPython), real-time system optimization, engineering documentation practices.
Lab specs for solar kits:
- Power requirements: None for panel operation (sunlight or 100W+ incandescent/LED grow light for indoor testing). Battery charging requires compatible voltage regulators (usually included in intermediate+ kits).
- Connectivity: Standalone systems for basic kits; Arduino/Raspberry Pi integration for advanced projects (USB serial for data logging, I2C/SPI for sensor arrays).
- Expandability: Modular. Panels can be wired in series (higher voltage) or parallel (higher current). Standard MC4 connectors on quality kits (e.g., Elenco Deluxe Solar Educational Kit) allow integration with off-the-shelf components.
- Durability: Panels are fragile—thin glass or resin-coated cells crack under impact. Expect breakage in households with children under 8 unless you enforce strict handling protocols. Junction boxes and wiring are the weak points; look for kits with reinforced solder joints.
The most underrated solar project skill? Failure diagnosis. When your daughter's solar car stops moving, she learns to isolate variables: Is the panel shaded? Is a wire loose? Is the motor stalled? Is the battery dead? That troubleshooting loop—hypothesis, test, iterate—is the same process used in professional electrical engineering. For more on measuring and optimizing panel performance, read our guide to measuring solar panel efficiency in science projects.
Real-world parallel: The charge controller Arduino sketch your 14-year-old writes to prevent battery overcharge? That's the same logic used in grid-tied solar inverters and electric vehicle battery management systems. The skills aren't toy-scale—they're industry-foundational.
One caution: Many budget solar kits ship with underpowered panels (< 0.5W) that barely light an LED in full sun. You want at least 1–2W per panel for meaningful experimentation. Check the spec sheet, not the marketing copy.
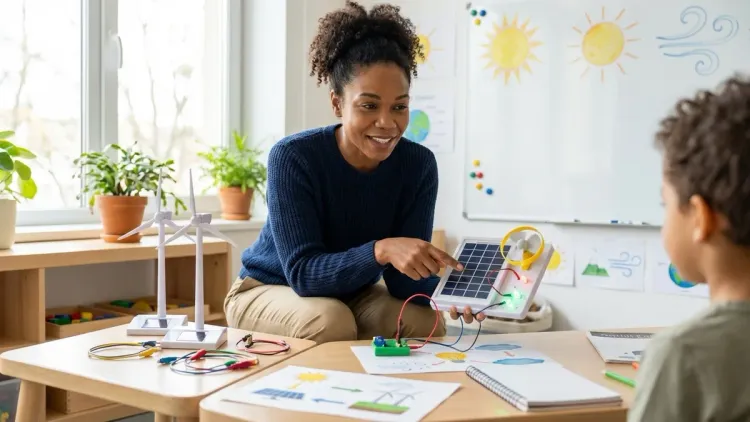
How Wind Energy Projects Work (and What Your Child Actually Learns)
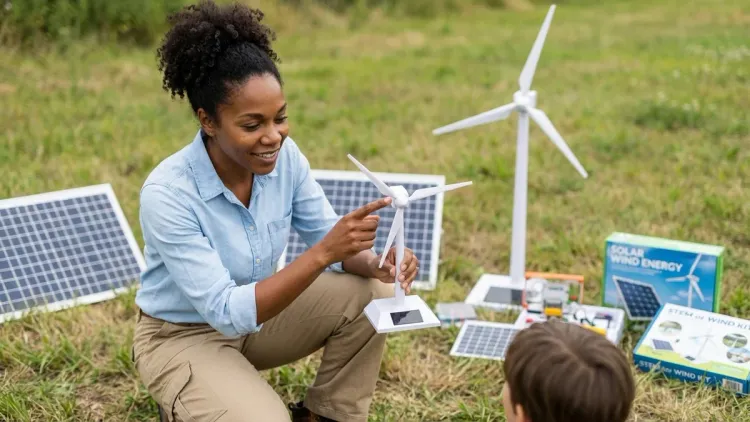
Wind energy kits convert kinetic energy (moving air) into rotational mechanical energy, then into electricity via a generator. Most educational kits—like the KidWind Basic Wind Experiment Kit—include plastic turbine blades, a small DC generator (often a repurposed motor), a tower or mounting structure, and measurement tools like multimeters or LED load banks.
The physics: Wind pushes against the turbine blades, creating lift (just like an airplane wing). The blades spin a rotor connected to a generator shaft. Inside the generator, magnets rotate past copper coils, inducing current through electromagnetic induction—the same principle Michael Faraday demonstrated in 1831. Your child sees this as "spinning makes electricity," but the engineering depth is staggering.
Skill progression in wind projects:
- Beginner (ages 8–11): Assembling pre-cut blades, mounting a turbine, testing with a fan or natural wind, observing voltage/current output with an LED or multimeter. Outcome: mechanical assembly, understanding that blade shape and wind speed affect power output.
- Intermediate (ages 12–15): Designing and cutting custom blade profiles (airfoil shapes), testing blade pitch angles, calculating tip-speed ratio, building gearboxes to optimize generator RPM, measuring power curves under variable wind speeds. Outcome: aerodynamics basics, gear ratio math, empirical data collection, graphing and analysis.
- Advanced (ages 16+): CAD design of blades (Fusion 360, Tinkercad), 3D printing or CNC-cutting custom parts, integrating stepper motors for active blade pitch control, building rectifier circuits to convert AC generator output to DC for battery charging, programming Arduino-based anemometers and data loggers. Outcome: CAD/CAM workflow, AC-to-DC conversion, sensor integration, mechanical-electrical system integration.
Lab specs for wind kits:
- Power requirements: Generator output only (no external power needed). Testing often requires a 12V fan (around 15–30W) for indoor experimentation or consistent outdoor wind (8+ mph for entry-level turbines).
- Connectivity: Standalone for basic kits. Advanced projects integrate Arduino (for data logging and control), stepper motor drivers (for pitch control), and MQTT/WiFi modules (ESP8266/ESP32) for remote monitoring.
- Expandability: Highly modular if you commit to a platform like KidWind (compatible generators, blade sets, tower extensions). Many kits use 3.5mm or screw-terminal connections for easy wiring changes.
- Durability: Blades are the failure point. Expect broken blades within 10–20 hours of outdoor use if your child doesn't balance the rotor or if wind gusts exceed design limits (usually 20–25 mph for plastic kits). Generators are robust—most are brushed DC motors run in reverse, which tolerate stall conditions and over-speed better than you'd expect.
The most underrated wind project skill? Iterative design with real failure consequences. When your son's 3D-printed blades shatter in a 15 mph gust, he learns that material selection, layer adhesion direction, and structural reinforcement aren't abstract—they're survival. That lesson carries into mechanical engineering, aerospace design, and any discipline where physics imposes hard limits. For a step-by-step walkthrough of turbine construction, see our guide to creating a wind turbine science project.
Real-world parallel: The blade pitch optimization your 15-year-old tests with a KidWind kit? That's the same challenge Vestas and GE engineers solve in multi-megawatt turbines. The data-logging Arduino code? It mirrors the SCADA systems that manage wind farms across the Great Plains.
One frustration: Wind project outcomes are weather-dependent. If you live in a calm climate or only test indoors with a fan, you'll never see the performance peaks that make wind exciting. Solar projects work anywhere with light. Wind projects demand airflow.
Why the Solar vs Wind Energy Projects Comparison Matters for Your Learning Path
Here's the truth: Most STEM curricula treat renewable energy as a single unit, as if solar and wind are interchangeable examples of "clean power." They're not. They're different engineering disciplines, and the one you start with shapes your child's relationship with energy systems for years.
Solar projects build electrical competency. If your child eventually wants to code microcontrollers, design circuits, or work with sensors and embedded systems, solar is the on-ramp. You're dealing with DC voltage, current regulation, battery chemistry, and power electronics—all skills that transfer directly to robotics, IoT, and embedded hardware. My own path from solar experiments at sixteen to building an off-grid home lab started because solar projects taught me to read datasheets, size wire gauge, and debug circuits without letting magic smoke out of components.
Wind projects build mechanical and systems thinking. If your child is drawn to machines—anything that moves, spins, lifts—wind turbines are the gateway. You're managing torque, rotational inertia, structural loads, and the chaotic variable of weather. These skills transfer to robotics (drive systems), aerospace (aerodynamics), and manufacturing (mechanical tolerances). Wind projects also teach humility—you can't control the wind, so you design systems that adapt.
The comparison matters because it determines what tools and mindsets your child normalizes. A child who grows up tweaking solar arrays thinks in terms of optimization curves and efficiency percentages. A child who grows up testing turbine blades thinks in terms of failure modes and stress limits. Both are valuable. Both are necessary for a generation that will inherit a grid in transition.
And here's the ecological lens: By 2026, the U.S. Energy Information Administration reports that solar and wind together account for over 16% of utility-scale electricity generation—and growing. Your child's hands-on fluency with these systems isn't just STEM enrichment. It's infrastructure literacy. For a broader view of how these projects fit into renewable energy education, explore our renewable energy science projects guide.
One more thing: The solar vs wind energy projects comparison also reveals cost structures. Solar kits scale down affordably—you can start meaningful experimentation for around $30–50. Wind kits require more precision components (generators, balanced rotors) and typically start around $50–80 for kits that actually produce measurable power. Budget accordingly.
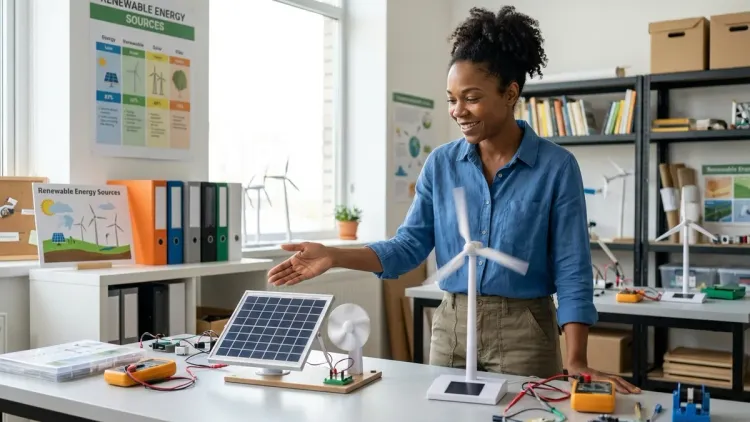
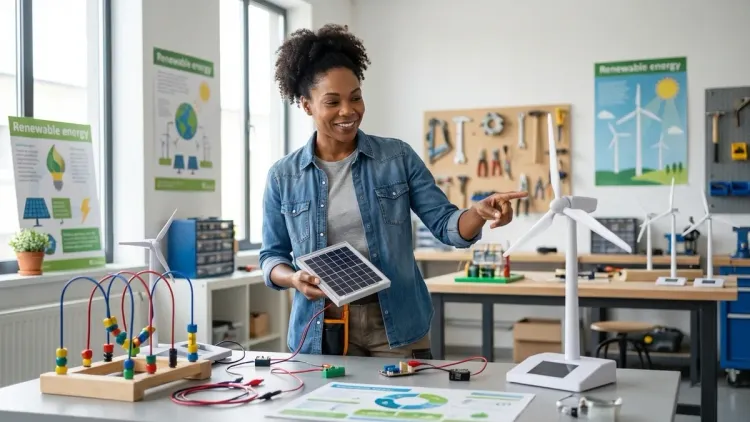
Types & Variations: Solar and Wind Project Categories
Not all solar and wind kits are built the same. Here's how to parse the landscape by learning outcome, not marketing fluff.
Solar Project Types
Snap-circuit solar kits (ages 5–9): Pre-wired panels connect to modules with no soldering. Examples: Snap Circuits Green Alternative Energy. Outcome: Cause-and-effect only. No troubleshooting depth. These are great for sparking curiosity but don't build engineering skills beyond basic polarity.
Modular solar experiment kits (ages 10–14): Loose panels, wires, motors, LEDs, multimeters. Child designs circuits, wires in series/parallel, integrates storage. Outcome: Circuit design, Ohm's law, load matching. This is where real learning starts.
Arduino-integrated solar kits (ages 14+): Panels plus microcontroller platforms for data logging, MPPT, or IoT integration. Outcome: Embedded programming (C++ in Arduino IDE), sensor fusion, system optimization. These prepare students for EE coursework and maker culture. If your child is ready to transition to text-based programming after solar tinkering, see our guide to transitioning from screen-free coding to Scratch and Python.
Wind Project Types
Pre-assembled turbine kits (ages 8–12): Fixed blades, tower, generator. Plug-and-test. Examples: KidWind MicroWind. Outcome: Observation only. Minimal design agency. Good for introduction, poor for iteration.
Blade-design experiment kits (ages 12–16): Modular blade hubs, templates for cutting custom blades, mounting for A/B testing. Outcome: Airfoil physics, empirical testing, data-driven design iteration. This is the sweet spot for middle and high school.
CAD-to-fabrication wind kits (ages 16+): Platform assumes access to 3D printer or laser cutter. Students design blades in CAD software, fabricate, test, iterate. Outcome: Full design-build-test cycle. Industry-standard CAD workflow (Fusion 360, Tinkercad). These prepare students for engineering internships and college labs. For more on integrating 3D printing into your STEM projects, see our guide to teaching kids 3D design skills with Tinkercad and Fusion 360.
Platform ecosystems matter. KidWind offers the most expandable wind system—compatible generators, blade sets, data loggers. Thames & Kosmos and Elenco offer strong solar ecosystems. If you start with one brand's entry kit and want to scale up, check compatibility before buying add-ons.
Subscription vs one-time purchase: Almost all renewable energy kits are one-time purchases with no consumables—a stark contrast to chemistry sets or biology kits. The exception: If you integrate IoT platforms (Adafruit IO, Arduino Cloud), some charge subscription fees for data storage beyond free tiers (usually sufficient for educational use). No hidden costs otherwise.
Frequently Asked Questions
Which is better for beginners: solar or wind energy projects?
Solar projects are better for beginners ages 6–10 because they offer immediate, predictable results—connect a panel to a motor, add light, watch it spin—with no moving parts to balance or mechanical assembly challenges. Wind projects require more patience, fine-tuning of blade pitch and rotor balance, and often frustrate younger children who expect instant gratification. Solar also works indoors with a desk lamp; wind requires consistent airflow, which means testing outdoors or with a dedicated fan.
Do solar and wind energy kits require ongoing subscriptions or replacement parts?
No subscriptions are required for standalone kits. Solar panels and wind generators are durable components with no consumables—once you own the kit, you own it indefinitely. However, wind turbine blades (especially 3D-printed or thin plastic versions) will break after repeated outdoor use or gusts beyond design limits, requiring reprints or replacements (usually around $5–15 for blade sets). Solar panels can crack if dropped, but normal use doesn't degrade them. If you integrate Arduino Cloud or other IoT platforms for data logging, some services charge beyond free-tier limits (typically 2–5 projects or 10,000 data points/month), but this is optional and educational use rarely exceeds free thresholds.
Can you combine solar and wind energy in one STEM project?
Yes, and it's pedagogically powerful. Hybrid renewable energy systems—where solar panels and wind turbines charge a shared battery bank—teach load balancing, charge controller design, and the real-world challenge of intermittent energy sources. You'll need a charge controller that accepts multiple inputs (Arduino-based DIY controllers work; commercial MPPT controllers designed for off-grid systems are overkill for educational scale but instructive). Expect to spend around $80–120 for a combined setup with 5–10W solar, a small wind turbine, battery bank (18650 lithium cells or sealed lead-acid), and voltage regulation. The learning outcome: understanding complementary generation profiles—solar peaks midday, wind often peaks morning/evening or seasonally.
Which energy projects teach skills used in actual renewable energy careers?
Both, but in different career paths. Solar projects—especially Arduino-integrated MPPT and data-logging systems—prepare students for careers in electrical engineering, solar installation (NABCEP certification path), embedded systems, and energy auditing. Skills learned include circuit design, power electronics, and microcontroller programming (C++, MicroPython), all directly transferable to grid-tied solar design and battery storage systems. Wind projects—especially CAD-designed turbine blades and mechanical optimization—prepare students for mechanical engineering, aerospace (aerodynamics fundamentals), manufacturing, and robotics drive systems. If your child is aiming for hands-on renewable energy work, solar has more entry-level career paths (residential installation, O&M). If they're aiming for engineering school, wind projects teach more CAD and mechanical design workflow.
At what age should kids transition from basic renewable energy kits to Arduino-integrated projects?
Most children are ready for Arduino integration at ages 13–15, assuming they have basic algebra skills (for voltage/current calculations) and comfort with logical sequencing (if-then statements, loops). The leap isn't primarily coding—Arduino's block-based and example-sketch ecosystem is accessible—but rather conceptual scaffolding: understanding that a microcontroller reads sensor data, makes decisions, and controls outputs. Before Arduino, ensure your child has completed at least 3–5 standalone solar or wind projects, can troubleshoot a non-working circuit by isolating variables (broken wire, dead battery, mismatched load), and is motivated by the question "How can I make this smarter?" Arduino IDE supports C++ (text-based) and platforms like ArduinoBlocks offer visual programming, so you can meet your child where they are. For a detailed progression from hands-on to programming, see our guide on how to transition from screen-free coding to Scratch and Python programming.
Summary: Choose Based on Your Child's Engineering Path, Not the Energy Source
The solar vs wind energy projects comparison isn't a battle—it's a roadmap. Solar builds electrical fluency, teaches circuit design and embedded programming, and offers fast iteration cycles that reward curiosity. Wind builds mechanical intuition, teaches aerodynamics and structural design, and demands patience with real-world variables. Both prepare children for the energy systems defining the next century.
Start with solar if your child gravitates toward screens, sensors, and solving problems through logic. Start with wind if they're drawn to machines, motion, and the satisfaction of building something that physically spins. Or start with both and watch which one they return to after the first frustration.
These aren't toys. They're apprenticeships in the infrastructure your child will inherit. Build wisely.