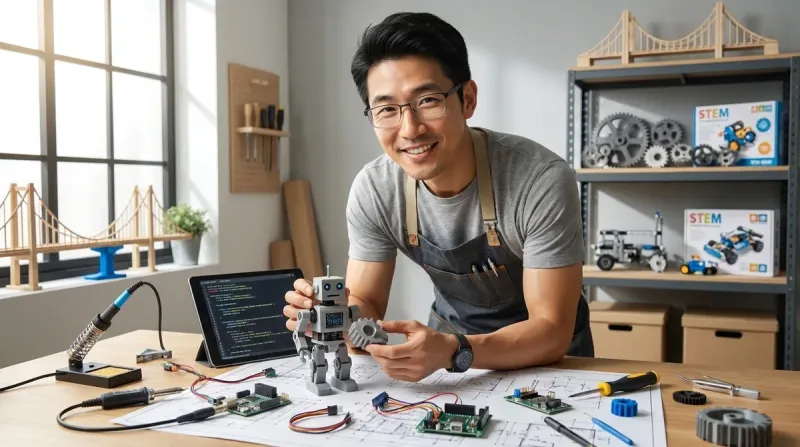
Twelve is the magic year when kids transition from following instructions to designing solutions. After watching hundreds of twelve-year-olds move through my maker lab, I've learned that stem by design strategies and activities for 12 year olds need to shift from "build what's in the box" to "build what solves the problem." This guide maps the exact capabilities your child should be developing right now—and the equipment, software, and project structures that actually build them.
What Is STEM by Design?
STEM by design isn't a brand or a specific curriculum—it's a pedagogical approach that puts design thinking at the center of science, technology, engineering, and mathematics learning. Instead of completing pre-defined experiments with known outcomes, students identify problems, prototype solutions, test them, and iterate based on data.
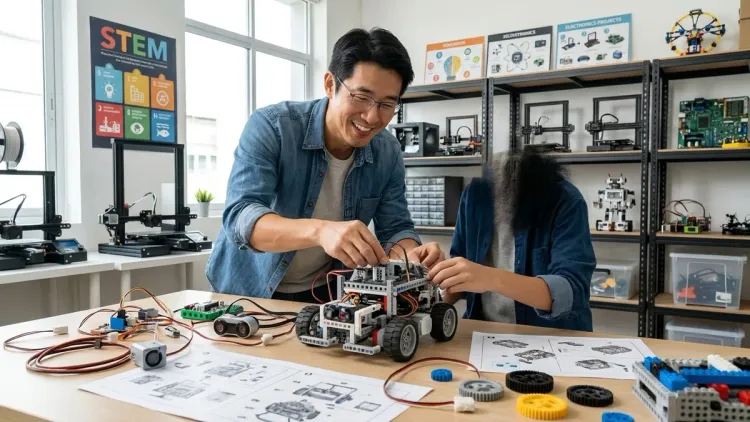
For twelve-year-olds specifically, this means moving from kits with single correct outcomes to open-ended platforms that support multiple solution paths. I've seen this transition happen in my lab dozens of times: a kid who spent last year building the robot in the manual now spends this year designing a custom gripper to pick up irregular objects.
The critical difference? Agency over outcomes. When you're implementing stem by design strategies and activities for 12 year olds, you're building the capability to define success criteria, not just meet someone else's. This aligns perfectly with the cognitive development stage most twelve-year-olds occupy—they're ready for abstract thinking, systematic problem-solving, and understanding trade-offs between competing design constraints.
This approach prepares kids for industry-standard engineering workflows: define requirements, prototype rapidly, test against specifications, document failures, and iterate. These aren't "someday" skills—they're what professional engineers do on Monday morning. Your twelve-year-old can start building these capabilities now with the right tools and project structures.
How STEM by Design Works
The design-centered approach follows a five-phase cycle I've refined through years of running student projects. Understanding this cycle helps you select appropriate tools and structure meaningful activities.
Phase 1: Problem Definition and Research. Students identify a genuine problem (not a contrived textbook scenario) and research existing solutions. For twelve-year-olds, this works best when the problem affects them directly. I've watched kids spend hours researching water quality standards after testing their own tap water with LEGO Education SPIKE Prime Set sensors, or diving into aerodynamics after their first quadcopter crash. The key infrastructure requirement here: internet access for research, and ideally, connection to real-world data sources. Cloud-dependent platforms like Google's Teachable Machine let kids train machine learning models on real datasets, building research skills alongside technical ones.
Phase 2: Design and Planning. This is where CAD software, circuit diagrams, and pseudocode come in. Twelve-year-olds can handle industry-standard tools now—I start kids on Fusion 360 (free educational license) rather than simplified alternatives because the capability ceiling is higher. They'll hit frustration points, absolutely. But the skills transfer directly to professional workflows. For programming design, I prefer Python with clear commenting requirements over block coding at this age; it forces architectural thinking. The essential lab specs here: a computer capable of running CAD software (8GB RAM minimum, dedicated graphics preferred), and a large display or second monitor for keeping reference materials visible while designing.
Phase 3: Prototyping and Fabrication. This phase separates design-centered learning from theoretical STEM. Students build physical or digital prototypes to test their ideas. For twelve-year-olds, I recommend platforms with multiple iteration cycles built into the budget—3D printing, laser cutting (with supervision), breadboard circuits, or software simulation environments like Tinkercad Circuits. The crucial requirement: failed prototypes need to be cheap and fast. If each iteration costs $30 and takes three days, kids learn to avoid risk. If iterations cost pennies and take 20 minutes, they learn to test aggressive ideas. This is why I push families toward enclosed 3D printers with PLA filament (around $20/kg, yielding dozens of test prints) rather than expensive consumable-based kits.
Phase 4: Testing and Data Collection. Students run structured tests and collect quantitative data about their prototypes' performance. For physical projects, this means measurement tools—calipers, multimeters, force gauges, temperature sensors. For code-based projects, it means logging execution time, memory usage, or prediction accuracy. I've built data literacy by having kids graph their results in Python using matplotlib or even Excel before moving to conclusions. The discipline of "test, measure, record" before declaring success builds scientific rigor. Critical equipment here depends on project type, but a decent digital multimeter, precision calipers, and a USB logic analyzer cover 80% of student projects in my lab.
Phase 5: Analysis, Iteration, and Documentation. Students compare test results to their original success criteria, identify failure modes, and decide whether to iterate the design or move forward. This is where I see the biggest gap in most commercial STEM kits—they don't build iteration into the structure. Your role when implementing stem by design strategies and activities for 12 year olds is to normalize failure as data. I require lab notebooks (digital or physical) where students document what didn't work and why. These become incredibly valuable when they're stuck three iterations later and need to remember why they abandoned an earlier approach.
The infrastructure to support this cycle: version control for code (GitHub is industry-standard and free), photo documentation of physical builds (smartphones work fine), and spreadsheet or graphing software for data analysis. Total additional cost beyond the fabrication tools themselves: $0 if you use free platforms.
Why STEM by Design Matters for Twelve-Year-Olds
This specific age window—typically sixth or seventh grade—is when students develop formal operational thinking according to Piagetian cognitive development models. They can handle abstract concepts, multiple variables, and systematic hypothesis testing. But this capability atrophies without use.
I've watched kids who spent ages 8-11 building excellent Lego kits hit a wall at twelve because they never learned to define their own problems. They're fast builders, sure, but paralyzed when faced with a blank page. Design-centered learning builds creative confidence alongside technical skills. When you ask a twelve-year-old who's been through multiple design cycles to "build something that helps elderly neighbors," they don't freeze—they start asking questions about user needs and researching assistive technologies.
From a career preparation standpoint, this approach maps directly to engineering, product design, data science, and research science workflows. The National Academy of Engineering emphasizes design thinking as a core competency across all engineering disciplines. Kids who build these skills at twelve have a five-year head start before college engineering programs. More practically: they're prepared for high school robotics competitions, science fair projects, and maker challenges that expect original work, not kit assembly.
The key skill outcomes twelve-year-olds should hit through stem by design strategies and activities for 12 year olds:
- Requirements definition: Can translate vague problems into specific, measurable success criteria
- Iterative development: Understands that first attempts fail and builds multiple versions
- Data-driven decisions: Uses measurement and testing to choose between design alternatives rather than guessing
- Documentation habits: Maintains records that let them (or others) reproduce and understand their work
- Tool literacy: Knows which tools suit which problems and can learn new tools independently
These aren't abstract goals. I can measure them. A kid who's developed these capabilities can take a platform like Arduino or micro:bit and build novel projects without step-by-step tutorials. That's the capability milestone that matters.
Core STEM by Design Activity Categories for Age Twelve
Organizing stem by design strategies and activities for 12 year olds into categories helps you build a progressive learning path. Here are the five domains I've found most effective, with specific capability milestones for each.
Physical Engineering and Fabrication
Projects involving mechanical design, structural engineering, and digital fabrication. The killer apps here are 3D printing and laser cutting (with supervision). Twelve-year-olds can design functional parts—not just decorative objects—using constraints like tolerance, material properties, and assembly methods.
Capability milestones: Design parts with specific measurements that mate with existing hardware (mounting a servo motor, creating a press-fit enclosure). Understand how printing orientation affects strength. Calculate material costs and print time before starting fabrication.
Essential lab specs: 3D printer with 0.2mm layer resolution minimum, build volume at least 200×200×200mm, heated bed for reliable prints. Desktop CNC or laser cutter is optional but expands material possibilities dramatically. Budget around $250-400 for an entry-level printer like the Creality Ender 3 V3 SE, which I've run through hundreds of hours in student hands with solid reliability after the initial setup.
Progressive learning path: Start with modifying existing designs from Thingiverse, move to designing single-purpose objects from scratch, then tackle multi-part assemblies with moving components. Final milestone: design and fabricate a complete functional device that solves a real problem.
Electronics and Circuit Design
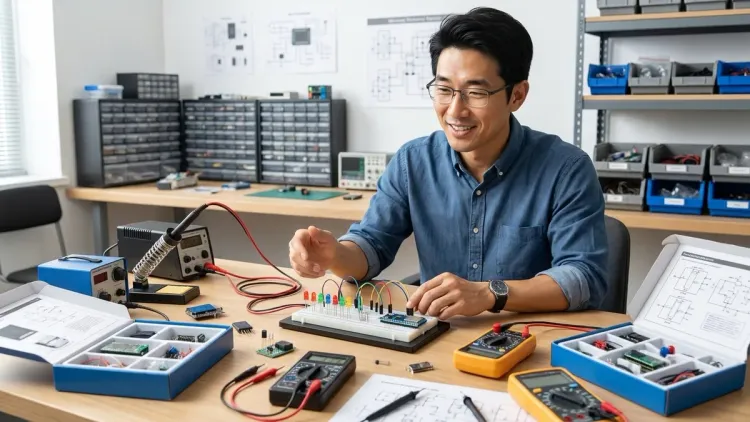
Moving from pre-wired kits to breadboard prototyping, PCB design basics, and understanding component datasheets. Twelve-year-olds can handle reading voltage and current with a multimeter, calculating resistor values for LEDs, and debugging basic circuit problems.
Capability milestones: Build circuits from schematic diagrams (not pictorial guides). Use Ohm's law to calculate component values. Diagnose problems using a multimeter methodically. Understand the difference between series and parallel circuits in practice, not just theory.
Essential lab specs: Quality breadboard (avoid the cheap ones—poor connection reliability teaches kids that electronics are flaky), jumper wire kit, multimeter with continuity testing, assorted resistors/LEDs/buttons. Power supply with adjustable voltage (3.3V, 5V, 9V, 12V) and current limiting. Budget $60-80 for a complete prototyping setup. The Elegoo Electronics Component Fun Kit covers basics but you'll need to add a decent multimeter.
Progressive learning path: Start with simple LED circuits, progress to transistor switching, then to integrated circuits like 555 timers, and eventually microcontroller interfacing. Each stage requires reading datasheets and calculating component values—critical industry skills.
Programming and Computational Thinking
Transition from block-based coding to text-based languages, with emphasis on debugging, algorithm design, and understanding computational complexity. For twelve-year-olds, I strongly recommend Python as the primary language—it's what I teach in my lab because the progression to professional tools is seamless.
Capability milestones: Write functions with parameters and return values. Debug code using print statements and logical reasoning. Understand loops, conditionals, and basic data structures (lists, dictionaries). Import and use libraries. Read and understand other people's code with moderate effort.
Essential lab specs: Computer with Python 3.10+ installed, code editor with syntax highlighting (I prefer VS Code for students—free and industry-standard), internet access for documentation. No additional hardware required initially, though pairing Python with Arduino or Raspberry Pi for hardware control adds motivation. Total cost: $0 if you have a computer already.
Progressive learning path: Start with command-line programs (calculators, text games), move to data analysis with pandas, then to hardware control with GPIO or serial communication, and eventually basic machine learning with scikit-learn. This path tracks directly with college CS curriculum, just four years early.
Data Science and Analysis
Collecting, cleaning, analyzing, and visualizing data from sensors or public datasets. This is where STEM by design gets seriously powerful—kids learn to support design decisions with evidence. Twelve-year-olds can handle spreadsheet analysis easily, and many can move into Python-based workflows.
Capability milestones: Collect sensor data systematically with timestamps. Graph data to identify trends. Calculate basic statistics (mean, range, correlation). Clean messy data (handling missing values, outliers). Present findings with appropriate visualizations.
Essential lab specs: Environmental sensors like temperature, humidity, air quality, or water quality testing. Data logging platform—could be as simple as writing to CSV files, or structured platforms like Google Sheets API or Adafruit IO. Graphing software—Excel works, Python matplotlib is better for reproducibility. Budget $40-120 depending on sensor sophistication.
Progressive learning path: Start with manual data recording and graphing, move to automated sensor logging, then to cleaning and analyzing datasets, and finally to predictive modeling or hypothesis testing. The environmental monitoring and citizen science domain provides endless real-world datasets.
Robotics and Autonomous Systems
Integrating mechanical design, electronics, and programming into systems that sense and respond to their environment. This is the ultimate integration challenge and where design thinking becomes essential—there's rarely one "correct" robot design for a given task.
Capability milestones: Design and build a chassis that accommodates motors, wheels, sensors, and control electronics. Write code that reads sensors and adjusts motor behavior in real-time. Debug mechanical, electrical, and software problems systematically. Iterate designs based on performance testing.
Essential lab specs: Robotics platform with expandability—I prefer Arduino-based systems over proprietary platforms because component-level access teaches more. Motors (DC, servo, stepper), motor drivers, distance sensors, line sensors. Chassis parts (can be 3D printed). Budget $80-200 depending on platform sophistication. The LEGO SPIKE Prime hits a sweet spot for twelve-year-olds: fast prototyping, Python programmable, expandable with LEGO Technic parts.
Progressive learning path: Start with pre-designed chassis and basic motor control, move to sensor integration and reactive behaviors, then to custom mechanical design for specific tasks, and eventually autonomous navigation or competition challenges. This path mirrors professional robotics development.
Strategic Implementation Framework
Here's how I structure a year-long progression when parents ask me how to implement stem by design strategies and activities for 12 year olds at home. This assumes roughly 4-6 hours per week of project time—weekends plus one or two evenings.
Quarter 1: Foundations and Tool Literacy (Weeks 1-12)
Goal: Build competency with core tools across multiple domains. Resist the urge to jump straight to complex projects—tool literacy first.
Activities:
- CAD Basics (3-4 weeks): Work through Fusion 360 or Tinkercad tutorials. Design and 3D print five simple objects with specific dimensional requirements. I have kids measure existing household objects with calipers and recreate them digitally to within 0.5mm—teaches precision and measurement.
- Circuit Prototyping (3-4 weeks): Build ten different circuits from schematics, progressively more complex. Learn to read datasheets. Calculate all component values before building. Document each circuit with photos and descriptions in a lab notebook.
- Python Fundamentals (4-5 weeks): Complete a structured online course (I recommend MIT's "Introduction to Computer Science and Programming Using Python" or similar). Write 20+ small programs. Emphasize debugging and reading error messages.
Key mindset shift: This quarter isn't about original designs yet. It's about building tool fluency so students aren't fighting their tools when they start designing. I've seen too many kids get frustrated with ambitious projects because they haven't mastered basics.
Quarter 2: Guided Design Challenges (Weeks 13-24)
Goal: Apply tool skills to structured problems with defined requirements but open-ended solutions.
Activities:
- Mechanical Challenge: Design a device that drops an egg from 2 meters without breaking it, using only 3D-printed parts and rubber bands. Requirements: must weigh less than 100g, must be reusable for 10 drops. Test, measure, iterate.
- Electronics Challenge: Build a plant watering reminder that flashes an LED when soil moisture drops below a threshold. Must run on batteries for 2+ weeks. Calculate power consumption before building.
- Programming Challenge: Write a program that analyzes a dataset (weather data, sports statistics, whatever interests them) and generates three visualizations that tell a story. Must handle missing data gracefully.
- Integration Challenge: Build a line-following robot using Arduino, motors, and IR sensors. Must complete a course in under 60 seconds. Document three different sensor placement strategies and test each.
Key mindset shift: Multiple solutions exist. Testing determines which is better for specific criteria. Failure is expected and valuable. This is where design thinking becomes real—I've watched kids spend hours debating whether lighter weight or better shock absorption matters more for their egg-drop design.
Quarter 3: Self-Directed Projects (Weeks 25-36)
Goal: Students identify their own problems and design solutions with mentor support, not step-by-step guidance.
Structure: Each student proposes a project that uses at least two STEM domains (e.g., robotics = mechanical + electronics + programming; environmental sensor = electronics + programming + data analysis). They write a project proposal with:
- Problem statement (what need does this address?)
- Success criteria (how will you know it works?)
- Required capabilities (what skills/tools needed?)
- Timeline with milestones
- Bill of materials with cost estimate
I review proposals, ask hard questions ("How will you measure air quality improvement?" "What happens if the servo motor stalls?"), and approve. Then students execute with weekly check-ins. I don't solve their problems—I ask questions that help them solve problems.
Example projects I've mentored:
- Automated plant watering system with soil moisture feedback and data logging
- Custom game controller for a sibling with limited hand mobility
- Air quality monitor that posts data to a website
- Quadcopter with FPV camera (lots of crashes, lots of learning)
Key mindset shift: Ownership. This is their project. They define success. They manage time. They debug problems. This is the closest to professional engineering workflow a twelve-year-old can experience at home.
Quarter 4: Documentation and Presentation (Weeks 37-48)
Goal: Communicate technical work clearly to different audiences—a critical professional skill.
Activities: Students document their Q3 project thoroughly:
- Technical Documentation: Write assembly instructions that someone else could follow. Create wiring diagrams or code architecture explanations. Document all components with part numbers and costs.
- Design Rationale: Explain why they made specific design choices. What alternatives did they consider? What testing informed decisions?
- Demonstration Video: Create a 3-5 minute video showing the project working, explaining the problem it solves, and discussing one significant challenge they overcame.
- Public Presentation: Present to family, friends, or a local maker meetup. This terrifies most kids initially, but it's invaluable—being able to explain technical work to non-technical audiences is a career-multiplier skill.
I also have students start a new Q4 project in parallel, applying lessons from Q3. The documentation from their first major project becomes the template for all future work.
Key mindset shift: Technical work isn't complete until it's communicated. This is where building a portfolio of maker projects begins—documentation that demonstrates capabilities to future teachers, programs, or employers.
Equipment Investment Strategy
Parents consistently ask me: "What do I actually need to buy?" Here's my tiered recommendation based on hundreds of home lab setups I've consulted on.
Tier 1: Foundation ($300-500, covers 80% of projects)
Start here. This equipment supports the majority of stem by design strategies and activities for 12 year olds without breaking the budget.
Computer requirements: The bottleneck for many families. You need enough power for CAD software and programming environments. Minimum: Intel i5 or AMD Ryzen 5 processor, 8GB RAM, 256GB SSD, integrated graphics work but dedicated GPU helps with Fusion 360. A used business laptop from 2020-2022 hits these specs for around $300-400. Linux is free and runs all necessary software (Fusion 360 excepted—needs Windows or macOS).
3D Printer: Creality Ender 3 series or similar. Budget $250-300. Yes, there are cheaper printers. I don't recommend them—poor reliability kills learning momentum. The Ender 3 requires some setup and calibration (which is valuable learning itself) but prints reliably afterward. Add $40 for two spools of PLA filament in different colors.
Electronics kit: Basic breadboard prototyping kit with assorted components. $40-60. Look for kits that include an Arduino Uno or compatible clone—it's the gateway to hardware control from software.
Measurement tools: Digital calipers ($20), basic multimeter ($25). These get used constantly.
Software: All free. Python, Arduino IDE, Tinkercad (browser-based CAD), Fusion 360 (free educational license), VS Code, Git.
Running costs: Mainly 3D printer filament (around $20/month if printing regularly), occasional electronic components (resistors, LEDs, sensors—budget $10-20/month).
Tier 2: Expansion ($500-1000 additional)
Add these after 6-12 months when you've identified which domains your child gravitates toward.
If they love robotics: Better robot platform. LEGO SPIKE Prime ($330) or VEX IQ ($300-400). Both use Python, both expand extensively, both prepare for competition robotics if they go that direction.
If they love electronics: Oscilloscope (budget $80-150 for educational models), adjustable power supply ($50), larger component assortment including microcontrollers beyond Arduino ($100). This tier enables RF projects, audio circuits, and motor control beyond hobby servos.
If they love data/environmental science: Quality sensor kit for environmental monitoring ($100-200). Look for sensors with digital interfaces (I2C or SPI) rather than analog—easier to use accurately, teaches modern communication protocols. Air quality, water quality, weather sensing are all accessible.
If they love fabrication: Laser cutter is the dream ($300-2500 depending on size/power). Realistically, many families join a local makerspace for laser cutter access rather than buying. Alternative: better 3D printer with larger build volume, multi-material capability, or higher resolution ($400-700).
Tier 3: Prosumer ($1000+ additional)
This is where you're building capability that extends into high school and potentially college. Only consider this if your twelve-year-old is deeply committed and has exhausted Tier 1-2 capabilities.
Raspberry Pi 5 with accessories ($120-150) for Linux learning and more powerful computing projects than Arduino handles.
Competition robotics platform like FTC-legal VEX or FIRST components (highly variable, $500-2000 depending on ambition).
Advanced fabrication tools: Resin 3D printer for high-detail work ($250-400), CNC machine for metalworking ($800-2000), or quality laser cutter if you're serious about production work.
Specialized sensors/tools based on specific interests: microscope with digital imaging, spectrophotometer, thermal camera, high-precision scales.
I've equipped multiple home labs at this tier, and my consistent advice: don't buy Tier 3 equipment to motivate interest; buy it to support existing demonstrated passion. The kid who's already built twenty Arduino projects will devour a Raspberry Pi. The kid who's struggled through five will feel overwhelmed.
Common Implementation Pitfalls (And How I've Learned to Avoid Them)
After watching dozens of families attempt to implement stem by design strategies and activities for 12 year olds, I've seen the same failure modes repeatedly. Here's what actually goes wrong and how to prevent it.
Pitfall 1: Starting with Ambition Instead of Foundation
Parents see amazing teen maker projects online and want their twelve-year-old building quadcopters or CNC machines immediately. I get it—those projects are inspiring. But they require 200+ hours of foundational skill-building first.
What happens: Kid gets frustrated, abandons project, equipment gathers dust, parent concludes "my child isn't interested in STEM."
Fix: Start with projects where success is achievable in 2-4 hours of focused work. Build tool skills through small wins. I've watched kids who "weren't interested" suddenly spend 20 hours on a self-directed project after they'd built competence through smaller successes. Confidence enables ambition, not vice versa.
Pitfall 2: Treating Every Project as a Kit
Many families buy a robotics kit, build it following instructions, then buy another kit and repeat. The kid becomes an excellent instruction-follower but can't design anything original.
What happens: Plateaus hard around age 13-14. They're fast builders but freeze when faced with open-ended challenges. Loses interest because there's no creative agency.
Fix: After completing 2-3 kits to learn the platform, require modifications or original designs. "Build the kit robot, then modify it to climb a 20-degree ramp" or "design a completely new robot that can move an object from point A to point B." This forces design thinking while still scaffolding learning.
Pitfall 3: No Constraints or Success Criteria
"Build whatever you want" sounds supportive, but without constraints, most twelve-year-olds spiral. They redesign constantly, never finish anything, or build something that sort of works but they can't articulate why.
What happens: Projects drag on for months. No clear endpoint. Hard to feel accomplished. Eventually abandoned.
Fix: Every project needs defined success criteria before starting. What specific problem does this solve? How will you measure success? What's the timeline? What's the budget? I make students write this down. Constraints aren't limitations—they're what makes design thinking possible. Professional engineers always work within constraints.
Pitfall 4: Parent Over-Involvement or Under-Involvement
Two failure modes here. Over-involved parents solve problems for kids to prevent frustration or keep projects on schedule. Under-involved parents provide equipment but no structure or mentoring.
What happens (over-involvement): Kid learns helplessness. Doesn't develop debugging skills. Can't work independently.
What happens (under-involvement): Kid gets stuck, doesn't know how to get unstuck, abandons project. Equipment sits unused.
Fix: Your role is structured mentorship. Ask questions rather than providing solutions. "What have you tried?" "What does the error message say?" "How could you test whether the motor or the code is the problem?" Schedule regular check-ins (I do weekly 15-minute reviews) where they explain progress and problems. Provide resources (point to documentation, suggest search terms) but don't do the work.
Pitfall 5: Inadequate Documentation
Most kids hate documentation. They want to build, not write. But undocumented projects are learning opportunities that evaporate—six months later, they can't remember why they made specific choices or how they solved problems.
What happens: Can't build on past work. Keeps re-learning the same lessons. Portfolio of completed projects exists physically but can't demonstrate capabilities to others.
Fix: Make documentation a non-negotiable part of "done." Doesn't have to be formal—photos with captions, code comments explaining logic, quick videos showing how things work. I require lab notebooks (digital or physical) with date-stamped entries. Takes 10 minutes per session but pays off enormously. This habit tracks directly to professional engineering practice where documentation is mandatory.
Age-Appropriate Complexity Calibration
One question I field constantly: how do I know if a project is too hard or too easy for a specific twelve-year-old? There's enormous capability variation at this age.
Here's my practical assessment framework:
Too easy: Child completes it with zero frustration, zero problem-solving, zero learning of new concepts or tools. They're bored. They're not challenged. Time investment feels wasted.
Appropriate difficulty: Child encounters 3-5 significant problems during the project. Each problem requires research, experimentation, or debugging to solve, but solution is achievable within a few hours. Child feels accomplishment upon completion and can articulate what they learned.
Too hard: Child encounters insurmountable problems requiring knowledge/skills they can't acquire within reasonable time. Frustration outweighs progress for multiple sessions. Requires adult intervention to complete basic steps. Project gets abandoned.
The sweet spot: you should see struggle but not despair. I aim for projects where kids spend about 20-30% of their time stuck on problems, figuring out solutions, and working through frustration. That's where learning happens.
Practical calibration techniques:
Tier projects by dependency chain. Don't attempt circuit design involving transistors until they've mastered basic resistor/LED circuits. Don't tackle multi-part assemblies in CAD until they can design and print single parts to spec. Each project should introduce 1-2 new concepts while reinforcing existing skills.
Provide graduated support. Start projects with minimal scaffolding. If they're stuck after a reasonable attempt, provide progressively more specific hints. I use a three-tier hint system: (1) general direction ("have you considered how the sensor's viewing angle affects placement?"), (2) specific resource ("check the datasheet for this sensor's range specifications"), (3) worked example if they're still stuck. Most kids rarely need tier 3.
Normalize iteration. First attempts should fail quickly and cheaply. I actively encourage kids to build "bad" first prototypes just to identify problems—breadboard circuits before soldering, rough 3D prints in draft mode before high-quality final versions, pseudocode before full implementation.
Integration with Formal Education
Most twelve-year-olds are in sixth or seventh grade. How do stem by design strategies and activities for 12 year olds integrate with school science and math curricula?
In my experience: loosely, but powerfully. School provides theory and foundational knowledge. Home STEM lab provides application and design practice. The combination is dramatically more effective than either alone.
Specific integration opportunities I've successfully exploited:
Science class: When school covers topics like energy, forces, chemical reactions, or ecosystems, home projects can explore them practically. Studying energy? Build a solar panel project and measure efficiency under different conditions. Studying forces? Design a mechanism with specific mechanical advantage and test it. The school's conceptual teaching suddenly has tangible meaning.
Math class: Programming provides immediate application for algebra, geometry, and even pre-calculus. Calculating motor speeds for a robot requires unit conversion and algebraic manipulation. Designing 3D-printed parts requires geometric reasoning. Analyzing sensor data uses statistics. I've seen kids who "hated math" suddenly care about it because they needed it to make their project work.
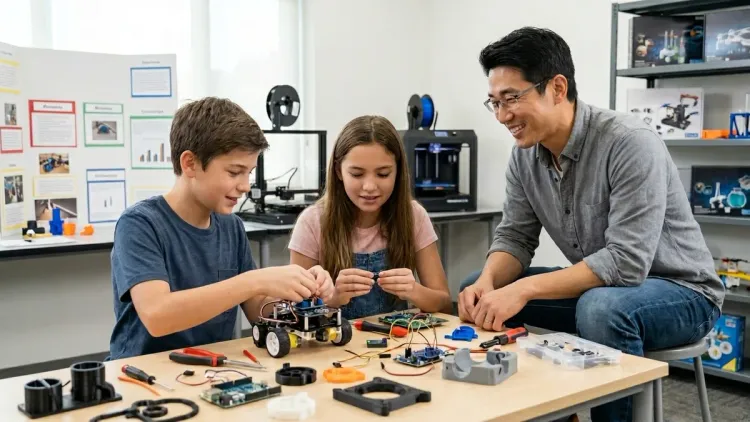
Science fair projects: This is the obvious connection point. Schools increasingly expect original research for science fairs, not baking-soda volcanoes. A twelve-year-old who's been through multiple design cycles at home can propose, execute, and document a genuinely original investigation that stands out. I've mentored multiple award-winning projects that came directly from home lab work.
Career exploration: Many middle schools include career readiness components. A student with documented maker projects can speak concretely about engineering, product design, or data science careers. Better yet: they have evidence of capability, not just interest.
The key: don't force alignment. If your child is passionate about robotics but school is covering plant biology, don't contort the robotics project into a plant-watering system just for school relevance. The design and technical skills transfer across domains. Forced alignment kills intrinsic motivation.
Building Community and Mentorship
Twelve-year-olds working on stem by design strategies and activities for 12 year olds benefit enormously from community beyond their parents. Here's how to build it without massive time investment.
Local makerspaces: Many cities have community makerspaces with equipment access and knowledgeable members. I've seen kids get unstuck on problems in minutes by asking an experienced maker who's worked with similar systems. Costs vary ($50-100/month typical), but many offer youth memberships or free open-shop nights. The equipment access alone often justifies it—laser cutters, CNC machines, electronics workbenches, tool libraries.
School clubs: Robotics clubs, coding clubs, maker clubs. Even if the formal curriculum is kit-based, the peer community provides motivation and knowledge sharing. I've watched kids who were unmotivated at home light up when they could show peers what they'd built.
Online communities: Carefully moderated. Arduino forums, Raspberry Pi forums, Thingiverse, GitHub, and Reddit communities (r/arduino, r/3Dprinting, etc.) can provide technical help. The culture varies dramatically by platform—I prefer forums with strong anti-harassment policies and active moderation. Teach your child to search before asking (99% of beginner questions are already answered) and to document their question clearly (what they tried, what happened, what they expected).
Local competitions: FIRST LEGO League, VEX IQ, science fairs, maker faires. Deadlines drive completion. Recognition motivates. Seeing what other kids build expands possibilities. Not every child thrives in competition, but many find it energizing.
Mentorship from professionals: Harder to arrange but incredibly valuable. Some companies offer STEM mentorship programs. I've connected motivated students with engineering professionals willing to do quarterly check-ins. Even 30 minutes per quarter answering questions and reviewing projects makes a difference.
The community investment pays off: kids learn faster, maintain motivation better, and develop professional network-building skills early. The engineering profession is highly collaborative—solitary genius is a myth. Starting that collaborative mindset at twelve builds career-relevant habits.
Frequently Asked Questions
What's the difference between STEM by design activities and regular STEM kits for twelve-year-olds?
Regular STEM kits typically provide all components and step-by-step instructions leading to a predetermined outcome—you build what's in the manual, and there's one correct result. STEM by design activities provide platforms, tools, and constraints but expect students to define problems and design original solutions with multiple possible approaches. A STEM kit might have you build a specific robot following instructions; a STEM by design approach gives you motors, sensors, and a microcontroller, then asks you to design a robot that accomplishes a specific task, measure its performance, and iterate to improve it. The kit builds following-instructions skills; the design approach builds engineering and problem-solving capabilities that transfer to novel situations.
Do I need to be technically proficient myself to support STEM by design learning at home?
Not technically proficient in the specific domains, but you need to be willing to learn alongside your child and provide structured support. I've worked with parents who knew nothing about programming or electronics but successfully mentored student projects by learning to ask good questions ("What have you tried? What does the documentation say? How can you test that hypothesis?"), helping establish timelines and milestones, and facilitating access to resources and community when students get stuck. Your role is project management, encouragement through frustration, and helping develop metacognitive skills—not being the technical expert. That said, if you're completely unwilling to engage with the technical material at all, your child will likely need external mentorship through a makerspace, club, or online community to stay unstuck.
How much time per week should a twelve-year-old spend on STEM by design activities?
I recommend 4-6 hours per week for meaningful skill development—typically weekend project time plus one or two evening sessions. Less than that and projects drag out so long that kids lose momentum; more than that risks burnout unless the child is deeply self-motivated. The time should be concentrated enough for flow state and problem-solving, not fragmented into 20-minute sessions where they spend most of their time remembering where they left off. During intensive project phases (competition prep, science fair deadline), committed kids often invest 10-15 hours weekly, but that's not sustainable year-round. The key metric isn't hours logged but completed projects—if they're finishing meaningful projects quarterly and developing new capabilities, the time investment is working.
Can STEM by design activities prepare a twelve-year-old for actual STEM careers, or is it just enrichment?
Both, but the career preparation is genuine and substantial. The skills twelve-year-olds build through well-structured design projects—reading technical documentation, debugging systematically, designing within constraints, testing hypotheses with data, iterating based on results, documenting work for others—are the exact skills professional engineers and scientists use daily. I've watched students who started serious maker work at twelve enter high school with capabilities equivalent to second-year engineering students in areas like CAD, circuit design, or Python programming. They have multi-year head starts for AP classes, college admissions portfolios demonstrating technical capability, and sometimes even freelance or competition income from their skills. The platforms they're learning on—Arduino, Python, Fusion 360, Git—are industry-standard tools, not educational toys. A twelve-year-old who can design functional 3D-printed parts, write working Python code, or build sensor-based systems is building capabilities with direct professional value, not just "enrichment."
What if my twelve-year-old loses interest in STEM by design projects after a few months?
First, distinguish between temporary frustration and genuine disinterest. Most kids hit motivation valleys when stuck on hard problems or between projects—that's normal and doesn't mean they've lost interest permanently. Provide structure during valleys: suggest smaller projects with quick wins, take a break and come back fresh, or pivot to a different STEM domain if they're burned out on robotics but energized by environmental science. However, if after genuinely trying design-centered STEM with appropriate support and equipment for 6+ months they show consistent disengagement, that's valuable information too—maybe their passion lies elsewhere, and that's completely fine. Not every child will love making things or solving technical problems, and forcing it damages the relationship with learning. The goal is to provide genuine opportunity and support, not to manufacture a specific interest. The equipment and skills aren't wasted even if they pivot—understanding how things work, problem-solving systematically, and learning independently are valuable regardless of career path.
Summary

Implementing stem by design strategies and activities for 12 year olds means shifting from following instructions to defining problems and designing solutions. I've watched hundreds of twelve-year-olds make this transition in my lab, and the capability growth is dramatic when you provide the right tools, structure, and mentorship.
Start with foundation equipment—a capable computer, 3D printer, electronics prototyping kit, and free software—budget around $400-500 total. Build tool literacy through focused skill-building before tackling ambitious projects. Structure a year-long progression from guided tutorials through constrained design challenges to fully self-directed projects with documentation and presentation.
The capabilities your twelve-year-old should develop aren't abstract—they're measurable. Can they design a 3D-printable part to specific dimensions? Read a circuit schematic and build it? Write Python code that reads sensor data and makes decisions? Debug problems systematically using measurement and logic? Iterate designs based on test results? Document their work so others can understand and reproduce it? These skills transfer directly to high school coursework, competition robotics, science research, and eventually professional engineering or scientific careers.
The investment—time, money, and emotional support through frustration—pays off in capabilities that create opportunities for decades. I've seen it happen repeatedly. Twelve is exactly the right age to start building these skills seriously, while the neuroplasticity for new tool acquisition is high and before the opportunity cost of time gets expensive. Give your child the platforms and structure to design, test, fail, iterate, and eventually succeed at building things that matter to them. That's what engineering actually is.