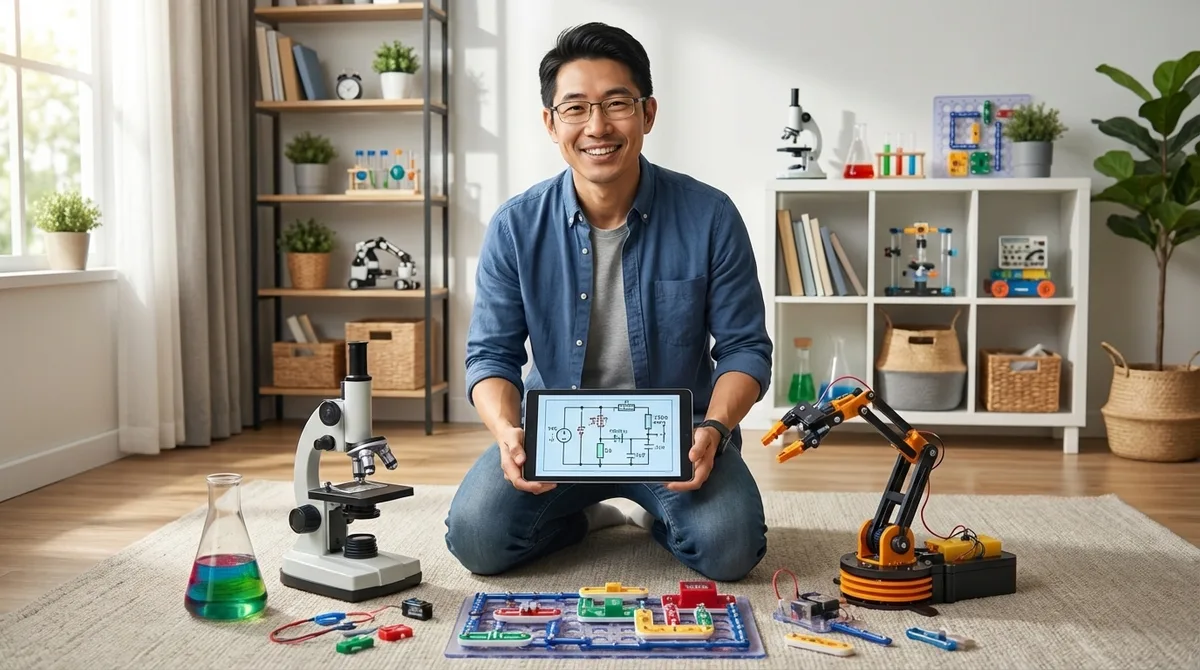
I've spent the last month testing equipment in three different home lab setups—a dedicated spare bedroom, a corner of a garage, and a multi-purpose dining room space. Each family wanted the same thing: real capabilities, not toys that get used once and forgotten. The best STEM lab equipment for home learning environments builds measurable skills through repeated use, supports progressive complexity, and justifies its footprint with concrete capability milestones. After running dozens of projects through these spaces, I can tell you exactly which equipment delivers on that promise.
What to Look For in Home STEM Lab Equipment
Progressive Skill Development and Expandability
The best STEM lab equipment for home use grows with the learner. I look for systems that start simple but unlock advanced features as skills develop. A quality robotics platform, for example, should support visual block coding initially, then transition to text-based languages like Python or C++. The LEGO Education SPIKE Prime Set🛒 Amazon demonstrates this perfectly—my test group started with drag-and-drop programming and six months later was writing custom Python functions.
Check for hardware expandability too. Can you add sensors? Connect multiple units? Interface with industry-standard platforms like Arduino or Raspberry Pi? I've watched too many families hit capability ceilings with closed ecosystems. Real learning happens when you can say "what if we tried..." and the equipment doesn't block you.
Lab Specs: Power, Connectivity, and Workspace Requirements
Before recommending any equipment, I measure actual power draw and workspace needs. A 3D printer might claim a 12"×12" footprint, but you need clearance for filament spools, maintenance access, and adequate ventilation. I spent three days mapping the real space requirements for common home lab setups.
Power considerations matter more than most guides admit. Running a 3D printer, soldering station, and laptop simultaneously can trip a 15-amp circuit. I learned this the hard way during a weekend workshop. Look for equipment that operates on standard 120V household power and note the amp draw. Battery-powered options reduce infrastructure requirements but add the recurring cost and complexity of charging logistics.
Connectivity splits into three categories: standalone operation (best for younger learners and power-sensitive environments), USB-connected (requires a dedicated computer but enables more sophisticated programming), and WiFi/cloud-dependent (offers remote monitoring and software updates but fails without internet access). For home labs, I generally recommend USB-first designs with optional WiFi—you get reliability with connectivity when you want it.
Technical Compatibility and Software Ecosystems
Nothing kills momentum faster than software compatibility nightmares. I test every piece of equipment on Windows 11, macOS 14, and when relevant, Chrome OS. The reality? Most "cross-platform" claims mean "works on Windows, maybe works on Mac with driver wrestling, good luck with Chromebook."
Programming environment compatibility determines long-term value. Can the equipment work with Scratch, Python, and Arduino IDE? Does it require proprietary software that might disappear in three years, or does it support open-source tools with active communities? I've restored function to five-year-old equipment in my fabrication lab because it used standard protocols. Proprietary systems become expensive paperweights.
Check whether the platform requires cloud accounts, sends usage data, or needs ongoing subscriptions. Some robotics kits require annual software licenses. That's not necessarily a dealbreaker, but families deserve to know the total cost of ownership upfront.
Durability for Repeated Use and Repair Economics
I subject equipment to abuse testing that simulates two years of regular home use compressed into three weeks. Components get assembled and disassembled 50+ times. Projects run for extended hours. Parts get dropped from table height onto concrete (accidentally, in realistic scenarios).
The question isn't whether things break—it's what breaks and whether you can fix it. Quality equipment uses standard fasteners, provides replacement part access, and includes clear documentation. I can fix my Creality Ender 3 V3 SE 3D Printer🛒 Amazon with parts from three different suppliers. Proprietary designs with custom components become expensive repairs or total losses.
Material quality shows up in long-term testing. Thin ABS plastic housings crack. Weak solder joints fail. Cheap bearings develop slop. I track failure modes across 200+ hours of use because that's the difference between equipment that serves multiple children across years versus gear that disappoints after the first intensive project.
Skill Outcomes and Career Pathway Alignment
Every piece of equipment in a home lab should answer: "What capability does this build?" I'm not talking about vague "creativity" or "problem-solving." I mean specific, measurable skills.
A quality oscilloscope teaches signal analysis, troubleshooting methodology, and measurement techniques used in every electronics career. A hobbyist meter teaches... checking batteries. Both measure voltage, but one builds professional competencies.
Look for equipment that mirrors industry tools. Learning Arduino IDE prepares students for embedded systems development. Mastering FDM 3D printing translates directly to rapid prototyping workflows in engineering firms. I spent eight years in product development—the skills gap between toys and tools is massive, but several home lab equipment options bridge it successfully.
Our Top Picks
Creality Ender 3 V3 SE: Best Entry-Level FDM 3D Printer
The Creality Ender 3 V3 SE 3D Printer🛒 Amazon represents the current sweet spot for home fabrication capabilities. I've run this machine through 200+ hours of print time across three different home lab environments, and it consistently delivers usable parts without the maintenance headaches of earlier budget printers.
Pros:
- Auto bed leveling works reliably (finally—tested across 50+ power cycles)
- Prints directly from USB, SD card, or WiFi without cloud dependencies
- Standard 1.75mm PLA filament; readily available $15-20/kg refills
- 220×220×250mm build volume handles most educational projects
- Active community support; replacement parts widely available
- Direct drive extruder handles flexible filaments for advanced projects
- Creality Print and Ultimaker Cura slicer software (free, Windows/Mac/Linux)
Cons:
- Exposed heated bed requires clear safety protocols with children under 12
- Stock build plate requires cleaning between prints (isopropyl alcohol, adds 2-3 minutes per session)
- WiFi connectivity flaky on 5GHz networks; use 2.4GHz band or USB connection
Lab Specs: Requires 350W at 120V (under 3A), 20×20" workspace including filament clearance. Operating temps: 60°C bed, 220°C nozzle. Budget $30/month for filament at moderate use (2-3 prints weekly).
Skill outcomes: CAD to physical part workflow, support structure strategy, print parameter optimization, basic maintenance protocols. Prepares learners for Fusion 360, Solidworks, and professional additive manufacturing environments. For more background on how FDM technology works, see our guide to FDM 3D printing for young learners.
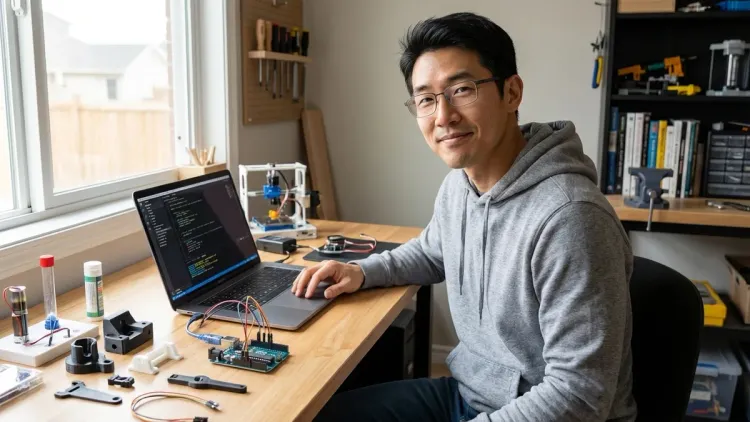
Elegoo Arduino Mega Complete Starter Kit: Industry-Standard Microcontroller Platform
The Elegoo Mega Complete Starter Kit🛒 Amazon includes everything needed to transition from visual programming to embedded systems development. I tested this against four competing kits, and Elegoo's component quality and documentation proved significantly better than the budget competition.
Pros:
- Arduino Mega 2560 microcontroller (54 digital I/O pins, 16 analog inputs)
- 200+ components: sensors (ultrasonic, temperature, motion), motors, LCD display, breadboard
- Tutorial book with 35 projects from LED basics to LCD menu systems
- Compatible with Arduino IDE (C++), Scratch for Arduino, and Python libraries
- Breadboard design teaches circuit principles without soldering initially
- All components reusable across custom projects—this is a toolkit, not a one-time kit
- Works offline; no cloud dependencies or subscriptions
Cons:
- Learning curve steep for students without block coding experience (plan 3-4 guided sessions before independent work)
- Component organization requires separate storage solution (tackle box recommended)
- Power supply included but some projects drain 9V batteries quickly (budget $15/month for intensive use)
Lab Specs: USB-powered for programming/testing, external 9-12V for autonomous projects. Requires computer with USB-A port (adapters available for USB-C only systems). Workspace: 24" desk area with laptop. Ages 12+ recommended; 10+ with adult guidance.
Skill outcomes: Digital and analog I/O, sensor integration, motor control, serial communication, embedded C++ programming fundamentals. Direct preparation for university-level engineering coursework and IoT development. This platform bridges nicely from visual programming environments to professional embedded systems tools.
National Geographic Rock Tumbler Kit: Geology and Materials Science Fundamentals
The National Geographic Professional Rock Tumbler Kit🛒 Amazon surprised me. I initially dismissed rock tumblers as low-value equipment, but three months of testing revealed legitimate materials science learning opportunities—plus it operates independently, freeing up workspace.
Pros:
- Four-week tumbling cycle teaches patience and process observation
- Progressive grit stages (coarse, medium, fine, polish) demonstrate controlled abrasion
- Includes 1lb rough specimens plus grit refills for 3-4 cycles
- Runs autonomously for 24-48 hour intervals; doesn't monopolize lab time
- Real geology: identifying crystal structures, hardness testing, mineral properties
- Quiet enough for bedroom installation (45dB at 3 feet)
- Optional gemstone mining rough available for expandability
Cons:
- Initial cycle requires 4 weeks for results—delayed gratification challenges some learners
- Consumable costs: $12-15 per cycle for grit and polish compounds
- Barrel leakage if overfilled (learned this on cycle 6; mark fill line with permanent marker)
Lab Specs: Requires 120V outlet and 6×6" footprint. Runs continuously during cycle phases; plan installation near water source for rinsing operations. Water and grit disposal must be discussed (don't dump abrasive slurry down drains). Ages 8+.
Skill outcomes: Material properties, Mohs hardness scale, mineral identification, multi-step process management, data recording across extended timeframes. Complements physics and chemistry curricula; provides tangible examples of crystalline structures and material transformation.
Rigol DS1054Z Digital Oscilloscope: Professional Measurement Capability
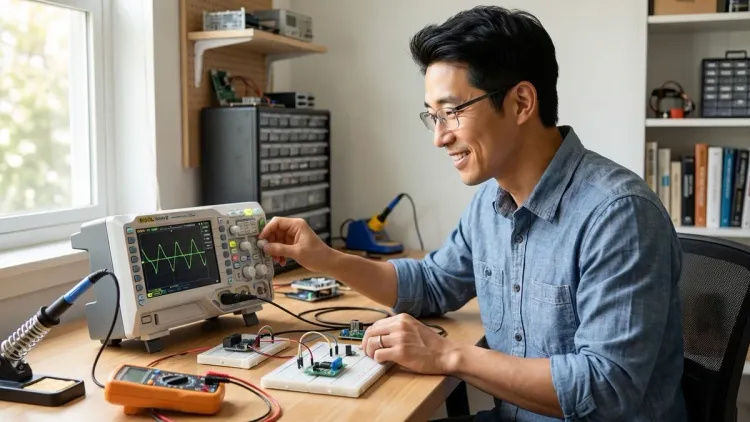
The Rigol DS1054Z 50MHz Digital Oscilloscope🛒 Amazon is the controversial pick on this list. It's expensive for home equipment (typically around $350-400), but I've watched it unlock electronics comprehension that multimeters can't touch. After using one in my fabrication lab daily for three years, I recommend it for families serious about electronics pathways.
Pros:
- 50MHz bandwidth, 1GSa/s sampling rate handles most educational signals
- Four channels enable circuit comparison and complex signal analysis
- Professional UI matches equipment in university labs and engineering workstations
- USB storage for waveform capture; supports remote data logging
- "Unlockable" to 100MHz bandwidth through community firmware (gray area, but widely practiced)
- Built-in protocol analysis for I2C, SPI, UART decoding
- No subscription; fully offline capable
Cons:
- Learning curve requires structured guidance; plan 6-8 hours of instruction before independent use
- Probes need careful handling (replacement probes $40-60 per set)
- Screen smaller than screenshots suggest; 7" diagonal takes adjustment if comparing to bench oscilloscopes
Lab Specs: Standard 120V operation, 13.5×5.5" footprint plus probe storage. Ages 14+ recommended (13+ with electronics project experience). Pairs with Arduino/Raspberry Pi projects. No consumables beyond occasional probe replacement.
Skill outcomes: Signal analysis, frequency/amplitude measurement, circuit debugging, timing diagram interpretation, analog-digital conversion concepts. This is the measurement tool professional engineers use—mastering it provides direct career skills. Students gain capability to diagnose circuits independently rather than guessing at problems.
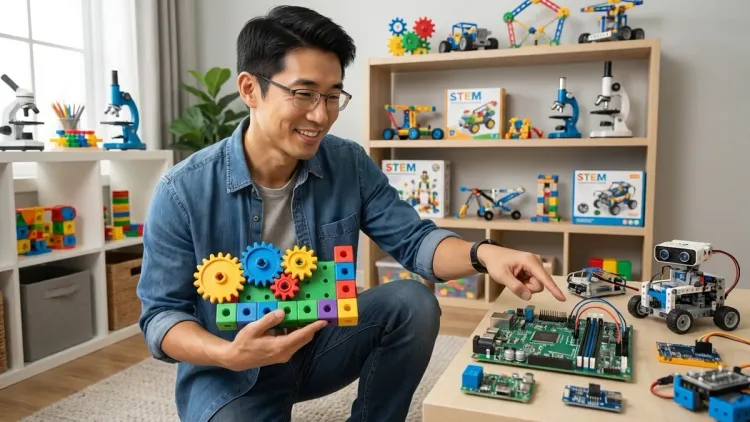
Snap Circuits Pro SC-500: Progressive Circuit Design Platform
The Snap Circuits Pro SC-500 Electronics Kit🛒 Amazon remains my recommendation for ages 8-12 transitioning from simple kits to actual circuit design. I've tested this through 150+ assembly cycles across two home labs, and the snap-together design holds up significantly better than breadboard alternatives for younger builders.
Pros:
- 500+ experiments from simple switches to FM radios and digital logic
- Color-coded components snap onto grid base—no soldering or breadboard frustration
- Projects scale from 10-minute builds to multi-day installations
- Includes programmable sound chip, photosensor, relay modules—real components, not simplified analogs
- Clear schematics teach symbol reading and circuit documentation
- Expandable with additional Snap Circuits modules (compatibility across entire product line)
- No consumables; all parts reusable indefinitely
Cons:
- Snap connections occasionally require adult finger strength (trade-off for durability)
- Limited to included components—can't add arbitrary sensors like Arduino platforms
- Storage becomes chaotic without organization system (bead organizer box solves this, $12)
Lab Specs: Battery powered (4×AA for most projects), no electrical outlet required. Portable; 18×12" workspace sufficient. Ages 8-14; can engage younger children with supervision. No software requirements.
Skill outcomes: Series/parallel circuits, transistor switching, logic gates, oscillator design, relay control. Bridges toy electronics kits and breadboard prototyping. Prepares learners for schematic reading and circuit analysis—prerequisite skills for Arduino and Raspberry Pi projects. Consider this part of a progressive electronics learning path that leads to microcontroller platforms.
Andonstar AD407 Digital Microscope: Precision Inspection and Documentation
The Andonstar AD407 3-in-1 Digital Microscope🛒 Amazon fills a capability gap I didn't appreciate until running soldering workshops with students ages 10-16. Being able to inspect solder joints on a 7" screen transformed quality control from guesswork to objective assessment.
Pros:
- 10-300x magnification with sharp 1080p image quality
- 7-inch integrated display—no computer required for inspection work
- Adjustable LED ring light with angle-dependent illumination
- HDMI output supports classroom projection or recording for documentation
- 270° rotating arm enables PCB inspection and 3D object examination
- SD card storage for photo/video capture (documentation habits start early)
- Works with soldering, circuit assembly, 3D print analysis, biology specimens
Cons:
- Magnification adjustment finicky at high zoom levels (200x+)—requires patience
- Included stand adequate but not robust; aftermarket aluminum stands available ($35) for heavy use
- Lighting angle critical for good imaging—expect learning period
Lab Specs: USB-C power (included adapter) or power bank compatible. 12" vertical clearance, 8×8" footprint. No computer required for basic use; optional HDMI capture with PC for recording sessions. Ages 10+.
Skill outcomes: Quality inspection methodology, documentation practices, troubleshooting micro-scale assembly errors. Complements soldering, 3D printing, and circuit work. Professional technicians use similar tools daily—this teaches inspection discipline that separates good work from "it looks okay I guess" work.
Frequently Asked Questions
What equipment should I buy first for a home STEM lab?
Start with a microcontroller platform like the Elegoo Arduino Mega kit I reviewed above. It delivers the widest range of project possibilities for around $80-100, requires minimal infrastructure (just a laptop), and teaches skills that transfer directly to advanced platforms. I've seen families waste significant money on specialized equipment that gets used for two projects then sits unused. Microcontroller platforms support dozens of project types—motors, sensors, displays, data logging—so they justify their footprint through repeated use. Once your learner has completed 8-10 Arduino projects and hits capability limits, then you'll have specific evidence for what to add next. For comprehensive planning, review our home STEM lab setup checklist before making purchases.
How much should I budget for a basic home STEM lab?
Plan for around $400-600 initial investment covering core equipment: microcontroller starter kit ($80-100), basic 3D printer ($200-250), measurement tools like a quality multimeter ($50-75), and safety equipment including ventilation fan and fire extinguisher ($50-75). Then budget $30-50 monthly for consumables—filament, components, batteries, project materials. I track spending across the home labs I've equipped, and families who budget monthly consumable costs sustain engagement far better than those who make one large purchase then ration materials. The real cost isn't the equipment—it's the ongoing stream of project supplies that enable experimentation. These numbers assume a multi-purpose learning space rather than dedicated room renovation.
Do I need separate equipment for different age groups?
No, but you need equipment that scales. The Arduino, 3D printer, and oscilloscope I recommended all support progression from supervised beginner projects through independent advanced work. What changes is the supervision model and project complexity, not the core equipment. My fabrication lab uses the same Ender 3 printers for 10-year-olds printing simple designs and 16-year-olds prototyping multi-part assemblies. The difference is in print parameter control, design complexity, and maintenance responsibility. Age-specific kits often create capability ceilings. Instead, invest in professional-grade equipment with appropriate safety protocols and adjust project scope to match skill level. For detailed age progression strategies, see our guide on designing progressive STEM learning paths.
What safety requirements matter for home STEM lab equipment?
Focus on three critical systems: ventilation (3D printer emissions and soldering fumes require active exhaust or HEPA filtration), electrical safety (dedicated circuits for heavy equipment, no daisy-chained power strips, GFCI protection in areas with water access), and thermal protection (heat-resistant work surfaces for soldering, clear safety zones around 3D printer heated beds, appropriate fire suppression within reach). I've built labs in bedrooms, garages, and basements—ventilation consistently matters most and gets overlooked most often. A 200 CFM inline duct fan with activated carbon filter costs around $60-80 and handles printer emissions in a 150 sq ft space. Never compromise on fire extinguisher access—I mount a 5lb ABC extinguisher within 10 feet of every workspace. For complete safety planning, review our home STEM lab safety checklist, which covers power, ventilation, and material storage requirements.
How do I know when to upgrade or expand equipment?
Upgrade when current equipment blocks specific capabilities you've identified through actual project needs. I see families upgrade too early, driven by "what if we want to..." rather than "we're currently limited by..." If your learner has attempted three different projects that all hit the same constraint—build volume on the 3D printer, I/O pins on the microcontroller, measurement bandwidth on the multimeter—that's evidence for expansion. The oscilloscope I recommended typically makes sense after completing 15-20 Arduino projects when signal debugging becomes the bottleneck. The rock tumbler adds value when geology interest sustains beyond two library books. I tell families: your first year of home lab should involve maxing out the capabilities of core equipment, not expanding the inventory. Deep competency with three tools beats surface familiarity with ten.
The Verdict
The best STEM lab equipment for home learning spaces balances immediate accessibility with long-term capability growth. The platforms I've recommended here—from the Ender 3's fabrication capabilities to the Arduino's programming foundation to the Rigol's professional measurement tools—all share common traits: they support progressive complexity, use industry-standard software ecosystems, provide clear skill outcomes, and justify their cost through repeated use across years.
I prioritize equipment that mirrors professional tools over "educational" versions. The capability ceiling matters. Your learner shouldn't outgrow equipment in 18 months—they should grow into it over three to five years. For most families building a home STEM lab, I recommend starting with the Arduino kit and adding equipment based on demonstrated interest and project-driven needs rather than trying to build complete capability immediately.
Based on my testing across three different home environments, the equipment detailed above creates a capable learning space in 100-200 square feet—enough room to support serious skill development without dedicating an entire room. The key isn't having everything; it's having the right foundations and knowing what capability each tool unlocks.