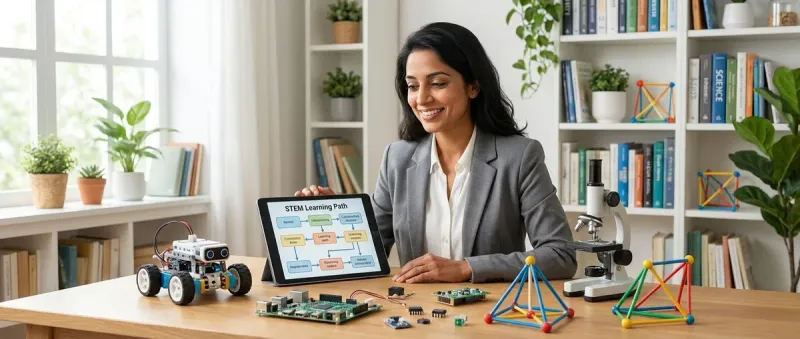
At age twelve, your child stands at a remarkable developmental crossroads. Their abstract reasoning has matured enough to grasp systems thinking, yet they still retain that wonderful hands-on curiosity that makes learning feel like exploration rather than obligation. You're here because you want to channel that energy into something meaningful—a structured how to design stem learning path for 12 year olds that builds genuine capabilities, not just surface-level engagement.
This guide will walk you through creating a progressive, skill-building STEM curriculum tailored to your child's current abilities and future goals. You'll learn how to assess where they are, identify concrete capability milestones, select tools that prepare them for industry-standard platforms, and structure their learning so each skill builds on the last. Expect to spend about 2-3 hours planning initially, then ongoing adjustments as your child progresses.
The beauty of twelve? They can now handle real programming languages, design for actual fabrication, and contribute to legitimate citizen science research. Let's build a path that honors that capacity.
What You'll Need
Before you begin designing your child's learning path, gather these planning tools and resources:
- Skills assessment worksheet (paper or digital spreadsheet to map current capabilities)
- Notebook or digital document for tracking milestones and progress
- Access to your child for a 30-minute conversation about interests and frustrations
- Budget estimate (ballpark figures for initial equipment and recurring costs)
- Space inventory of your home learning area (measure available workspace, power outlets, ventilation)
- Device compatibility list (operating systems, RAM, storage available on computers/tablets you already own)
- Calendar or timeline tool for mapping 12-month learning progression
- Samples of your child's recent work (projects, artwork, writing—anything that shows current problem-solving approaches)
Step 1: Conduct an Honest Skills Audit
Start by sitting down with your child—not to test them, but to have a genuine conversation about what they already know and where they feel stuck. This isn't about grades or achievement anxiety. Ask them to show you something they've built or created recently, whether it's a Minecraft redstone circuit, a scratch animation, or a cardboard prototype of something they imagined.
Watch how they explain their process. Do they understand cause-and-effect relationships? Can they articulate why something didn't work? Twelve-year-olds often have fragmented skills—they might know basic block-based coding but never learned to debug systematically. They might build elaborate LEGO structures without understanding the engineering principles that make them stable.
Document specific capabilities, not vague assessments. Instead of "good at math," note "can calculate percentages mentally but struggles with word problems requiring multi-step logic." Instead of "likes science," write "asks sophisticated questions about climate systems but hasn't designed an experiment independently."
Pay particular attention to frustration points—these reveal the edges of their current capacity and show you exactly where to focus next. If they abandon projects when code doesn't work immediately, they need debugging strategies. If they build impressive prototypes but can't explain how they'd improve them, they need iterative design frameworks.
This audit should reveal three to five concrete skill gaps that, once addressed, would unlock whole new categories of projects. These gaps become your roadmap.
Step 2: Define Clear Capability Milestones for the Year
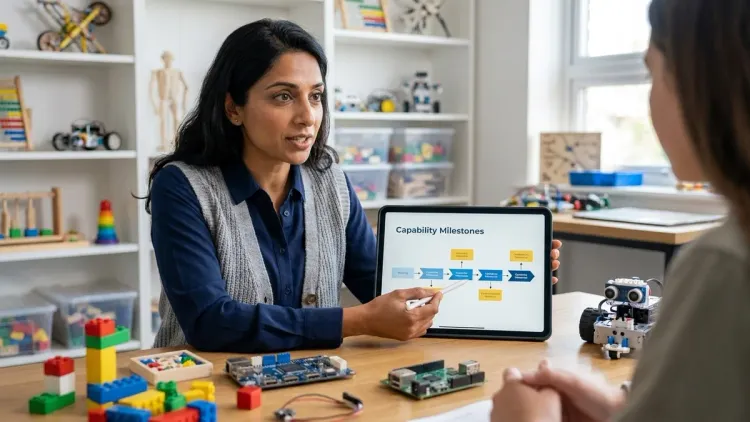
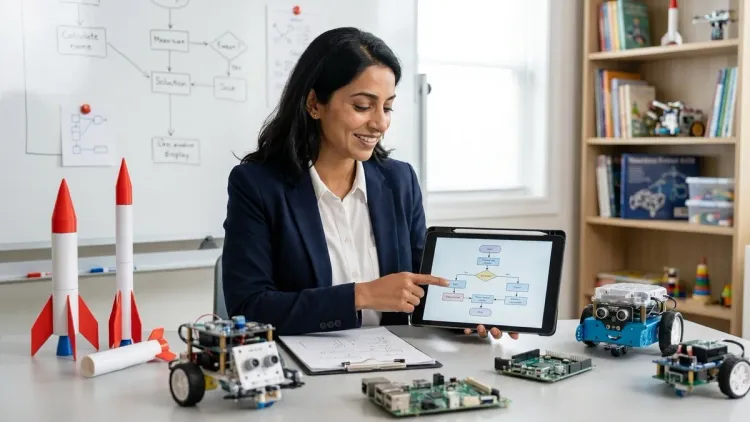
Now translate those gaps into measurable outcomes—not "learn Python," but "write a functional Python script that reads sensor data and triggers an action based on threshold values." Twelve-year-olds respond beautifully to concrete goals they can visualize completing.
Structure milestones across these capability domains:
Programming and computational thinking: Transitioning from block-based to text-based coding, understanding syntax and debugging, working with variables and functions, basic data structure manipulation. A realistic 12-month milestone might be "complete three Arduino projects using C++ with minimal help, understanding libraries and function calls."
Physical computing and electronics: Reading circuit diagrams, understanding voltage/current/resistance relationships, safely prototyping with breadboards, recognizing when to use sensors vs actuators. Target something like "design and build a functional environmental monitor using Arduino or micro:bit with temperature, humidity, and light sensors."
3D design and fabrication: Moving from simple block modeling to parametric design, understanding print orientation and support structures, troubleshooting failed prints. Aim for "design a functional multi-part assembly in Tinkercad or Fusion 360, export for 3D printing with appropriate tolerances."
Scientific method and data literacy: Formulating testable hypotheses, collecting data systematically, recognizing patterns vs noise, presenting findings clearly. Consider "complete a citizen science project collecting environmental data for 30+ days and submit findings to a real research database."
Each milestone should take 6-12 weeks of consistent effort—long enough to develop genuine competency, short enough to maintain motivation. You're building a portfolio of real capabilities, not just checking boxes.
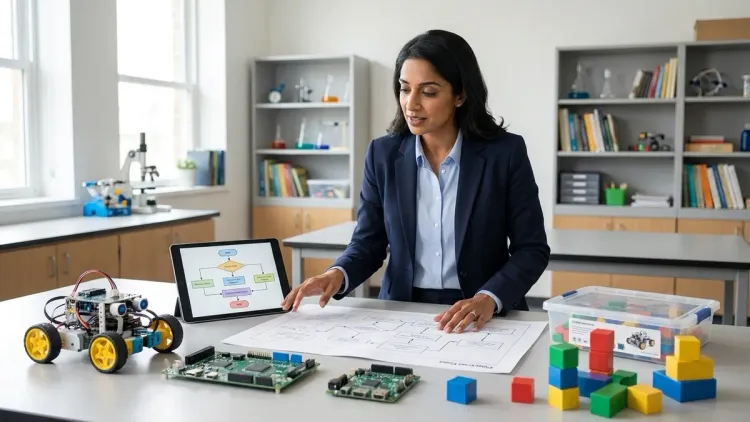
Step 3: Map Tools to Skills in a Progressive Sequence
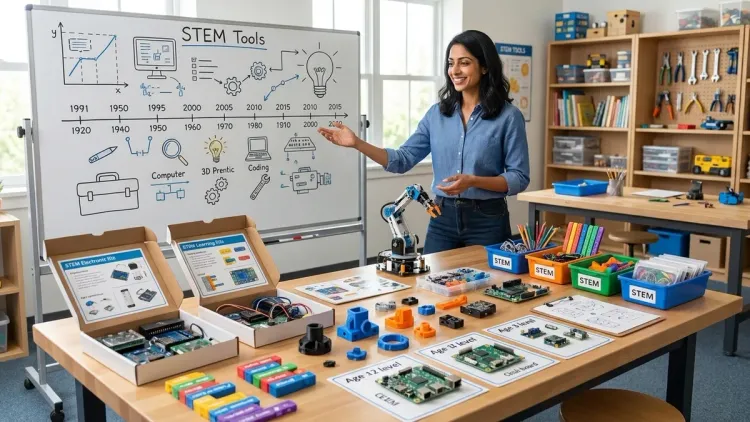
Here's where many parents stumble—they buy impressive equipment without considering how tools connect to each other in a learning progression. Your child needs a pathway where each platform builds skills that transfer to the next, more sophisticated tool.
Start with their current comfort level and create a three-tier structure:
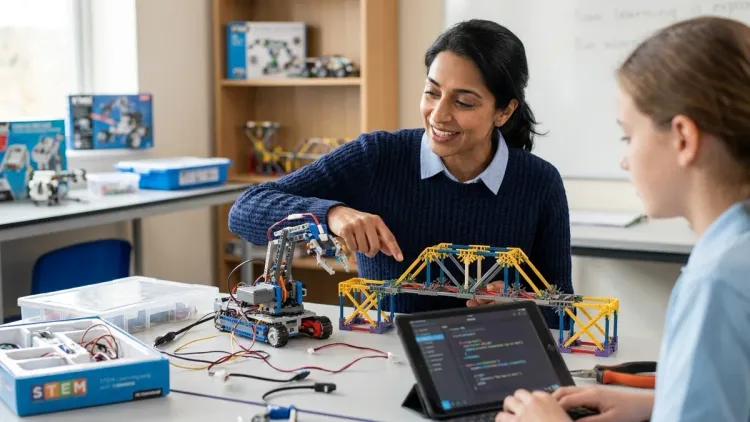
Foundation tier (immediate start): Choose tools that build confidence while introducing industry-standard concepts. If they're comfortable with Scratch but haven't touched text-based code, the LEGO SPIKE Prime Set bridges that gap beautifully—it supports both block-based Scratch and Python programming, letting them transition gradually. Lab specs: requires Windows 10+/macOS 10.14+/ChromeOS, no subscription after purchase, expandable with standard LEGO Technic elements, extremely durable for repeated disassembly.
Intermediate tier (3-6 months in): Introduce genuine prototyping platforms. The Arduino Starter Kit teaches C++ programming, breadboard prototyping, and sensor integration—all skills that transfer directly to professional embedded systems development. Lab specs: requires Arduino IDE (free, offline-capable, Windows/Mac/Linux), no consumables except occasional component replacements, compatible with thousands of third-party shields and sensors, powered via USB (no special electrical requirements).
Advanced tier (6-12 months in): Add tools for fabrication and advanced projects. A beginner-friendly 3D printer like the Creality Ender 3 V3 SE enables your child to design, iterate, and create physical objects—essential for moving from digital concepts to tangible prototypes. Lab specs: requires 110V outlet with 350W capacity, Creality Print slicer (free, Windows/Mac/Linux), uses standard 1.75mm PLA filament (consumable, around $20-25/kg), open-frame design requires dedicated workspace with ventilation, sturdy but requires periodic maintenance.
Critical consideration: Avoid platforms that lock you into proprietary ecosystems requiring ongoing subscriptions. You're investing in transferable skills, not brand loyalty. Check whether each tool uses standard programming languages, open file formats, and compatible hardware—these are signs it's teaching industry-relevant capabilities rather than platform-specific tricks.
Link tools to specific milestones. "To complete the environmental monitoring project, you'll use the Arduino with DHT22 temperature/humidity sensor and TSL2591 light sensor, then visualize data using Python matplotlib library." This shows your child exactly how tools combine to achieve real outcomes.
Step 4: Create a Balanced Weekly Learning Structure
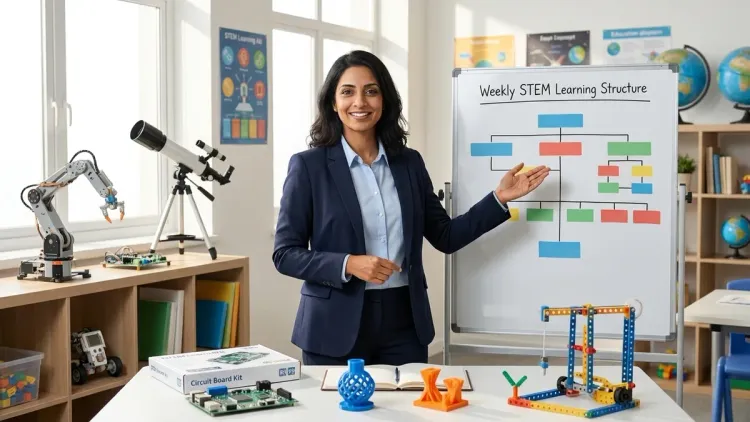
Twelve-year-olds need structure with flexibility—enough routine to build consistent skills, enough freedom to follow interesting tangents. I've watched dozens of families try rigid daily schedules, only to watch motivation evaporate within weeks. The alternative works better.
Design a weekly rhythm with three components:
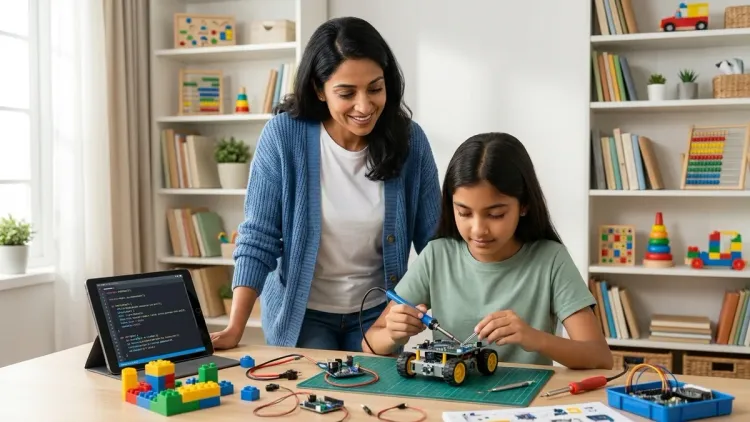
Skill-building sessions (2-3 hours weekly, can split across days): Focused time working through structured tutorials or curriculum. This is where they learn new syntax, practice new techniques, build foundational knowledge. Keep these sessions short enough that they end before frustration peaks—two 90-minute sessions beat one marathon four-hour session every time. During these sessions, you're the support crew, not the director. Sit nearby, available for questions, but resist the urge to solve problems for them.
Project work (3-5 hours weekly): Applying those new skills to something they've chosen to build. This is messier, involves more failure, and creates more genuine learning. Your role here is even lighter—check in periodically, ask good questions ("What did you try? What happened? What might you try differently?"), and celebrate interesting failures as much as successes. Project-based learning at this age teaches persistence and systems thinking that structured lessons can't touch.
Documentation and reflection (30-60 minutes weekly): Often overlooked, but crucial. Have your child maintain a simple project journal—what worked, what didn't, what they'd do differently next time. This metacognitive practice accelerates learning dramatically. It also creates a portfolio they can show for internships, summer programs, or simply to remember their own progress when motivation dips.
Balance screen-based and screen-free work. Even in tech-focused STEM learning, hands-on prototyping, sketching circuit diagrams, building cardboard mockups, and testing physical iterations matter enormously for spatial reasoning and creative problem-solving. My own research consistently shows that children who prototype physically before coding solve problems more creatively than those who work exclusively in digital environments.
Expect this structure to evolve. Some weeks they'll dive deep into a fascinating project and skip formal lessons entirely. That's fine—the structure exists to maintain momentum, not to constrain genuine curiosity.
Step 5: Build in Assessment Without Pressure
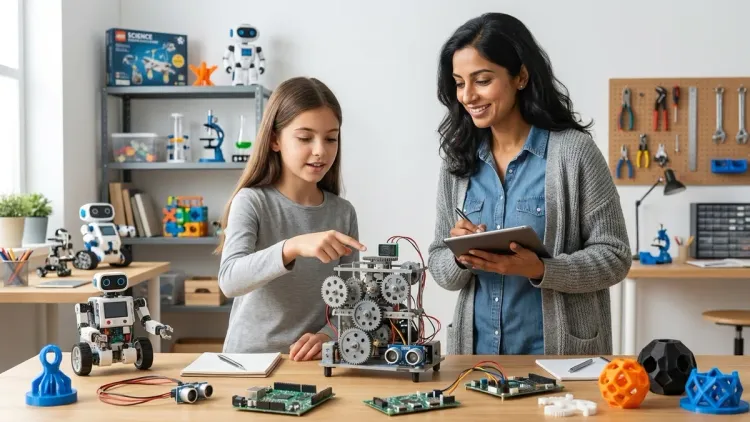
You need feedback mechanisms that show whether your child is actually gaining competency, but formal testing tends to undermine intrinsic motivation. Instead, use capability demonstrations—can they actually do the thing?
Every 6-8 weeks, introduce a small challenge project that requires skills they've supposedly learned. Frame it as a puzzle, not a test: "I wonder if you could build a device that sends you a notification when your plant needs water" or "Could you design a phone stand that adjusts to three different angles?"
Watch them work. Can they start independently, or do they freeze? Do they reference documentation effectively, or expect you to provide all answers? Can they debug systematically when things don't work? These behaviors tell you far more than any quiz could.
Adjust your path based on what you observe. If they complete challenges quickly and easily, you're moving too slowly—introduce more sophisticated concepts. If they struggle repeatedly with the same type of problem, slow down and provide more scaffolded practice in that specific area. There's no standardized pace here; twelve-year-olds' development varies enormously based on prior exposure and cognitive style.
Create opportunities for them to teach what they've learned—explaining concepts to a younger sibling, creating a tutorial video, or leading a workshop for peers. Teaching reveals understanding (or lack thereof) like nothing else. When my own daughter explained circuits to her ten-year-old brother, she suddenly realized she didn't actually understand parallel vs series configurations—a gap her project work had hidden because she'd been following instructions without genuine comprehension.
Document progression tangibly. Keep early projects alongside recent ones. Photograph breadboard circuits before disassembly. Archive code with dated comments. This visible evidence of growth becomes powerfully motivating during inevitable rough patches when they feel like they're not improving.
Step 6: Connect Learning to Real-World Applications
Twelve-year-olds are developing sophisticated awareness of real-world problems—climate change, social justice, technological impacts. Channel that awareness into your STEM path. Show them exactly how the skills they're building connect to meaningful work adults do in actual careers.
When they're learning sensor programming, introduce them to environmental monitoring and citizen science contributions. Organizations like SciStarter list hundreds of real research projects accepting data from student scientists. Collecting water quality data for a university research project transforms "learning to code a pH sensor" into "contributing to research that protects local ecosystems."
When they're mastering 3D design, show them assistive technology projects—organizations that need custom-designed adaptive tools for people with disabilities. Suddenly they're not just practicing CAD skills; they're solving real problems for real people.
Invite professionals to share their work (virtual conversations work perfectly). A 20-minute Zoom call with a robotics engineer, environmental scientist, or game developer who uses skills your child is learning creates aspirational connections that outlast any curriculum. Ask them to show something they're currently building and explain how they learned what they know. Most professionals are remarkably generous about these conversations when you're clear that you're seeking inspiration, not job-hunting.
Enter competitions or exhibitions when your child is ready—not as high-stakes judgment, but as opportunities to share work and see what peers are building. Science fairs, robotics competitions, maker faires, and online showcases provide external validation and community connection that home learning sometimes lacks.
The goal isn't early career specialization—twelve is far too young for that. The goal is helping them see that the skills they're building matter beyond school assignments, that people use these capabilities to solve problems and create things that improve lives.
Step 7: Plan for Evolution and Pivot Points
Your learning path isn't static—it should evolve as your child's interests sharpen and their capabilities expand. Build deliberate checkpoints every three months to assess whether the current trajectory still makes sense.
During these checkpoints, ask:
What energizes them? Pay attention to which projects they return to voluntarily, which topics spark unprompted questions, which YouTube videos they watch in their free time. These signals matter more than what you hoped they'd love.
What are they avoiding? Sometimes avoidance signals frustration with genuine difficulty—that's when you lean in with more support. Sometimes it signals actual disinterest—that's when you pivot. Distinguishing between the two requires conversation and observation, not assumption.
What prerequisites are missing? Sometimes progress stalls because an assumed foundational skill turns out to be shaky. They might struggle with Arduino projects not because programming is hard, but because they don't understand circuit fundamentals. Backfilling gaps isn't failure; it's smart course correction.
Where do they want to go deeper? As skills develop, interests often narrow productively. Your child might start with broad "robotics" interest but discover they're fascinated specifically by computer vision, or biomechanical design, or swarm behavior. Let them specialize—going deep develops expertise better than staying superficially broad.
Prepare for common pivot points: Many twelve-year-olds discover they prefer design over coding, or data analysis over hands-on building, or teaching over individual creation. None of these preferences are problems—they're clarifications. A STEM path can emphasize different disciplines while still building computational thinking, problem-solving, and scientific reasoning.
Be willing to abandon tools that aren't serving the journey. If you invested in a platform that turns out to be frustrating or limiting, don't fall prey to sunk cost fallacy. Sell it, donate it, and redirect resources toward tools that actually match your child's evolving needs. The best learning path isn't linear—it's responsive.
Step 8: Foster Independence and Self-Directed Learning
Your ultimate goal isn't to manage your child's STEM education indefinitely—it's to teach them to manage their own learning. By the end of this year-long path, they should be capable of identifying skills they need, finding resources to learn them, and assessing their own progress.
Start transferring responsibility gradually:
Teach resource literacy early. Show them how to find quality tutorials, read documentation, evaluate whether a YouTube video is teaching good practices or sloppy shortcuts. Sit with them the first few times they search for solutions independently—this models the research process rather than just handing them answers.
Normalize getting stuck. When they encounter problems, resist the urge to immediately provide solutions. Instead, guide them through problem-solving frameworks: "What's the smallest piece of this that you could test separately? What does the error message actually say? What did you change right before it stopped working?" These questions teach debugging mindsets that transfer to every technical domain.
Encourage them to find their own learning community. Online forums, local maker spaces, school clubs, or even Discord servers focused on specific platforms—twelve is old enough to participate thoughtfully in technical communities. Monitor initially for safety, but give them space to ask questions, share work, and learn from peers. This builds the professional skill of learning collaboratively.
Create space for self-designed projects. After they've completed several guided projects, challenge them to propose something entirely their own: "Design a project that uses at least three skills you've learned this year, solves a problem you care about, and teaches you at least one new thing." Provide budget and support, but let them drive specification, design, and execution. These self-directed projects reveal what they've truly internalized.
Celebrate intelligent failure. When projects don't work despite good planning and effort, dissect what went wrong without disappointment. Some of my most successful adult students trace their competence back to childhood projects that failed spectacularly but taught them more than a dozen successful paint-by-numbers kits. Your reaction to failure shapes whether your child develops resilience or fragility.
By year's end, you should be consulting more than directing—offering resources and accountability while they increasingly drive their own learning priorities.
Pro Tips & Common Mistakes
Start with existing interests, even if they seem frivolous. Your child loves gaming? Build a path toward game design and programming. Obsessed with marine biology? Focus on environmental sensors and data science. The technical skills transfer regardless of initial context, but intrinsic motivation doesn't—you can't force it, only channel it.
Don't confuse expensive with effective. I've watched families invest thousands in professional-grade equipment before their child has mastered fundamentals. An Arduino kit under $100 teaches more than a $2000 robot platform if the child isn't ready for that complexity. Build incrementally—upgrade when current tools become limiting, not before.
Avoid curriculum paralysis. Many parents spend months researching the "perfect" curriculum, worried about making the wrong choice. You'll learn more from three months of imperfect action than six months of perfect planning. Start with the information you have, observe your child's response, and adjust. The path reveals itself through walking, not through planning.
Budget for consumables and failures. 3D printer filament, replacement electronic components, materials for prototypes—these ongoing costs surprise families who budgeted only for initial equipment. Plan for around $30-50 monthly for active makers. Also budget emotionally for failed prints, fried components, and abandoned projects. They're not waste; they're tuition.
Watch for signs you're pushing too hard. If your child consistently avoids lab time, completes projects mechanically without curiosity, or stops sharing their work with you, pull back. Burned-out twelve-year-olds often develop lasting aversion to STEM. Better to slow down and preserve genuine interest than to push through and kill motivation chasing someone else's timeline.
Common mistake: treating screen time as monolithic. Thirty minutes of focused Arduino programming develops skills; thirty minutes of random YouTube browsing doesn't. Quality matters more than quantity. That said, balance still matters—screen-free prototyping, sketching, and physical building complement digital work and develop different cognitive capacities.
Frequently Asked Questions
How do I design a STEM learning path if my 12 year old has never done any STEM activities before?
Start with accessible, success-focused foundation projects that build confidence before complexity. Choose a versatile platform like LEGO SPIKE Prime that supports both block-based and text-based programming, allowing your child to begin where they're comfortable and progress at their own pace. Spend the first month on guided projects that guarantee success—following clear instructions to build functioning devices teaches basic vocabulary and workflows without overwhelming frustration. Then gradually introduce open-ended challenges where they modify existing designs before creating entirely original projects. Late starters often progress rapidly once initial anxiety dissolves, so resist the urge to compare their timeline to children who've been tinkering since age six.
Should my 12 year old learn Arduino or Raspberry Pi first for their STEM learning path?
For most twelve-year-olds, Arduino makes a better starting point because it focuses specifically on physical computing and embedded programming—the satisfaction of making lights blink, motors spin, and sensors respond happens quickly. Arduino's C++ syntax is simpler than full Python, the hardware is more forgiving of beginner mistakes, and projects typically cost less because you're not powering a full computer. Raspberry Pi becomes valuable later when they want to build more complex systems requiring an operating system, web connectivity, or advanced data processing. That said, if your child already has strong Python skills and wants to work with machine learning or computer vision, Pi might fit better—assess their current capabilities rather than following a universal rule.
How much time should my 12 year old spend weekly on their STEM learning path?
Aim for five to eight hours weekly distributed across three or four sessions—enough to maintain skill momentum without crowding out other developmental needs like physical activity, creative play, social connection, and unstructured downtime. Quality and consistency matter more than quantity; two focused 90-minute sessions accomplish more than one exhausting four-hour marathon. Watch for signs of optimal engagement: they lose track of time, return to projects voluntarily, or talk about them unprompted. If they're watching the clock or completing work mechanically, reduce duration even if it means slower progress—sustained interest over years matters more than intensive short-term gains. Remember that informal learning counts too; a child debugging code while chatting with online peers is developing both technical and collaboration skills simultaneously.
When should I add 3D printing to my 12 year old's STEM learning path?
Introduce 3D printing when your child has demonstrated sustained interest in building physical projects and has basic digital literacy—typically after they've completed several electronics or robotics projects and expressed frustration with available parts or desire to create custom designs. They should be comfortable with computer interfaces, capable of following multi-step procedures, and mature enough to understand safety protocols around heated components. Plan to dedicate three to four hours for initial setup, calibration, and learning basic slicer software before attempting real projects. Start with Tinkercad for modeling—it's free, browser-based, and requires no installation. Your first printer should prioritize reliability over features; budget around $250-400 for a beginner-friendly enclosed model with automatic bed leveling. Ensure you have dedicated workspace with ventilation, as even PLA filament produces particles you don't want accumulating in bedroom air.
Summary
Learning how to design stem learning path for 12 year olds means building from genuine capability assessment, not age-based assumptions. You've now got a framework: audit current skills honestly, define measurable milestones, select tools that form progressive sequences, structure weekly rhythms that balance instruction with exploration, assess through demonstration rather than testing, connect learning to real-world applications, plan for evolution, and gradually transfer ownership to your child.
The path you create matters less than your willingness to adjust it. Stay responsive to your child's emerging interests, frustrations, and capabilities. The technical skills they build this year—programming, prototyping, systematic problem-solving, scientific thinking—will serve them regardless of which specific career they eventually pursue.
You're not just teaching STEM subjects. You're teaching your child that they can learn hard things, that persistence through frustration produces capability, and that their ideas can become tangible realities. That's the real education.