
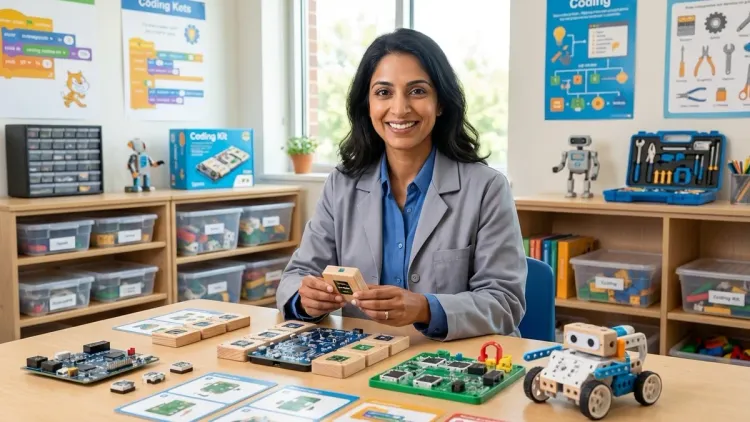
You want your child to develop real programming skills—but you're not eager to hand them a screen at age four. That's the tension so many parents feel, and it's completely valid. This screen free coding learning path progression checklist walks you through the concrete steps from tactile, unplugged coding tools all the way to industry-standard Arduino programming. You'll know exactly which skills to build first, how to recognize readiness for the next stage, and which products support each milestone without wasting money on dead-end toys.
This guide is for parents who see coding as a skill-building investment, not entertainment. I'll show you how to move through each phase with intention, building computational thinking before your child ever touches a keyboard.

Foundation Stage: Ages 3-6 — Building Sequencing and Cause-Effect Logic
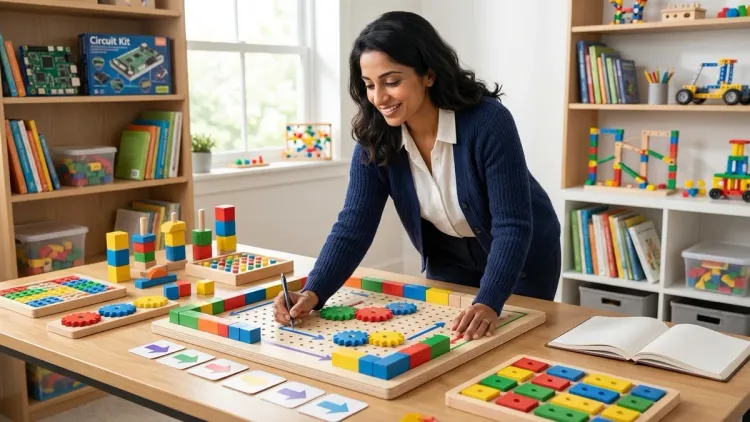
Before your child can write a single line of code, they need to internalize sequencing, directionality, and cause-and-effect reasoning. These are the cognitive building blocks that make programming intuitive later. Screen-free tools at this stage use physical manipulation—moving pieces, following paths, arranging cards—to make abstract logic tangible.
Robot toys with directional buttons (ages 3-5): Products like the Learning Resources Code & Go Robot Mouse Activity Set use physical arrow buttons to program a path. Your child presses "forward, right, forward" and watches the mouse execute the sequence, building immediate cause-effect feedback without text or symbols.
Sequence cards and storyboarding kits (ages 4-6): Tools like ThinkFun Code Master Programming Logic Game introduce algorithm design through puzzle cards. Kids arrange instruction cards to solve a maze, learning that order matters and debugging is part of the process—core programming concepts delivered through cardstock.
Unplugged board games that teach conditionals (ages 5-6): Games like Robot Turtles teach if-then logic (if there's a wall, use the laser card) without any electronics. This is where your child starts understanding conditionals—the foundation for all branching logic in real code.
Chunking complex tasks into steps (observational skill): At this stage, verbalize sequencing in daily routines: "First we put on socks, then shoes—what happens if we reverse that?" This cognitive habit—breaking tasks into ordered steps—is algorithm thinking in its purest form.
Pattern recognition activities (ages 4-6): Physical pattern blocks, sequence puzzles, and even clapping games build loop recognition. When your child notices "this part repeats three times," they're identifying loops—they just don't call them that yet.
Spatial reasoning through directional play (ages 3-5): Grid-based games where kids move pieces up/down/left/right mirror how code controls motion on a screen or a robot on a floor. Products with physical grids—like unplugged coding mats—let kids internalize coordinate systems through their bodies, not abstraction.
Skill Outcome Milestone: By the end of this stage, your child should be able to create a multi-step sequence to achieve a goal, recognize when the sequence fails (debugging), and revise it independently. They don't need to know the word "algorithm," but they should understand that instructions have an order and consequences.
Lab Specs: No power requirements. All materials should be drop-proof and toddler-safe (no small batteries or choking hazards). Look for kits that store flat or in small bins—durability for repeated use matters more than variety at this stage.
For a deeper look at how to evaluate these tools for longevity and developmental fit, see our Screen-Free Coding Kit Evaluation Checklist.
Intermediate Stage: Ages 6-9 — Introducing Functions, Loops, and Debugging Without Syntax

Once sequencing feels intuitive, your child is ready for abstraction: using symbols to represent actions, nesting instructions, and understanding that one "block" can contain multiple steps. This is where screen-free coding learning path progression bridges concrete manipulation and representational thinking.
Card-based coding systems with function cards (ages 6-8): Kits like Osmo Coding Starter Kit for iPad (used without the screen component in some activities) or purely unplugged equivalents use cards to represent functions—reusable chunks of code. Your child learns that "jump" can mean "move forward twice, then up once," teaching abstraction and efficiency.
Physical programming boards with loops and conditionals (ages 7-9): Products like Code & Go Robot Mouse Advanced Sets introduce loop tiles and conditional switches. Your child programs the robot to "repeat this path three times" or "if sensor detects obstacle, turn right," mirroring for loops and if statements in real code.
Collaborative unplugged coding games (ages 6-9): Games where one child writes instructions and another executes them—human robot activities—teach communication precision. When your child's "instructions" fail because they weren't specific enough, they experience what programmers call semantic errors without the frustration of a screen.
Debugging challenges with intentional errors (ages 7-9): Kits or worksheets that present a broken sequence and ask "what went wrong?" build critical debugging skills. This is where your child learns that errors aren't failures—they're information. That mindset shift is essential before transitioning to text-based code.
Pattern abstraction and nested loops (ages 8-9): Activities that require recognizing "this three-step pattern repeats inside this five-step pattern" teach nested loops. Physical manipulatives make this visible in a way that screen-based block code sometimes obscures.
Binary logic games and sorting algorithms (ages 8-9): Unplugged games that teach how computers sort information (like card-sorting challenges) introduce algorithmic efficiency. Your child starts thinking about "better" vs "worse" ways to solve a problem—the heart of computational thinking.
Skill Outcome Milestone: Your child should be able to design a multi-step program using reusable functions, recognize and fix logic errors independently, and explain why a sequence works or doesn't. They're ready for visual block-based coding when they can abstract a physical sequence into symbolic representation without needing the physical objects present.
Lab Specs: Most products still require no power. Look for modular systems that expand (additional cards, tiles, or challenge packs) rather than single-use kits. Durability focus: laminated cards, sturdy tiles that won't warp, and storage solutions that keep pieces organized through dozens of uses.
For guidance on when your child is ready to move from these tools to screen-based platforms, read our guide on How to Transition from Screen-Free Coding to Scratch and Python Programming.
Transition Stage: Ages 9-11 — Block-Based Visual Programming with Hardware Control

This is where screen-free coding learning path progression meets the screen—but not passively. Your child uses visual block-based languages (Scratch, Blockly, or MakeCode) to control physical hardware. The tactile feedback loop remains: they write code, and a robot moves or a light blinks. This bridges the abstract nature of on-screen code with real-world cause and effect.
Block-based coding platforms that control robots (ages 9-11): Products like LEGO Mindstorms or VEX GO kits use drag-and-drop block coding to program motors and sensors. Your child writes code on a tablet, uploads it, and watches the robot execute—reinforcing that code does something tangible. Software requirements: iOS/Android tablets or Windows/macOS computers; typically offline-capable once software is installed, but initial setup requires internet.
Microcontroller starter kits with visual editors (ages 10-11): The micro:bit Go Bundle uses MakeCode, a block-based editor that compiles to actual microcontroller code. Your child drags blocks, but behind the scenes, the micro:bit is running real embedded code—preparing them for Arduino's text-based IDE without the syntax learning curve yet. Lab Specs: Requires micro-USB cable and AAA batteries for portable use; runs offline once code is uploaded; durable for classroom environments.
Sensor-driven conditional programming (ages 9-11): Kits with light, sound, or distance sensors teach event-driven programming: "when button pressed, do X" or "while distance < 10cm, do Y." This introduces real-time decision-making in code, a leap from pre-planned sequences.
Parallel processing and timing (ages 10-11): Block-based platforms that let your child run multiple scripts simultaneously (like Scratch's "when green flag clicked" across multiple sprites) teach concurrency—the idea that multiple processes can run at once. This concept is essential before Arduino, where managing timing without blocking code is a common challenge.
Debugging with serial monitors and LED feedback (ages 10-11): Visual coding platforms often include real-time variable displays or LED indicators. Your child learns to read debugging output—a critical skill for text-based programming, where print statements and serial monitors replace visual cues.
Skill Outcome Milestone: Your child should be able to write a multi-conditional program that responds to sensor input in real time, debug using output feedback, and explain how their code controls physical hardware. They're ready for text-based coding when block-based syntax feels limiting—when they want to do something the blocks don't support.
Lab Specs: Requires a computer or tablet (specs vary by platform—most run on Chromebooks or entry-level laptops). Check offline vs cloud-dependent functionality: some platforms (like Scratch) default to online but have offline editors; MakeCode works offline after initial download. Connectivity: USB for uploading code to hardware; Bluetooth for some robot kits. Expandability: Look for kits with sensor packs and motor add-ons that grow with skills rather than standalone closed systems.
Our Robotics Kit Compatibility Checklist helps you verify software and hardware compatibility before purchasing.
Advanced Stage: Ages 11+ — Arduino IDE and Text-Based Embedded Programming

This is the culmination of the screen free coding learning path progression: your child moves from visual blocks to industry-standard text-based code. Arduino is where hobbyist skills meet professional ones—the same IDE and language (C++) used in robotics labs, engineering firms, and university courses.
Arduino Uno R3 starter kits (ages 11+): The Arduino Starter Kit Official is the standard entry point. It includes the Uno board, breadboard, LEDs, resistors, and a project book that teaches C++ syntax through hands-on builds. Your child writes code in the Arduino IDE (free, runs on Windows/macOS/Linux, fully offline-capable), compiles it, and uploads via USB. Lab Specs: Requires USB-A cable and 5V power (from computer or wall adapter); breadboards and components are reusable across projects; expect occasional wire failures and LED burnout—factor in replacement packs.
Transitioning from blocks to text with hybrid editors (ages 11-12): Tools like ArduBlock or mBlock offer a block interface that generates Arduino C++ code in real time. Your child sees the text version of their blocks, making the syntax leap less jarring. This is a bridge, not a destination—use it for 2-3 projects, then move to pure text.
Sensor integration and analog input (ages 12+): Arduino projects with potentiometers, photoresistors, and temperature sensors teach analog-to-digital conversion and real-world data input. Your child learns to read datasheets, calculate resistor values, and write code that interprets noisy sensor data—practical engineering skills that screen-only code can't teach.
Libraries and code reuse (ages 12+): Arduino's ecosystem of community libraries (for servos, displays, sensors) teaches your child to read documentation, import dependencies, and build on others' work—mirroring professional software development. This is where coding becomes a collaborative, real-world skill.
Debugging embedded systems (ages 12+): Arduino has no interactive debugger. Your child uses serial print statements to trace variable values and logic flow—teaching the fundamentals of debugging without IDE guardrails. This is harder than block-based platforms, and that's the point. Frustration tolerance built here pays off in every future programming language.
Expanding to Arduino Nano, ESP32, and Raspberry Pi Pico (ages 13+): Once the Uno feels mastered, microcontroller diversity teaches that C++ skills transfer across platforms. The ESP32 adds Wi-Fi and Bluetooth; the Pico uses MicroPython. Your child learns that programming isn't device-specific—it's about understanding hardware interfaces and adapting code.
Skill Outcome Milestone: Your child should be able to write, compile, and debug original Arduino projects from scratch, read component datasheets to wire circuits independently, and modify library code to suit their needs. These are entry-level embedded engineering skills—the same ones used in IoT development, robotics startups, and university mechatronics programs.
Lab Specs: Arduino IDE requires minimal system resources (runs on old laptops). Power requirements: 5V USB or 7-12V barrel jack for standalone operation. Connectivity: USB for programming; optional Bluetooth/Wi-Fi with advanced boards. Safety: Soldering irons for permanent projects require ventilation and adult supervision until around age 14. Expandability: Infinite—Arduino is an open platform with thousands of compatible sensors, actuators, and shields. Durability: Boards can survive shorts and miswiring (to a point), but static discharge kills them; invest in anti-static wristbands for dry climates.
For more on Arduino-compatible robotics platforms, see Best Arduino Robotics Kits for Kids.
Supporting Infrastructure: Lab Setup and Continuity Across Stages
The screen free coding learning path progression only works if each stage builds on the last—and that requires intentional organization and progressive storage. You're not just buying products; you're curating a learning environment.
Dedicated storage for each stage (all ages): Keep screen-free tactile tools in one bin, block-based hardware in another, and Arduino components in labeled drawers. When your child revisits earlier stages (and they will—skills aren't linear), retrieval should be effortless. Clear bins with picture labels work for younger kids; drawer organizers with component labels (resistors, LEDs, sensors) work for teens.
Documentation and project journals (ages 6+): Encourage your child to photograph or sketch each completed project and note what worked or didn't. This isn't busywork—it's teaching version control and iterative design. By the Arduino stage, they should be keeping a lab notebook with circuit diagrams and code snippets, mirroring professional engineering practice.
Power and connectivity infrastructure (ages 9+): Once you introduce hardware, you need reliable USB ports (invest in a powered hub if using an old laptop), spare cables, and a consistent workspace with good lighting. Flickering connections cause frustration that looks like coding failure but is actually hardware failure—don't let bad cables sabotage confidence.
Expandability planning (all ages): Buy kits with open-ended expansion rather than closed ecosystems. A micro:bit or Arduino grows with your child through add-ons; a proprietary robot that only works with its app becomes e-waste when they outgrow it. Check compatibility with third-party sensors and components—open platforms win long-term.
Consumables budget (ages 11+): Arduino projects burn through LEDs, resistors, and jumper wires. Budget for replacement components quarterly. This isn't product failure—it's the cost of iterative learning. A box of 100 LEDs costs around $8 and lasts months; don't let a $0.10 burnt LED halt a project.
Software version management (ages 9+): Block-based platforms update frequently, sometimes breaking old projects. Pin software versions when something works, or keep offline installers. Arduino IDE is stable, but library updates can introduce breaking changes—teach your child to read changelogs and test before updating.
For a complete guide to setting up a space that supports this progression, see How to Build a Home STEM Lab.
Final Check Before You Go
Use this quick-reference checklist to verify your child's readiness for each stage:
Foundation Stage (Ages 3-6):
- ✓ Can follow multi-step verbal instructions independently
- ✓ Recognizes patterns and repeating sequences in daily life
- ✓ Understands that actions have predictable outcomes
- ✓ Shows frustration tolerance when a sequence doesn't work as expected
Intermediate Stage (Ages 6-9):
- ✓ Creates multi-step plans before acting (doesn't just guess-and-check)
- ✓ Explains reasoning for a sequence of steps
- ✓ Identifies errors in their own or others' instructions
- ✓ Understands that one action can represent multiple steps
Transition Stage (Ages 9-11):
- ✓ Comfortable with symbolic representation (icons and blocks feel intuitive)
- ✓ Reads and follows written instructions independently
- ✓ Troubleshoots using feedback (lights, sounds, error messages)
- ✓ Expresses curiosity about "how things work" behind the interface
Advanced Stage (Ages 11+):
- ✓ Tolerates delayed gratification (debugging takes time and patience)
- ✓ Reads technical documentation with adult support
- ✓ Types comfortably enough that syntax entry isn't a physical barrier
- ✓ Shows intrinsic motivation to build original projects (not just follow tutorials)
Frequently Asked Questions
How long should my child stay at each stage before moving forward in the screen free coding learning path progression?
There's no fixed timeline—readiness is skill-based, not age-based. Most children spend 6-18 months at the foundation stage, 12-24 months at the intermediate stage, and 6-12 months at the transition stage before feeling limited by block-based platforms. Watch for intrinsic frustration with current tools (not boredom, but "I want to do something this can't do") as the signal to advance. Rushing creates gaps; staying too long creates disengagement. When your child completes projects independently at their current stage without adult prompting, they're ready to explore the next.
Can my child skip screen-free stages and start directly with block-based coding or Arduino if they're older?
You can, but you'll likely circle back to fill gaps. A 12-year-old starting Arduino without prior computational thinking will struggle not with syntax, but with algorithm design—the "how do I break this problem into steps" thinking that screen-free tools build viscerally. If your child is older but new to coding, spend 2-4 weeks with intermediate-stage screen-free tools (not the preschool ones) to build debugging habits and sequencing intuition, then accelerate through block-based platforms in a few weeks rather than months. The goal isn't to complete every product in every stage—it's to ensure the cognitive foundations exist before adding syntax complexity.
What's the difference between screen-free coding and just playing with puzzles or games?
The intentionality of computational thinking instruction. A jigsaw puzzle builds spatial reasoning, but it doesn't teach sequencing, conditionals, or debugging—the core structures of code. Screen-free coding tools are designed with explicit parallels to programming concepts: loops, functions, branching logic. When you use them, you're naming those concepts aloud ("Look, you created a loop—this part repeats!"), connecting tactile actions to future text-based syntax. Play is the vehicle, but the learning outcome is specific. Generic problem-solving toys are valuable, but they won't accelerate the transition to Arduino the way purpose-built coding tools will.
Final Thoughts

The screen free coding learning path progression isn't about delaying screens—it's about building foundations that make screens productive when they do arrive. Each stage in this checklist develops specific cognitive skills that transfer directly to text-based programming, robotics, and eventually software engineering.
Your child doesn't need to master every product at every stage. They need to develop the thinking patterns each stage represents: sequencing, abstraction, debugging, hardware control, and finally, text-based syntax. Some kids race through in two years; others take five. Both paths are valid.
When your 13-year-old writes their first Arduino sketch that reads a sensor and makes a decision in real time, you'll see the throughline—from the preschool robot mouse they programmed with arrow buttons to the C++ for loop blinking an LED. That's not luck. That's progressive skill-building, one tactile step at a time.