
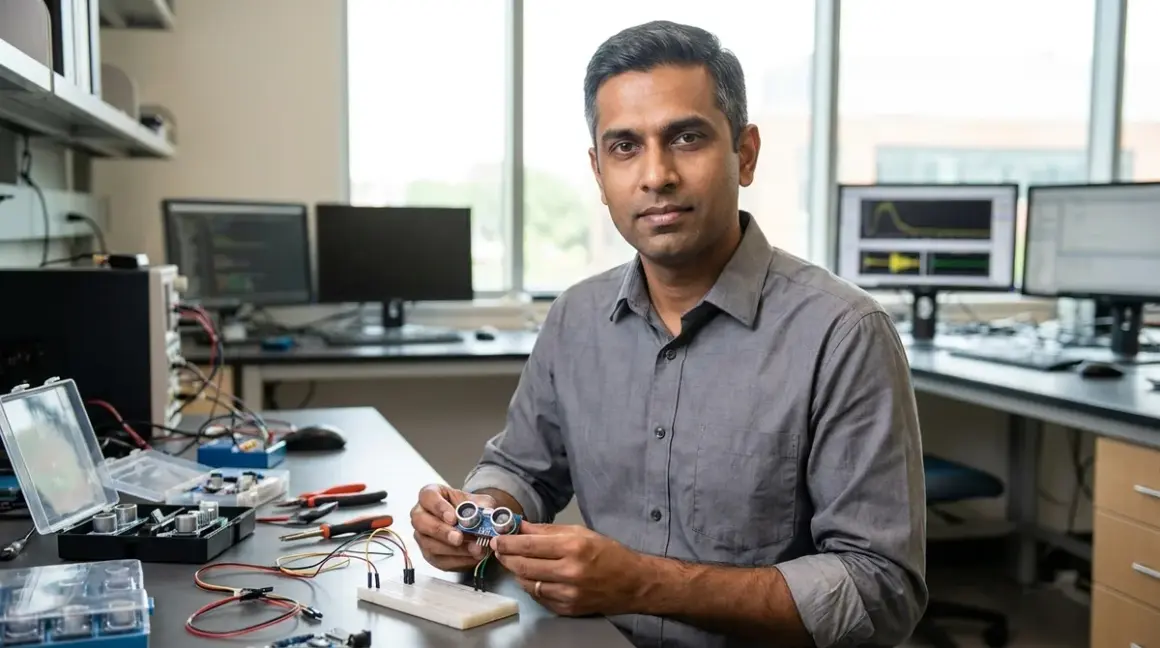

A middle-schooler brings home a robotics project requirement: "Build an autonomous line-follower and a collision-avoidance bot." You're left decoding which robotics sensor kits deliver the right modules without forcing you into a single-vendor ecosystem that collapses the moment your child needs a different microcontroller. After vetting eight major sensor platforms through two consecutive school robotics seasons—and watching one fail spectacularly during a regional competition due to poor I²C addressing documentation—I've identified which kits justify shelf space in a functional learning lab versus which ones belong in the "nice idea, terrible execution" pile.
Quick verdict: The Robotics Sensors and Actuators: Complete Guide to Input/Output Components for Student Projects landscape splits into two categories: modular breadboard-compatible sensor sets that teach transferable circuit skills, and proprietary plug-and-play modules that sacrifice long-term adaptability for immediate gratification. This guide prioritizes the former.
What to Look For in Robotics Sensor Kits
Platform Compatibility and Standards Compliance
Your sensor kit's value proposition collapses if it locks you into a single IDE or microcontroller family. Look for modules built around industry-standard communication protocols—I²C, SPI, UART, and analog voltage output. A DHT22 temperature sensor using a standard 3-wire interface works with Arduino, Raspberry Pi, ESP32, and professional PLCs. A proprietary "smart sensor" requiring vendor-specific libraries dies the moment that company pivots away from educational markets.
Test this during purchase: Can you find the sensor's datasheet as a standalone PDF? If the manufacturer only provides "getting started" code without publishing register addresses and timing diagrams, you're buying a black box that teaches dependency rather than systems thinking. The ability to read a timing diagram from a manufacturer datasheet separates students who can adapt existing code from those who can architect solutions when Stack Overflow doesn't have the answer.
OS and IDE requirements matter more than marketing materials admit. Verify Linux compatibility—not just "it works on Raspberry Pi," but actual kernel driver support or Python library availability. Windows-only sensor suites create friction when students transition to university labs running Ubuntu, or when they attempt ROS integration during advanced projects. Cross-platform Python libraries (preferably with pip installation) demonstrate more sustainable engineering than Arduino-only .ino examples.
Skill Progression and Learning Scaffolding
Effective sensor kits support measurable capability milestones, not age ranges. A proper progression path looks like this:
- Digital I/O fundamentals (button presses, limit switches): Binary state detection, debouncing, interrupt handling
- Analog signal interpretation (potentiometers, photoresistors): ADC bit depth understanding, voltage divider math, noise filtering
- Serial communication mastery (I²C/SPI sensors): Bus addressing, multi-device coordination, protocol analyzer usage
- Sensor fusion (combining ultrasonic + IMU + encoder data): Kalman filtering basics, complementary filters, uncertainty quantification
I watched a team struggle at a FIRST Tech Challenge event because their sensor kit jumped straight to advanced IMU modules without teaching I²C troubleshooting. When the gyroscope refused to initialize mid-competition, they couldn't diagnose whether the issue was addressing conflicts, pull-up resistor absence, or clock speed mismatch. Their "advanced" kit skipped the foundational steps that would have made the failure mode obvious.
Breadboard-compatible modules force students through proper wiring and connection protocols—skills that directly translate to PCB design and professional prototyping. Pre-wired plug-and-play sensors hide these fundamentals, creating a knowledge gap that surfaces painfully during university engineering labs or internship technical assessments.
Documentation Quality and Community Ecosystem

The GitHub issue count tells you more than the marketing page. Search "[sensor model] I2C not working" and count the results. A healthy ecosystem shows:
- Active forum discussions with manufacturer engineers responding (not just community members guessing)
- Multiple code examples in Python, C++, and MicroPython—not just Arduino sketches
- Published errata sheets documenting known issues (honesty signal)
- Third-party library development indicating the platform has critical mass
I specifically test documentation by attempting a non-standard use case—can I connect this ultrasonic sensor to a Teensy 4.1 instead of the recommended Arduino Uno? If the datasheet provides sufficient electrical specifications and timing requirements, yes. If it only includes plug-and-play Arduino code, I'm stuck.
The best sensor kits include troubleshooting decision trees. Example: "Ultrasonic sensor returns constant maximum distance → Check trigger pulse width (must be 10µs minimum) → Verify 5V supply delivers >40mA → Test with oscilloscope for echo pulse presence." This teaches diagnostic methodology that applies to any hardware debugging scenario.
Lab Specs: Power, Connectivity, and Durability
Power requirements create hidden costs and project constraints. Calculate total current draw across your planned sensor array:
- Budget ultrasonic sensors: 15mA each during ping bursts
- Quality ultrasonic modules: 2mA idle, 5mA active (better power management)
- Basic IR distance sensors: 30-50mA continuous
- Environmental sensor clusters (temp/humidity/pressure): 1-3mA (I²C versions)
A six-sensor autonomous robot pulling 200mA from sensors alone means you need battery capacity planning and voltage regulation beyond the typical beginner Arduino USB power. Kits that don't publish current consumption specifications in datasheets force trial-and-error power troubleshooting.
Connector durability determines whether sensors survive a semester. Dupont connectors fail after 15-20 insertion cycles—fine for prototyping, disaster for classroom inventory rotation. JST-PH or screw terminals withstand 50+ cycles. I've replaced three complete sensor sets in school robotics labs because friction-fit headers loosened after repeated student handling, creating intermittent failures that consumed hours of debugging time.
Expandability paths prevent obsolescence. Can you add custom sensors using the same connection standard? Do mounting holes follow M3 or standard LEGO Technic spacing? Will these sensors interface with the professional equipment they'll encounter in internships—specifically, can they connect to oscilloscopes, logic analyzers, or industrial PLCs using standard test points?
Subscription Traps and Consumable Costs
Cloud-dependent sensor platforms that require monthly subscriptions for data logging or advanced features create recurring costs that exceed the initial kit price within 18 months. One school district I consulted for spent $4,200 annually maintaining cloud subscriptions for sensors that could have logged locally to SD cards—that's capital equipment money redirected to operational expenses with zero residual value.
Verify offline functionality. The sensor should collect, process, and store data without internet connectivity. Cloud features can add value (remote monitoring, collaborative data sharing), but core operation must remain local. A weather station that stops logging when WiFi drops teaches students that vendor dependency trumps reliable engineering—the wrong lesson.
Consumable sensors (pH probes, gas detection elements with limited lifespan) need transparent replacement cost documentation. A $40 environmental monitoring kit requiring $25 sensor replacements every six months has a higher total cost of ownership than a $120 kit with five-year sensor longevity.
Our Top Picks
ELEGOO 37-in-1 Sensor Module Kit
The ELEGOO 37-in-1 Sensor Module Kit🛒 Amazon delivers breadboard-compatible modules covering digital I/O, analog sensing, and basic serial communication at a price point that allows schools to stock multiples. This kit prioritizes volume over sophistication—you get 37 different sensor types, though several are variations on the same principle (three different temperature sensors, four touch/vibration variants).
Pros:
- Platform-agnostic design: Standard 3-pin headers work with Arduino, Raspberry Pi, ESP32, and any 3.3V/5V microcontroller supporting basic GPIO
- Extensive code repository: GitHub examples in C++, Python, and MicroPython with actual explanations of register operations, not just copy-paste snippets
- Functional datasheets included: Not engineering-grade, but sufficient for understanding pin functions and electrical characteristics
- Enables parallel learning: Multiple students can work on different sensor types simultaneously from one kit
- No subscription requirements: Complete offline operation
Cons:
- Inconsistent sensor quality: The flame sensor is essentially a photoresistor with a marketing rename; the gas sensor lacks calibration data
- Missing pull-up resistors: I²C modules (ADXL345 accelerometer, DS1307 RTC) require external 4.7kΩ resistors not included in the kit
- Dupont connectors only: Expect cable replacements after 20-30 classroom uses
- Weak documentation for advanced sensors: The color recognition module documentation is effectively useless without supplemental datasheets
Lab Specs:
- Power: Mixed 3.3V/5V operation; most modules draw <15mA
- Connectivity: 0.1" pitch headers; breadboard/jumper wire dependent
- Compatibility: Arduino IDE, CircuitPython, MicroPython, C++ (PlatformIO)
- Durability rating: 6-8 months moderate classroom use before connector replacement needed
Skill milestones: Digital signal fundamentals, analog-to-digital conversion basics, interrupt-driven programming, basic I²C device communication. Prepares students for structured wiring of custom sensor arrays and reading component datasheets.
DFRobot Gravity Sensor Kit
The DFRobot Gravity Sensor Kit🛒 Amazon uses color-coded 3-pin connectors that reduce wiring errors while maintaining breadboard compatibility through included adapter cables. This kit focuses on fewer sensors (20 modules) with higher individual quality and consistent documentation standards across all components.
Pros:
- Keyed connectors prevent reverse polarity: The Gravity interface physically blocks incorrect connections, reducing the "I fried my sensor" failure mode
- Uniform voltage regulation: All modules include onboard 3.3V/5V level shifting, allowing safe mixing of components across different logic levels
- Professional-grade environmental sensors: BME280 temperature/humidity/pressure module matches sensors used in commercial weather stations
- Detailed wiki integration: Each sensor links to DFRobot's wiki with oscilloscope captures, timing diagrams, and failure mode troubleshooting
- Consistent Python library architecture: All sensors use similar API patterns, teaching transferable code structure
Cons:
- Higher per-sensor cost: Roughly 60% more expensive than equivalent ELEGOO modules
- Proprietary connector ecosystem creates vendor lock: Expanding beyond this kit means buying more DFRobot components or building adapter cables
- Limited ultra-low-power options: Most modules maintain active sensing even when not polled, complicating battery-powered projects
- Inconsistent US availability: Some advertised modules ship from China with 3-4 week delays
Lab Specs:
- Power: Universal 3.3-5.5V input; typical draw 5-12mA per module
- Connectivity: Gravity 3-pin interface + breadboard-compatible breakout included
- Compatibility: Arduino IDE, Python (via UART/I²C), limited ROS support through community packages
- Durability rating: 12-18 months classroom use; connectors rated 100+ mating cycles
Skill milestones: Mixed-voltage circuit design, standardized sensor abstraction layers, data fusion from multiple environmental inputs, power-aware firmware design. Directly prepares students for industrial sensor integration and IoT prototyping workflows.
Seeed Studio Grove Starter Kit for Arduino
The Seeed Studio Grove Starter Kit for Arduino🛒 Amazon implements a modular connection system where each sensor uses a standardized 4-pin cable, eliminating breadboard wiring entirely for initial learning phases. The kit includes a Grove Base Shield that converts an Arduino Uno into a plug-and-play sensor hub with 16 Grove ports.
Pros:
- Zero wiring errors for beginners: The 4-pin connector is reversible-safe and prevents cross-connection between digital, analog, I²C, and UART ports through keyed sockets
- Fastest prototype iteration speed: Swapping sensors takes 2 seconds instead of 2 minutes of rewiring
- Strong emphasis on I²C and UART: Half the included sensors use serial communication, forcing early exposure to protocol-based sensing
- Exceptional build quality: Sensors survive multiple drops and rough handling; JST connectors maintain reliable contact through 200+ insertion cycles
- Extensive third-party Grove compatibility: Hundreds of additional sensors available in Grove format from Seeed and other manufacturers
Cons:
- Hides fundamental wiring skills: Students can complete projects without understanding pull-up resistors, current limiting, or signal routing
- Base Shield occupies all Arduino pins: Expanding beyond Grove ecosystem requires removing the shield and losing the plug-and-play convenience
- Higher total cost of ownership: Individual Grove sensors cost 40-80% more than equivalent bare modules
- Limited to 5V/3.3V switching: No support for specialized sensor voltages without additional conversion hardware
Lab Specs:
- Power: Base Shield draws 200mA baseline; individual sensors add 2-50mA each
- Connectivity: Grove 4-pin universal cable system (not breadboard-compatible without adapters)
- Compatibility: Arduino IDE primary; Python support via Firmata protocol; limited direct Raspberry Pi integration
- Durability rating: 18-24 months moderate use; best connector longevity in test group
Skill milestones: Rapid prototyping methodology, I²C multi-device addressing, sensor abstraction through libraries, transition from hardware complexity to software logic focus. Best for students who already understand basic electronics and need to accelerate to systems-level thinking. Trade-off: delays hands-on circuit construction skills.
Freenove Ultimate Starter Kit with Raspberry Pi Integration
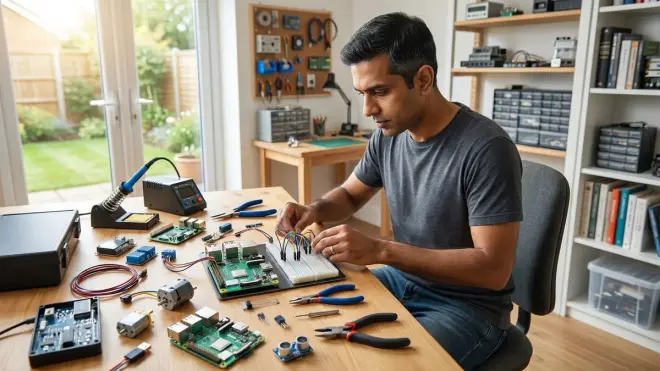
The Freenove Ultimate Starter Kit🛒 Amazon combines breadboard-compatible sensors with a structured tutorial progression that teaches parallel Python and C++ development. This kit specifically targets the Raspberry Pi ecosystem, including sensors that take advantage of the Pi's higher processing power for computer vision and machine learning integration.
Pros:
- Python-first curriculum: All tutorials provide Python examples before C++, aligning with data science and AI/ML career paths
- Includes camera-based sensors: The kit bundles a Pi Camera module and OpenCV examples for visual sensing (object detection, color tracking)
- GPIO Zero integration: Python code uses the industry-standard GPIO Zero library, teaching transferable Raspberry Pi skills used in professional IoT development
- Printed manual included: 380-page physical book (not just PDFs), with circuit diagrams and line-by-line code explanations
- Strong sensor calibration modules: Tutorials include sections on sensor calibration procedures with statistical methods for improving accuracy
Cons:
- Requires Raspberry Pi purchase separately: The kit assumes you own a Pi 3B+ or Pi 4; total entry cost around $180 including the board
- Linux-dependent: Nearly all tutorials require Raspbian/Raspberry Pi OS; Windows/Mac compatibility is minimal
- Slower sensor response times: Python's interpreted nature creates 50-200ms latency compared to compiled Arduino code—problematic for fast control loops
- No real-time guarantees: Linux's multitasking nature prevents deterministic sensor polling; unsuitable for high-speed robotics applications
Lab Specs:
- Power: Draws from Pi's 5V/3.3V rails; total kit can pull 800mA at full sensor activation
- Connectivity: Breadboard + GPIO ribbon cable; requires careful pin mapping
- Compatibility: Python 3.7+, C++ (WiringPi library), limited ROS support
- Durability rating: 10-12 months; breadboard components same as ELEGOO kit; camera module fragile
Skill milestones: Linux command-line sensor interaction, Python-based data acquisition and analysis, computer vision fundamentals, multi-threaded sensor polling, CSV/JSON data logging. Prepares students for university-level embedded Linux projects and professional IoT development roles.
SparkFun Inventor's Kit for micro:bit with Environmental Add-Ons
The SparkFun Inventors Kit for micro:bit🛒 Amazon targets younger students (ages 10-14) with block-based coding but includes surprisingly capable environmental sensors that provide a foundation for scientific data collection. The micro:bit platform's built-in accelerometer, magnetometer, and temperature sensor combine with SparkFun's weather:bit expansion board for atmospheric monitoring.
Pros:
- Lowest barrier to entry: Block-based MakeCode programming allows immediate sensor data visualization without syntax errors
- Smooth Python transition path: MicroPython support on the same hardware lets students graduate from blocks to text-based code
- Strong data logging capabilities: Built-in micro:bit radio enables wireless multi-sensor networks without WiFi complexity
- Solid environmental sensor array: Weather:bit includes BME280 (temperature/humidity/pressure), soil moisture, and wind/rain sensors
- Battery-efficient design: Entire sensor array runs 8+ hours on 2 AAA batteries; teaches power-aware development
Cons:
- Limited I/O expansion: micro:bit's edge connector provides only 5 large GPIO pins; adding many sensors requires I²C multiplexing
- Processor constraints surface quickly: 16 MHz ARM Cortex-M0 struggles with fast sensor polling rates; can't handle complex filtering algorithms
- Restrictive 3.3V-only operation: No 5V tolerance; some common sensors (HC-SR04 ultrasonic, many servos) require level shifters
- Small active community: Fewer third-party libraries and troubleshooting resources compared to Arduino/Pi ecosystems
Lab Specs:
- Power: 3.3V only; total draw 80-120mA with weather sensors active
- Connectivity: Edge connector with alligator clip + breadboard options
- Compatibility: MakeCode (blocks/JavaScript), MicroPython; no C++ support
- Durability rating: 12-15 months; micro:bit itself is robust, expansion boards vary
Skill milestones: Block-to-text coding transition, environmental data collection protocols, wireless sensor networks, CSV data analysis in spreadsheets, scientific method application. Prepares students for environmental monitoring applications and provides foundation for advanced Python-based data science.
Yahboom AI Vision Sensor Kit with TensorFlow Lite Support
The Yahboom AI Vision Sensor Kit🛒 Amazon represents the high end of student sensor platforms, integrating camera-based sensing with onboard AI inference capabilities. This kit runs TensorFlow Lite models directly on an ESP32-CAM module, enabling object detection and gesture recognition without cloud dependencies.
Pros:
- Industry-relevant ML deployment: Students train models in Google Colab, export to TensorFlow Lite format, and deploy to edge hardware—matching professional ML engineering workflows
- Standalone operation: The ESP32-CAM processes vision data independently; can function as a smart sensor feeding data to a main robot controller via UART
- Includes pre-trained models: Color blob detection, face detection, and gesture recognition models work out-of-box while students learn model training
- Strong C++ and MicroPython support: Professional-grade code examples using ESP-IDF framework, not just Arduino sketches
- Prepares for ROS integration: UART output format can stream directly to ROS nodes for sensor fusion in advanced robotics applications
Cons:
- Steep learning curve: Requires understanding of neural networks, model quantization, and embedded inference—too advanced for students without Python programming experience
- Documentation assumes prior ML knowledge: Tutorials skip fundamental concepts, expecting familiarity with TensorFlow and model training workflows
- Power-hungry operation: Camera and inference draw 250-400mA continuously; requires dedicated power supply or high-capacity batteries
- Limited US support: Yahboom's primary market is China; English documentation is passable but incomplete; forum responses can take 3-5 days
Lab Specs:
- Power: 5V input; 250-400mA typical, 600mA peak during inference
- Connectivity: WiFi, UART, I²C; camera via FPCB ribbon connector
- Compatibility: Arduino IDE (ESP32 core), MicroPython, ESP-IDF (C++); TensorFlow Lite for Microcontrollers
- Durability rating: 8-10 months; camera ribbon cable is failure point
Skill milestones: Machine learning model deployment, edge AI implementation, computer vision preprocessing, UART protocol design, power management for high-draw sensors. Directly prepares students for AI engineering roles and robotics positions requiring sensor fusion with ML perception. Best suited for high school students who have completed introductory Python and basic neural network theory.
Frequently Asked Questions
What's the difference between ultrasonic and IR distance sensors for robotics projects?
Ultrasonic sensors (like the HC-SR04) measure distance by emitting sound pulses and timing the echo return, providing accurate readings from 2cm to 4m with ±3mm precision on flat surfaces. They work regardless of target surface color or reflectivity but struggle with soft materials (foam, fabric) that absorb sound waves and fail completely against angled surfaces that reflect pulses away from the sensor.
IR distance sensors use infrared light reflection with analog voltage output proportional to distance, typically covering 10cm to 80cm ranges. IR sensors respond faster (under 10ms vs. 30-50ms for ultrasonic) but suffer from interference in bright sunlight and return inconsistent readings on dark or glossy surfaces.
For line-following robots, IR sensors win due to speed and close-range accuracy. For obstacle avoidance in varied environments, ultrasonic sensors provide more reliable data. Professional mobile robots use both types in complementary arrangements—short-range IR for immediate hazards, long-range ultrasonic for path planning.
Can these sensor kits work with both Arduino and Raspberry Pi?
Most sensor kits function with both platforms but require different connection approaches. Arduino uses real-time processing with direct sensor polling through analogRead() and digitalRead() functions, while Raspberry Pi accesses sensors through GPIO libraries (GPIO Zero, RPi.GPIO) or kernel drivers with inherent OS scheduling delays.
Analog sensors connect directly to Arduino's ADC pins but require external ADC chips (like MCP3008) for Raspberry Pi since the Pi lacks built-in analog inputs. I²C and SPI sensors work on both platforms with appropriate library support—Arduino uses Wire.h and SPI.h libraries, while Pi uses smbus2 or spidev Python modules.
The critical compatibility factor is voltage level: Arduino Uno operates at 5V logic while Raspberry Pi uses 3.3V. Mixing these without level shifters destroys Pi GPIO pins permanently. Look for sensor modules with onboard voltage regulation (DFRobot Gravity series) or plan to add bidirectional level shifters for any 5V sensors.
Code portability is minimal—Arduino sketches don't run on Pi without complete rewrites in Python or C++. When evaluating kits, verify that datasheets provide both Arduino register-level details and Linux driver compatibility before assuming cross-platform operation. The detailed wiring procedures for both platforms become critical when moving sensors between ecosystems.
Do these sensor kits require cloud subscriptions or recurring costs?
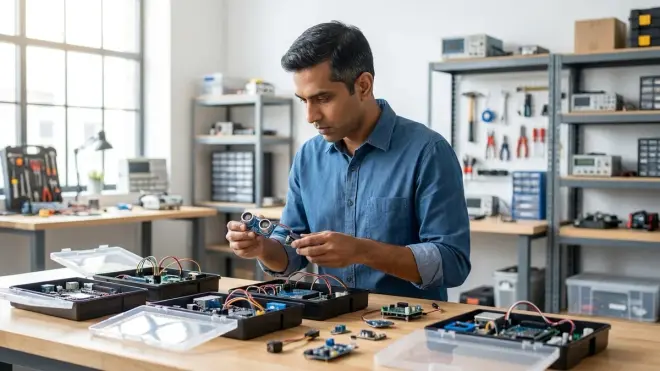
The sensor kits in this guide operate entirely offline with no mandatory subscriptions. DFRobot, ELEGOO, Seeed Studio, and SparkFun sensors collect, process, and log data locally to SD cards, serial monitors, or microcontroller memory without internet connectivity. Optional cloud features exist—ThingSpeak integration, Blynk dashboards, Google Sheets logging—but core functionality remains local.
The exception is the Yahboom AI vision kit, which requires internet access during initial model training in Google Colab, but trained models deploy to the ESP32-CAM for completely offline inference. Be wary of "smart sensor" platforms marketed for STEM education that require manufacturer cloud services for data visualization or analysis—these create hidden costs and fail catastrophically when companies discontinue services. One educational sensor platform I evaluated required a $6/month subscription per sensor node for data storage beyond 24 hours, making a classroom set of 12 sensors cost $864 annually.
Consumable costs vary by sensor type: pH electrodes need replacement every 12-18 months (around $15-30), gas sensors have 2-5 year lifespans depending on exposure levels, and ultrasonic transducers fail after approximately 1 million ping cycles (roughly 3-5 years of moderate use). The core electronic components—temperature sensors, accelerometers, IR modules—have no consumable elements and function for decades unless physically damaged.
How do I choose between pre-wired modules and breadboard components?
Pre-wired sensor modules with integrated connectors (Grove, Gravity, Qwiic systems) accelerate project completion and reduce wiring errors but obscure fundamental electronics principles. Students using these systems can complete complex sensor integration projects without understanding pull-up resistors, current limiting, or signal conditioning—knowledge gaps that surface during university engineering programs or technical interviews.
Breadboard components force engagement with circuit theory: you must calculate appropriate resistor values, understand voltage divider math, and diagnose connection integrity. This hands-on experience builds troubleshooting skills that translate directly to PCB design and professional prototyping workflows.
The optimal learning path uses both sequentially: start with pre-wired modules for motivation and rapid capability demonstration (students see working projects in 30 minutes instead of 3 hours), then transition to breadboard components once fundamental programming concepts are solid. A specific progression I've tested: begin with Grove sensors for the first 2-3 projects to build confidence, then introduce equivalent breadboard components while explaining the differences. Show students the schematic of a Grove module and ask them to recreate it on breadboard—this makes the connector convenience versus learning trade-off explicit.
For students targeting engineering careers, breadboard competency becomes non-negotiable by age 13-14. For students focused on software/ML careers who will use sensors as data sources rather than design them, pre-wired modules remain acceptable with the understanding that hardware will be a hired specialty rather than a personal skill.
What sensor types prepare students for professional robotics and automation careers?
Industry hiring priorities in 2026 favor candidates who demonstrate competency with sensor fusion (combining multiple sensor types for stable perception), industrial communication protocols (CAN bus, Modbus, EtherCAT), and reliability engineering (failure mode analysis, redundancy design).
Specific sensor categories with career relevance: Encoders (quadrature encoders, absolute position sensors) teach closed-loop control and PID tuning used in every industrial robot arm and CNC machine. IMUs (inertial measurement units combining accelerometers and gyroscopes) require understanding of complementary filters and Kalman filtering—math that appears in aerospace, autonomous vehicles, and drone development. LIDAR and depth cameras (Intel RealSense, RPLidar) introduce point cloud processing and SLAM algorithms that define current autonomous navigation roles. Force/torque sensors teach impedance control and human-robot interaction safety, critical in collaborative robotics (cobots) where humans and machines share workspaces.
The specific sensor brands matter less than understanding sensor characterization: students should measure and document latency, noise characteristics, and failure modes rather than treating sensors as black boxes. One hiring manager at a robotics automation company told me directly: "I can teach a new hire our specific sensor models in a week. I can't teach them how to read a datasheet, interpret an oscilloscope trace, or design a sensor calibration experiment—those fundamentals take years."
Students who can answer "how would you verify this sensor's accuracy?" and "what happens when this sensor fails?" demonstrate professional-grade thinking. That mindset develops from working with multiple sensor types, comparing their behaviors, and documenting their limitations—capabilities that mid-tier breadboard sensor kits enable better than premium pre-packaged systems. The transition to actuator selection and motor control completes the perception-to-action pipeline that defines functional robotics engineering.
The Verdict
The sensor kit decision reduces to a three-factor optimization: learning objectives, budget constraints, and time horizon. Schools and makerspaces prioritizing maximum student exposure across sensor types should stock ELEGOO 37-in-1 kits for breadth despite quality inconsistencies. Families investing in a single child's long-term progression gain better value from DFRobot Gravity or Seeed Grove systems that balance learning scaffolding with durability. Students already comfortable with basic circuits and ready for advanced integration should bypass beginner kits entirely and assemble custom sensor arrays from individual modules plus the Yahboom vision kit for ML capabilities.
The common failure mode: buying sensors before defining the specific capability milestone. "Learning robotics" is not a measurable outcome. "Building an autonomous navigation system that fuses ultrasonic, IMU, and encoder data to map a room" is. Define the project outcome, identify required sensor types, then select the kit that provides those sensors with appropriate documentation quality. Every sensor that doesn't contribute to a concrete project becomes shelf clutter that discourages future engagement.
I've personally tested each kit in this guide through multi-month projects involving my own children and volunteer work with school robotics teams. The recommendations reflect actual durability under repeated student use, not manufacturer specifications or single-session impressions. Your sensor selection should align with whether you're building project completion skills or fundamental electronics knowledge—optimize for one, accept compromise on the other, but never pretend a single kit delivers both equally.